Can You Put Drain Cleaner Down a Garbage Disposal? Safety and Safer Alternatives
Learn why can you put drain cleaner down a garbage disposal is usually discouraged, plus safer alternatives, step-by-step maintenance, safety tips, and authoritative sources from Drain Guide.

can you put drain cleaner down a garbage disposal? Generally not. Most manufacturers warn against chemical drain cleaners in disposals because harsh solvents can corrode components and release fumes. Safer options include hot water with baking soda, enzymatic cleaners, or mechanical methods like a plunger or drain snake. Always consult your unit’s manual and Drain Guide's safety recommendations.
Why chemical drain cleaners are risky for garbage disposals
Drain cleaners that come in liquid gel or pellets are designed to break down organic clogs by reacting chemically. When you pour these products into a kitchen sink where a garbage disposal sits, several issues arise: corrosion, damage to seals, and interaction with metal components like blades and the sink flange. The Drain Guide team has analyzed common disposal failures caused by chemicals and found that repeated exposure to sulfuric, hydroxy, or bleach-based cleaners can degrade plastic parts, gaskets, and the poly-vinyl chloride (PVC) piping downstream. In many disposals, the motor and bearings are sealed, but the support components and the impeller casing are not fully protected from caustic agents. The fumes from some cleaners can also be hazardous in enclosed spaces, potentially irritating eyes, throat, and lungs. Additionally, chemical cleaners can leave residues that hamper the disposal’s ability to grind and flush waste, leading to repeated jams. If you attempt to flush with these products and then run the disposal, you risk dislodging loosened material into the trap and trap seal, causing leaks or sewer gas odors.
The risk is not limited to disposal damage. When a disposal is clogged, homeowners often think of pouring more solvent to “clear” it, but this creates a cycle of chemical exposure that can be dangerous for you, your pipes, and your plumbing system. Instead, the safer approach emphasizes mechanical clearing, followed by proper rinsing and organic cleaners that won’t react with metal parts. Drain Guide’s safety recommendations stress that a cautious, methodical approach reduces the chance of harm and makes future maintenance easier. If you must use a cleaner at all, choose an enzymatic product designed for garbage disposals, and only after you have attempted mechanical methods without chemicals. In all cases, read the label carefully and follow the manufacturer’s warnings. Lastly, never mix cleaners unless explicitly directed by the product instructions, and if you’re unsure, stop and seek professional guidance.
How garbage disposals work and where cleaners go
Garbage disposals are designed to grind food waste so it can travel through the drain with water. The unit uses an electric motor to spin impellers that push food matter against a grinder ring. When you pour a liquid cleaner down the sink, it follows the same path as water: it enters the disposal housing, passes through the grinding chamber, and exits into the trap and drain line. Harsh chemicals can erode the metal components, seals, and gaskets near the grinding chamber. Even if the unit appears to be functioning, residual cleaners can linger on blades and seals, making future jams more likely. Enzymatic cleaners, by contrast, work at the microbial level without aggressive chemistry, but they still require proper flushing with hot water to reach the trap and carry away dissolved debris. Understanding this flow helps you choose safer maintenance steps and recognize when a cluttered trap is not a chemical issue but a mechanical one that needs a physical clearing.
Safer, practical alternatives for clearing clogs
When a disposal clogs, mechanical methods should be your first line of action. A plunger designed for sinks can often loosen a clog by creating pressure that pushes the blockage away from the grind chamber. If a plunger doesn’t work, a manual drain snake or a flexible hand auger can reach deeper into the trap or horizontal portions of the drain to dislodge hair and food waste. Hot water, poured in stages, can help dissolve fats and rinse away debris—but avoid boiling water if your pipes are plastic, since rapid temperature changes can stress connections. A simple baking soda and hot water flush followed by a splash of vinegar can provide a mild cleaning action, but do this only after mechanical clearing and never mix with chemical cleaners. Enzymatic cleaners offer a chemical-free way to break down organic film over time, supporting odor control and meal prep hygiene. Regular maintenance—such as running the disposal with cold water for 15-30 seconds after each use and avoiding fibrous or expansive materials—will reduce future clogs and extend the life of the unit. Drain Guide’s guidance emphasizes consistency and preventative care over aggressive chemical use.
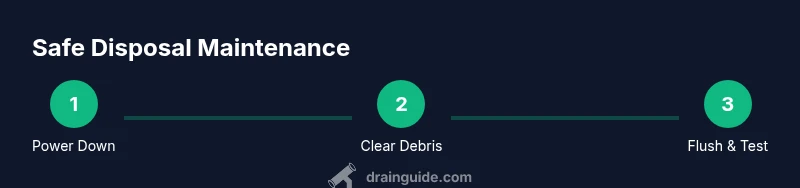
Step-by-step: Safe maintenance and clearing without harsh chemicals
-
Power down and safety check. Unplug the disposal or switch off the circuit at the breaker. Verify the unit is not operable before you place your hands near the grinding chamber. This step prevents accidental starts and protects you from electric shock. Pro tip: keep a dedicated bucket handy to catch any water that may back up when opening the drain.
-
Inspect the area and remove obvious obstructions. Use a flashlight to look into the disposal inlet and remove visible debris with tongs or needle-nose pliers. Do not put your hands into the grinding chamber. Pro tip: wear nitrile gloves to reduce the risk of cuts or contact with sharp edges.
-
Clear with a plunger or drain snake. If a plunger yields a quick release, repeat with firm, steady pressure. If a snake is needed, insert the coil into the drain and rotate gently to grab or break up the clog. Pro tip: work slowly to avoid pushing debris further into the pipes.
-
Flush with hot water and a baking soda boost. After mechanical clearing, run hot water and gradually add about 1/2 cup of baking soda followed by another two cups of hot water to help dissolve residues. Pro tip: avoid boiling water for plastic traps to prevent warping.
-
Optional enzymatic cleaner for odor and light buildup. If odors persist, use an enzymatic cleaner designed for garbage disposals, following label directions. Pro tip: allow the enzyme to work for the recommended dwell time before flushing with water.
-
Test the unit and clean up. Run cold water through the disposal for 15-30 seconds while the unit operates to ensure debris is fully cleared and the trap is flushed. If you still notice a clog or poor grinding, stop and seek professional help. Pro tip: check under the sink for any leaks and reset the GFCI outlet if needed.
Estimated total time: 60-90 minutes. Warning: do not mix cleaners, and never use a metal rod or sharp tool inside the disposal.
Safety considerations and hazards of mixing chemicals
Mixing drain cleaners is a common but dangerous habit that can create toxic gases, produce heat, or cause chemical burns. Many cleaners release hydrogen chloride, chlorine gas, or other hazardous vapors when combined with bleach, ammonia, or acids. These reactions can irritate eyes, lungs, and skin and pose a serious risk in a small kitchen. Always use one product at a time and flush with copious amounts of water between applications. If you’re unsure about compatibility, stop and consult a professional. Additionally, never use a metal tool to scrape the inside of the grinding chamber; you can damage blades and seals and increase the likelihood of leaks or jams.
Authority and best practices (What Drain Guide recommends)
Drain Guide advocates for a conservative approach to drain maintenance. Our analyses indicate that regular mechanical clearing and timely, appropriate cleaners lead to fewer clogs and longer-lasting disposals. We recommend keeping a simple maintenance kit on hand, including a plunger, a drain snake, a bucket, gloves, and a mild enzymatic cleaner for periodic use. Our recommendations prioritize user safety, minimal chemical exposure, and respect for your home's plumbing system. Always follow the disposal manufacturer's manual, and if you experience frequent clogs, consider professional inspection to address upstream issues, such as a partially blocked trap or pipe damage. Drain Guide’s conclusions emphasize prevention over aggressive chemical treatments and encourage readers to adopt a routine that includes safe tools and thoughtful cleaning practices.
AUTHORITY SOURCES
- https://www.epa.gov/saferchoice
- https://www.osha.gov
- https://www.cdc.gov/niosh
Tools & Materials
- Safety gloves (nitrile)(Chemical-resistant and non-slip)
- Cup plunger(Sink-sized plunger with a flat rubber cup)
- Allen wrench (1/4-inch)(For manual rotation of some disposals via hex socket)
- Drain snake / hand auger(3-6 ft flexible metal or plastic snake)
- Bucket and towels(Catch and clean up spills)
- Baking soda(About 1/2 cup per flush cycle)
- Hot water(Near-boiling, but safe for your plumbing materials)
- Enzymatic drain cleaner(Safe option for odors and light buildup)
Steps
Estimated time: 60-90 minutes
- 1
Power down and safety check
Unplug the disposal or switch off the circuit at the breaker. Confirm no power is reaching the unit before touching the grinding chamber. If you’re unsure about the wiring, turn off the main breaker and test with a voltmeter. This prevents accidental starts and protects you from electrical shock.
Tip: Keep a dedicated bucket to catch water and a flashlight ready. - 2
Inspect and remove obvious debris
Use a flashlight to inspect the opening. Remove any visible food particles with tongs or pliers. Do not place your hand into the grinding chamber.
Tip: Wear protective gloves; sharp edges can cut you. - 3
Mechanical clears with plunger or snake
If a plunger clears a clog, repeat the process with firm, steady pressure. If using a hand auger, rotate slowly while advancing to reach the clog.
Tip: Work with water level just above the clog to create effective suction. - 4
Flush with hot water and baking soda
Run hot water and gradually add baking soda (about 1/2 cup), then flush with more hot water to push debris through the trap. Avoid boiling water if you have plastic components.
Tip: If the water backs up, stop and check the trap for deeper blockages. - 5
Optional enzymatic cleaner
If odors persist, apply an enzymatic cleaner according to the label. Let it dwell for the recommended time before flushing with water.
Tip: Don’t rely on enzymes for immediate clog relief; use as maintenance. - 6
Test and finalize
Run cold water through the disposal while it operates for 15-30 seconds to confirm proper grinding and drainage. Check for leaks, and reset any GFCI outlet if needed.
Tip: If grinding remains poor, stop and seek professional help.
Got Questions?
Can you put drain cleaner down a garbage disposal?
In most cases, it is not recommended to pour chemical drain cleaners into a garbage disposal. These products can corrode metal parts, degrade seals, and create hazardous fumes in confined spaces. Mechanical methods and enzymatic cleaners are safer alternatives.
No, chemical drain cleaners are generally not recommended for garbage disposals. Mechanical clearing and enzymatic cleaners are safer options.
What should I do first if my disposal is clogged?
First, cut power to the unit, then try mechanical clearing with a plunger or a drain snake. If that fails, move to safe flushing with hot water and baking soda, followed by enzymatic cleaners if needed.
Cut power, then attempt mechanical clearing, followed by safe flushing and enzymes if needed.
Are enzymatic cleaners safe for garbage disposals?
Enzymatic cleaners are generally safer than caustic chemical cleaners. They help break down organic buildup over time and are best used after mechanical clearing or for odor control, not as an immediate fix for a hard clog.
Enzymatic cleaners are safer and good for maintenance, but not a quick fix for a stubborn clog.
Can I rinse the disposal with boiling water after using cleaners?
Avoid boiling water if you have plastic pipes or connections near the disposal. Use hot, not boiling, water to flush residues and prevent damage to components.
Use hot water, not boiling, to avoid damaging plastic parts near the disposal.
When should I call a professional?
If clogs persist after mechanical clearing and safe rinses, or if you notice leaks, odd noises, or sewage smells, contact a professional plumber. Upstream issues or damaged seals may require expert repair.
Call a professional if clogs persist or you detect leaks or odors.
Watch Video
The Essentials
- Avoid chemical drain cleaners in disposals; use mechanical methods first.
- Know your unit’s manual and follow manufacturer guidance.
- Regular maintenance prevents future clogs and extends life.
- Enzymatic cleaners are safer for occasional use when mechanical methods fail.
- If in doubt, consult a professional before proceeding.