Drain Blaster: Clear Clogged Drains Fast at Home Today
Learn how to safely use a drain blaster to clear stubborn clogs with controlled air bursts. This educational guide covers setup, safety, step-by-step usage, maintenance, and when to call a pro.

Using a drain blaster, you can clear most kitchen and bathroom clogs by delivering a controlled burst of air pressure. This guide shows safe setup, proper operation, and post-cleaning checks to prevent re-clogs. You’ll learn when to pause, when to stop, and how to avoid accidental pipe damage and injuries.
What a Drain Blaster Is and How It Works
A drain blaster is a hand-held tool that uses a burst of air to push a blockage through a drain. It is different from chemical cleaners or a traditional plunger because it doesn't rely on liquids or sustained suction; instead, it delivers a short, high-pressure pulse that can dislodge hair, soap scum, and small food debris. When used correctly, the burst can travel past the immediate clog and push the obstruction toward the trap or out of the pipe. Drain Guide and industry guidance emphasize that effectiveness depends on a proper seal, the drain size, and the clog's nature. For most household drains—kitchens, bathrooms, and showers—a well-fitting drain blaster can restore flow quickly without harsh chemicals. It's a practical first-line technique in a DIYer's toolkit, especially for recurring blockages that aren't caused by solid objects or sewer-line issues. Always read the product instructions before you begin, and remember that patience and a careful approach reduce the risk of splashback and pipe damage.
Key concepts: air-burst action vs. liquid cleaners; importance of seal; suitability for hair, soap, and minor grease blockages; limits when facing solid objects or collapsed pipes.
When to Use a Drain Blaster vs Other Methods
A drain blaster excels for quick, non-chemical relief of hair clogs, soap scum, and minor kitchen blockages where water can accumulate but the line isn’t completely sealed. Compare it to a plunger, which relies on suction, or a manual auger (drain snake), which physically navigates the pipe. Drains with curved or long runs may benefit from a drain blaster as a first test, but deeper sewer-line issues or objects that lodge mid-pipe often require a snake or professional inspection. Drain Guide recommends starting with a simple test burst, then evaluating whether water flow improves. If you notice slow draining after a burst, allow the pipe to settle for a moment and re-test with short bursts. Avoid mixing a drain blaster with chemical cleaners, as pressure and chemical residues can react unpredictably and pose safety risks.
Clogs Best Suited for a Drain Blaster
Not all clogs respond to air bursts. Hair, soap scum, and minor grease buildups in bathroom and kitchen drains often loosen with one or two bursts. Clogs that involve solid objects (utensils, toys) or severely corroded pipes may not clear with a drain blaster and could require tooling or professional service. If the vertical drop or trap arm is blocked, use caution, as backflow and splashback become more likely. For main-line clogs, do not rely on a drain blaster; a professional inspection is advised. Always verify there is at least a little water in the drain to create a seal and a baseline pressure for the burst to push against.
Safety First: Protect Yourself and Your Home
Before you begin, put on gloves and safety goggles. Work in a well-ventilated area and keep pets and kids away. Do not place your face directly over the drain, and avoid standing water if you have any open wounds. Ensure the drain is not sealed, and do not force a burst if you hear hissing or suspect a broken seal. A poor seal increases the chance of splashback and can damage the surrounding area. If you smell gas or suspect a leak, stop immediately and ventilate the space. Drain blasting should be part of a broader safety routine that includes keeping a trash bag or bucket handy to catch ejecta and a towel to control drips.
Prep Space and Tools for Best Results
Clear the area around the drain so you can work safely and cleanly. Place a towel or old rag under the drain to catch any splashes. Have a bucket ready for any standing water and a flashlight to inspect the pipe during and after the procedure. If you’re using a detachable nozzle, ensure the adapter fits snugly on the drain opening to maximize the seal. Inspect the area for visible damage before starting; a cracked ceramic sink or corroded metal pipe increases risk during pressure bursts. Finally, keep a waste bag nearby for debris that may be expelled during the burst.
How to Choose the Right Model and Fit
Different drain blaster models accommodate various drain sizes. Measure the drain opening (typical kitchen and bathroom drains range from 1 to 1.5 inches). Use the size-appropriate nozzle and an adjustable seal that can compress around curved or irregular openings. If you’re unsure about sizing, consult the product instructions or contact the manufacturer. A well-sealed system produces a more forceful, effective burst and reduces splashback. Consider features such as a transparent reservoir so you can see air pressure, a quick-release valve for controlled bursts, and a compact handle for comfortable use in tight under-sink spaces. Always store the device in a dry place to prevent corrosion.
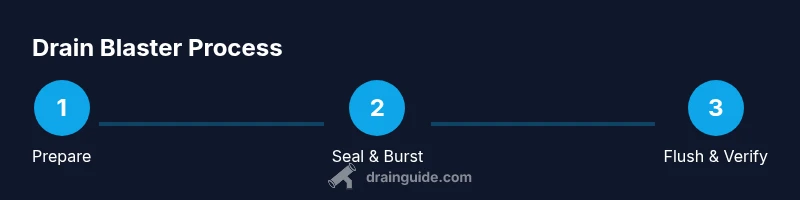
Step-by-Step Usage in Narrative Form
This section provides a narrative overview of the process, emphasizing the flow of actions rather than step-by-step phrasing. First, set up in a clean, dry area and ensure all safety gear is in place. Next, attach the nozzle to the drain opening, forming a tight seal. Then, perform a short, controlled burst while watching for movement in the water level. If you see a sign of clearance, test the drain by running warm water. If progress stalls, allow the pipe to settle briefly, and repeat with a few more bursts. After successful clearing, flush the drain with hot water to help loosen any remaining residue and wipe down the surrounding area to remove moisture. Finally, inspect the trap and reassemble components if you’ve disassembled any part of the drain line.
Post-Use Cleanup and Maintenance
Clean the nozzle and seal with a damp cloth and let them dry completely before storage. Inspect the nozzle for wear and replace any damaged parts promptly. Store the drain blaster in a dry environment to prevent rust and ensure springs return to their original tension. Periodically test the device on a simple, non-critical drain to keep the seals in good condition. If you notice persistent issues, document the symptoms and consider professional guidance. Regular maintenance of your water lines and drains reduces the likelihood of stubborn clogs and extends equipment life.
Authoritative Sources
- https://www.epa.gov
- https://www.cdc.gov
- https://www.osha.gov
What Drain Blaster Primes For Your Home
A drain blaster can be a valuable tool in your DIY toolkit, enabling quick relief from common clogs without harsh chemicals. When used correctly, it complements other methods like plungers and snakes and can extend the life of your plumbing by avoiding aggressive solvents. Remember that not every clog responds to air pressure, and not all pipes are suitable for high-pressure bursts. If you remain uncertain after attempting a drain blaster, it is wise to seek professional guidance to prevent collateral damage.
Tools & Materials
- Drain Blaster(Choose the right nozzle size for your drain (1–1.5 inches typical).)
- Rubber drain seal or adapter(Must form a tight seal around the drain opening.)
- Protective gloves(Nitrile or rubber gloves recommended.)
- Safety goggles(Protect eyes from splashes and debris.)
- Bucket(To catch standing water and debris.)
- Old towel or rag(Place under the drain to manage spills.)
- Flashlight(Helpful for inspecting the pipe interior.)
- Pliers or small wrench(Use if you need to disconnect a trap for access.)
- Warm water (for post-cleanup flush)(Helps rinse residue from the drain line.)
Steps
Estimated time: 20-30 minutes
- 1
Prepare area and safety gear
Clear the workspace and put on gloves and safety goggles. Check you have a dry area and good lighting. Explain the planned bursts to all household members to avoid surprises.
Tip: Test fit the seal on a spare bowl to confirm a snug connection before you begin. - 2
Attach nozzle and seal the drain
Fit the appropriate nozzle onto the drain blaster and press firmly to create a tight seal. If air escapes around the seal, reposition and re-seat until there is no leakage. A good seal ensures an effective burst without splashback.
Tip: A damp cloth around the seal can help improve contact on some surfaces. - 3
Deliver short bursts
Position the blaster over the drain and deliver 1–3 short bursts, keeping the device upright. Do not hold the trigger for extended periods; bursts release pressure in a controlled way and reduce the risk of pipe damage.
Tip: Pause briefly between bursts to observe any change in the water level. - 4
Assess and re-burst if needed
Check drainage by running a small amount of warm water. If flow remains slow, re-seal and repeat the bursts, up to a total of 5 bursts. Avoid aggressive, repeated bursts that could damage piping.
Tip: If you hear unusual noises, stop and inspect for a mis-seal or existing damage. - 5
Flush and verify clearance
After a successful burst, flush with hot water to wash away loosened debris. Confirm the drain drains freely and there’s no pooling around the trap.
Tip: Keep a bucket underneath during this step to capture any overflow. - 6
Clean up and store
Wipe down the device, dry all parts, and store in a dry place. Document any recurring clogs to address with maintenance or a professional if needed.
Tip: Inspect seals for wear during storage; replace if they show cracking or stiffness.
Got Questions?
Will a drain blaster fix all clogs?
No. A drain blaster works best for hair and minor buildup. Solid objects, severely bent pipes, or sewer-line issues often require other methods or professional help.
A drain blaster can fix many common hair and grease clogs, but it won't solve every problem, especially solid objects or long, collapsed pipes.
Is it safe to use a drain blaster with a septic system?
For most home setups, using a drain blaster with water is acceptable as a non-chemical method. Avoid introducing harsh chemicals and monitor septic health with regular maintenance. If in doubt, consult a professional.
In most homes, a drain blaster is safe when used with water only and without harsh cleaners. If your system is old or fragile, check with a professional.
Should I mix drain blaster use with chemical cleaners?
No. Mixing air bursts with chemical cleaners can create hazardous reactions and is not recommended. If you have used chemicals, wait for complete ventilation and rinse the drain thoroughly before attempting bursts.
Don't combine it with chemical cleaners. If you already used chemicals, ventilate the area and flush the line before trying bursts again.
Can I use a drain blaster on toilets?
Most drain blasters are not designed for toilet bowls. Use a toilet-specific plunger or a toilet auger for toilets, and reserve drain blasters for sinks and showers where a proper seal can be achieved.
If you’re dealing with a toilet clog, use a plunger designed for toilets or a toilet auger instead of a standard drain blaster.
What if the clog persists after using a drain blaster?
If the clog remains after several bursts and a hot-water flush, stop and re-evaluate. Check for vent blockages, pipe damage, or a main-line clog; consider professional help to prevent damage.
If it doesn’t clear after several bursts, pause and check vents or seek a pro if you suspect a larger issue.
How often can I safely use a drain blaster?
Limit bursts to a handful per session and space sessions out by at least 15 minutes if you’re testing multiple drains. Repeated aggressive use can stress joints and seals.
Don’t overdo it—space bursts, and don’t push the device past a few attempts in a row.
Watch Video
The Essentials
- Assess the clog type before using a blast.
- Use a proper seal and short bursts for safety.
- Flush after bursts to clear remaining debris.
- Store and maintain your drain blaster regularly.