How to Remove Tub Drain Plug: Step-by-Step Guide
Learn how to remove a tub drain plug safely and effectively. This guide covers tool prep, safe techniques, troubleshooting stuck plugs, and maintenance to prevent future clogs. Drain Guide Team provides practical, father-to-fix instructions for DIY homeowners.

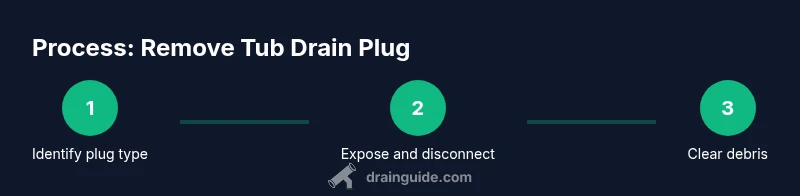
By following this guide, you will safely remove a tub drain plug and access the drain for cleaning or replacement. Before you begin, identify your plug type (lift-and-turn, push-pull, or pop-up), gather basic tools, and prepare a catch bucket. This step-by-step approach minimizes mess and reduces the risk of damaging the drain assembly.
Understanding tub drain plugs and why removal matters
A tub drain plug is a small, often overlooked part of your bathroom plumbing, but it plays a critical role in controlling water flow. When you know how to remove tub drain plug, you gain access to the drain for clearing hair, mineral buildup, and soap scum that can lead to slow drains or backups. In many homes a simple maintenance step can prevent expensive calls to a plumber. The common types you’ll encounter include lift-and-turn, push-pull, and pop-up designs; each requires a slightly different approach, but the underlying goal remains the same: gain secure access to the drain to inspect, clean, or replace the plug and seals.
From the perspective of routine DIY, removing the drain plug is not complicated once you understand the basic anatomy. The plug sits in a drain body connected to a stopper mechanism; behind it you may find a linkage rod, a screw, or a small spring assembly. If the linkages are corroded or clogged with hair, the plug can seize or rotate without effectively sealing or allowing water to drain. Regular checks—especially in homes with hard water or long-term use—keep the plug responsive and reduce the risk of leaks. In this guide, we’ll cover the most common plug styles, signs of trouble, and safe, practical steps to remove the plug and inspect the drain.
Essential tools and safety considerations
Before you begin, assemble a minimal toolkit and prepare the work area. The goal is to remove the plug without damaging the tub or drain assembly, so handle parts gently and protect the surrounding surface. Keep a bucket and towels handy to catch water and debris. Wear gloves to reduce the risk of slipping or cutting yourself on sharp edges. For many tub drains you’ll need a standard screwdriver (Phillips or flathead), needle-nose pliers, and an adjustable wrench. A drain snake or hair removal tool helps if hair is clogging deeper in the pipe. A flashlight or phone light improves visibility into the drain opening. If you encounter a stuck part, penetrating oil and a few minutes of wait can make removal safer. Finally, have a replacement plug or seal on hand if you find damage during inspection.
Preparing the workspace and tub area
Clear the bathroom floor and set up a temporary barrier to protect the tile from water and cleaners. Place a bucket under the overflow or drain to catch flushing water. Remove any visible stopper or cover from the drain to expose the plug fasteners. If you have a pop-up stopper, you may need to access a set screw at the base; a small screwdriver will usually do. Wipe the area around the drain with a damp cloth to minimize slips and ensure you can see oily residues on metal parts. Check the water level in the tub; if you’re draining first, you’ll want to keep a towel handy for any splashes. Make sure you know which plug type you’re dealing with, because lift-and-turn, push-pull, and pop-up designs each require a distinct removal approach. Finally, avoid forcing parts; if something feels stuck, pause and reassess rather than prying with excessive force.
Step-by-step: removing the tub drain plug
This section provides a concise sequence you can follow. Step 1: Identify plug type and prepare a clean working area. Step 2: Remove any visible cap or cover and inspect for screws or linkage. Step 3: If there is a screw, unscrew it carefully; if there is a linkage rod, detach it from the stopper. Step 4: Use needle-nose pliers or a small magnet to retrieve the stopper if it’s loose but remains trapped. Step 5: If the plug is stuck, apply a small amount of penetrating oil and wait 5–10 minutes before retrying. Step 6: If hair or debris blocks the drain, insert a drain snake or flexible wire and rotate to dislodge it. Step 7: Clean the drain opening, remove debris, rinse, and reinstall the stopper or replace the plug and seal. Tip: Work over a towel to catch water and avoid dropping parts into the drain. If you’re unsure about thread directions, turn counterclockwise to loosen, but only after you confirm it’s threaded.
Troubleshooting common issues when removing a tub drain plug
Even with preparation, you may encounter a stubborn plug. Common causes include a seized stem, corroded threads, or a hidden set screw. If you cannot locate a screw or you cannot move the stopper by hand, avoid forcing the component; instead, recheck the plug type and consult the model’s manual. Hair buildup behind the stopper is another frequent problem; in this case a drain snake or flexible cable helps dislodge debris. If the plug remains stuck after several careful attempts, stop and consider a professional assessment to prevent damage to the drain body or surrounding fixtures.
Maintenance and preventive tips after removal
Once you have removed the plug and cleared the drain, perform a light cleaning of the stopper, seal, and surrounding area to remove mineral buildup and soap scum. Reassemble properly, ensuring the seal is seated and the stopper sits flush in the drain opening. Schedule regular maintenance: monthly quick checks to confirm the plug moves freely and the drain clears with a simple flush. Consider using a small amount of mineral-safe cleaner and hot water to rinse the drain periodically. Keep hair catchers or drain screens in place to minimize future clogs, and replace any worn gaskets or seals to prevent leaks.
When to call a professional
If you cannot locate the plug’s stopping mechanism, if the stopper is visibly damaged, or if removing it requires forcing tools, it’s wise to call a licensed plumber. A pro can safely disassemble the assembly, inspect for corrosion, and replace worn components without risking plumbing damage. In older homes with cast-iron stacks or complex overflow designs, professional service often saves time and ensures a permanent fix.
Tools & Materials
- Bucket(to catch water and debris during removal)
- Towels or rags(to protect flooring and catch spills)
- Gloves(protect hands from sharp edges and grime)
- Screwdriver (Phillips or flathead)(to access screws on pop-up stoppers)
- Needle-nose pliers(grab or retrieve the stopper if loose)
- Adjustable wrench(tighten/loosen fittings or linkage nuts)
- Drain snake or flexible wire(clear hair/debris further down the drain)
- Flashlight(improve visibility inside the drain opening)
- Penetrating oil (e.g., WD-40)(help loosen stubborn components if stuck)
- Replacement tub drain plug(have on hand in case of damage)
- Magnet or small hook(retrieve loose metal parts)
Steps
Estimated time: 20-45 minutes
- 1
Identify plug type and prep
Examine the stopper to determine whether you have a lift-and-turn, push-pull, or pop-up plug. Clear the area around the drain and lay towels to catch any water that drains when you begin. This step sets the correct removal approach and reduces the risk of breaking the seal.
Tip: Know your plug type before prying; forcing a design you don’t understand can cause more damage. - 2
Expose the stopper and inspect for fasteners
Remove any visible cap or cover and look for screws, nuts, or a linkage rod. If you find a set screw, loosen it slightly with the appropriate screwdriver. If there’s a pop-up mechanism, check for a vertical linkage that connects to the stopper.
Tip: Take note of screw position for reassembly; a misplaced screw will cause misalignment later. - 3
Detach the stopper from the linkage
Gently disconnect the stopper from any linkage rod or pivot; hold the stopper steady to avoid dropping it into the drain. If the stopper is threaded, turn counterclockwise to loosen. Do not force a stuck connection—apply light pressure and reassess.
Tip: If you can’t remove the stopper by hand, use needle-nose pliers with a firm, controlled grip. - 4
Retrieve the stopper
If the stopper is loose but would not come out, use pliers or a magnet to grab and lift it. Avoid dropping the stopper into the drain by keeping your grip secure. Check for obstructions on the stopper stem while you have it out.
Tip: Place the stopper on a towel to prevent losing it in the tub if you set it down. - 5
Loosen a stuck plug with penetrating oil
Apply a small amount of penetrating oil to the stem and threads, then wait 5–10 minutes to let it penetrate. Gently work the plug back and forth to loosen; avoid over-tightening as it can strip threads.
Tip: Never spray oil directly into the drain; target the affected joint and wipe away excess oil. - 6
Clear hair and debris with a snake
Insert a drain snake or flexible wire and rotate to break up hair clogs and mineral buildup. Retrieve any debris and pull it free. Recheck the drain for smooth operation.
Tip: Take small pulls—forcing through a deeper clog can push debris into the plumbing.” - 7
Reassemble and test
Reinsert the stopper, reconnect any linkage, and tighten screws as needed. Run water to test drainage and recheck for leaks around the seal. If water drains unevenly, adjust the stopper height or seal seating.
Tip: Test multiple times with both full and partial water levels to ensure reliable operation.
Got Questions?
What type of tub drain plug do I have?
Most common types are lift-and-turn, push-pull, and pop-up. Inspect the stopper and linkage to determine the correct method for removal.
Most plugs come in three main types: lift-and-turn, push-pull, and pop-up. Look at the stopper and linkage to identify which method to use.
Can I use chemical drain cleaners to loosen a stuck plug?
Chemical cleaners are not ideal for loosening a stuck tub plug and can damage seals or pipes. Use mechanical methods first, and consult a pro if the plug remains stubborn.
Avoid chemical drain cleaners for a stuck tub plug. They can harm seals and pipes; try mechanical methods first or get professional help.
Is it safe for beginners to remove a tub drain plug?
Yes, with careful prep and following a step-by-step approach. Stop if you encounter resistance and reassess your plan or seek professional help.
It’s safe for beginners if you follow the steps and stop if something feels wrong. Seek help if you’re unsure.
How often should I inspect my tub drain plug?
Inspect the plug and seal every few months, and clean the stopper during routine bathroom maintenance to prevent buildup.
Check the plug and seal every few months and clean the stopper during routine maintenance.
What should I do if water still drains slowly after removal?
A slow drain after removal usually indicates a deeper hair or mineral clog. Use a drain snake to clear deeper obstructions or contact a plumber if unresolved.
If drainage remains slow after removal, there may be a deeper clog. Try a snake, or call a pro if it persists.
Watch Video
The Essentials
- Identify plug type before starting
- Use the right tools to avoid damage
- Clear debris and test the seal after reassembly
- Keep water contained and workspace clean