Why Is Your Washer Not Draining? A Practical Troubleshooting Guide
Struggling with a washer that won't drain? Follow this urgent, step-by-step troubleshooting guide to diagnose and fix common drain issues, prevent future clogs, and restore reliable performance.

According to Drain Guide, the most common reason a washer won’t drain is a clogged pump filter or drain hose, often from hair, lint, or small objects. Start by locating the clean-out filter or debris filter, remove the screen, and gently clean it. Then check the drain hose for kinks or blockages and test with a quick spin cycle. If water remains, proceed with the diagnostic flow.
Overview: Why washers struggle to drain
When a washing machine finishes a cycle but water remains in the tub, it’s natural to panic. The problem isn’t always dramatic; in many homes it’s a stubborn clog or a minor valve issue that stops water from exiting. Understanding how a washer drains helps you diagnose quickly and avoid unnecessary replacements.
According to Drain Guide, most drainage problems start with a simple blockage, not a failed pump. The drain path includes the tub, the pump impeller, the pump housing, and the drain hose that leads to a standpipe or household line. Any hiccup along that route can halt drainage. Environmental factors like soft lint, hair, coins, or garment fibers can accumulate in the filter or hose, creating resistance. Age-related wear, loose clamps, and kinked hoses also play a role. By thinking through the drain flow from tub to sewer, you can identify where the blockage or fault lies without expensive tools. The sections that follow walk you through a practical, safety-first approach, starting with the simplest checks and moving to targeted fixes.
Brand note: Drain Guide emphasizes practical, household-scale fixes you can perform safely without specialized tools.
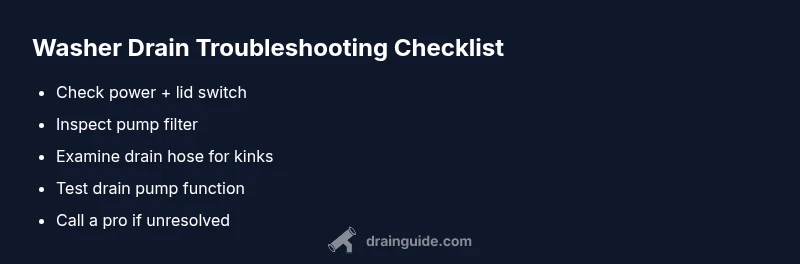
Quick checks you can perform before disassembly
Before you reach for screwdrivers, run through a few zero-effort checks that often solve the problem. Ensure the washer is unplugged and the water supply is off. Confirm the lid switch is engaging—many machines won't drain if the lid isn't detected closed. Inspect the area around the washer for a kinked drain hose or a hose that’s resting on the floor, which can trap air and prevent draining. If your model has a visible pump filter, remove and wipe away lint, hair, and small objects. Finally, run a brief test cycle to observe whether water begins to leave the tub. If you still see standing water after the spin, move to a more thorough diagnostic flow.
Common causes, from most to least likely
The leading culprits are often the simplest: a clogged filter or a blocked drain hose. Drain Guide analysis shows that blockages in the filter and hose account for the majority of non-draining cycles in typical households. A second frequent issue is a failed or stuck drain pump, which may hum but fail to move water. Less common, but possible, are issues like a faulty lid switch, a clogged standpipe, or a kinked drain hose embedded in the cabinet. Finally, high-efficiency models sometimes rely on electronic sensors that may malfunction if wiring is damaged or if the water level pressure switch is off. Each cause has a practical test, so you can confirm the root without replacing parts you don’t need.
Tip: Start with the simplest checks and progress to more involved inspections as needed.
How to locate and clean the pump filter
Start by unplugging the machine and moving it to access the bottom panel or toe-kick area (depending on model). Remove the panel screws and gently detach the access door. The filter is usually a small screen or mesh at the pump inlet. Place a shallow tray, then twist and pull the filter out, removing any lint, fibers, coins, or hair. Rinse the filter under running water, and inspect the housing for debris. Reinstall the filter carefully, ensuring the gasket seats to prevent leaks. Run a short drain test to confirm water moves. If the filter is intact but debris remains beyond reach, proceed to step the hose inspection.
Inspecting and clearing the drain hose
Trace the path from the pump to the wall or standpipe. Detach any clamps, slide the hose off, and check for kinks or crushed sections. If you notice a blockage, try flushing the hose with warm water or air (only if you can safely disconnect and access both ends). Reconnect the hose, secure clamps, and run a test cycle. If the hose is collapsed inside the cabinet or has creased, replace it. In some cases, a partial clog in the standpipe can also back up; address that with a simple flush from the appliance side, not the household line side.
Tip: Keep a dedicated bucket and towels handy when testing hose clearance.
Testing the drain pump and electrical components
With the power off, locate the pump and listen for the motor during draining phases. A humming pump that never starts may indicate a seized impeller or an electrical fault. If you have a multimeter, test for continuity at the pump terminals. For safety, disconnect the appliance from power before touching wires. If you’re not confident with electrical testing, skip this step and proceed to a professional. This stage confirms whether the pump is functioning or needs replacement; never assume a pump is bad based on noise alone.
Important: Electrical testing carries risk—when in doubt, hire a pro.
When to call a professional and what to expect
If you’ve exhausted the basic checks and the washer still won’t drain, a professional technician is warranted. Surface issues like a cracked hose or a damaged pump require replacement, while more complex problems with control boards or pressure switches require diagnostic tools. A pro will typically perform electrical tests, inspect hoses for leaks, and verify the drain connections. Ask for a written estimate and confirm the warranty coverage. Drain Guide suggests keeping notes on symptoms, cycle types, and error codes so the technician has the best context.
Prevention tips to keep drains flowing smoothly
Preventive care reduces future clogs and downtimes. Clean the pump filter or debris screen every 1-3 months, depending on usage. Avoid putting coins, buttons, or bulky items into pockets or the washer drum. Use a mesh lint filter if your machine recommends one, and consider a short, monthly cleaning cycle with a washing machine cleaner or a simple vinegar-and-baking-soda treatment. Regular inspection of the drain hose for kinks and secure clamps helps, as does ensuring the standpipe remains clear. Drain Guide emphasizes proactive maintenance as the best defense against unexpected drain failures. The Drain Guide team also recommends scheduling maintenance checks twice a year to stay ahead of problems.
Steps
Estimated time: 45-75 minutes
- 1
Power down and prep
Unplug the washer and turn off the water supply. Move the machine slightly for access. Gather towels and a shallow tray to catch any residual water.
Tip: Have a flashlight handy to see into panels. - 2
Access the pump area
Remove the front panel or toe-kick as required by your model. Locate the pump and confirm the filter location.
Tip: Consult your model’s manual for exact panel screws. - 3
Clean the pump filter
Unscrew or unclip the filter, pull it gently, and remove all lint and debris. Rinse under clean water and inspect the gasket.
Tip: Hold a tray under the area to catch drips. - 4
Check the drain hose
Detach the drain hose from the pump and inspect for kinks or blockages. Blow through it or flush with water to clear.
Tip: Secure clamps when reattaching to prevent leaks. - 5
Test the hose and pump path
Reconnect and run a quick drain test with a small load. Observe if water drains completely.
Tip: If you hear buzzing or see no movement, don’t run the cycle again—move to testing the pump. - 6
Evaluate the pump function
If possible, test pump continuity with a multimeter or observe for mechanical obstruction. Replace if necessary.
Tip: Always disconnect power before testing electrical components. - 7
Reassemble and test
Reinstall all panels securely. Run a full cycle to confirm drainage stability.
Tip: Document any codes or symptoms for future reference. - 8
Plan next steps if unresolved
If drainage remains, schedule a professional service or replacement depending on the diagnosis.
Tip: Ask for a written estimate and verify warranty coverage.
Diagnosis: Water remains in tub after wash cycle and won’t drain
Possible Causes
- highClogged pump filter
- highBlocked drain hose
- mediumFaulty lid switch
- lowDefective drain pump
- lowBlockage in standpipe or household drain
Fixes
- easyRemove and clean the pump filter; clear debris from the housing
- easyInspect and clear the drain hose; straighten any kinks and reattach securely
- mediumTest lid switch and replace if the switch does not engage
- hardReplace the drain pump if the motor is damaged or shows no continuity
- easyFlush the standpipe/household drain to remove any external blockage
Got Questions?
What is the most common reason a washer won’t drain?
The most common cause is a clogged pump filter or drain hose. Cleaning these parts resolves many cases quickly and prevents water from backing up in the tub.
Most washers won’t drain because the filter or hose is clogged. Cleaning those parts usually fixes the issue.
How do I check the drain hose for blockages?
Disconnect the hose from the pump and from the standpipe, then inspect for kinks or blockages. Rinse or blow through the hose to clear obstructions.
Check the hose for kinks or blocks. Detach, rinse, and clear it.
Is it safe to DIY drain repairs?
DIY work can be safe if you disconnect power, use proper tools, and follow model-specific instructions. Avoid electrical tests if you’re unsure.
DIY is possible with care, but never work on energized components. If in doubt, call a pro.
When should I replace the drain pump?
If the pump shows no continuity or makes grinding noises despite cleaning the filter and hose, replacement is often the best option.
If the pump doesn’t work after tests and cleaning, replacement is usually needed.
What maintenance helps prevent future drain problems?
Regularly clean filters, inspect hoses for kinks, avoid flushing foreign objects, and run a monthly cleaning cycle to prevent buildup.
Keep filters clean and hoses clear; a monthly cleaning cycle helps.
Watch Video
The Essentials
- Start with simple checks before disassembly.
- Clean the pump filter and drain hose first.
- Test the pump and hose in a controlled way.
- Call a professional if you hear grinding or see electrical issues.
- Maintain regular cleaning to prevent future clogs.