Do French Drains Need Cleaning? A Practical Homeowner's Guide
Discover when French drains need cleaning, how to spot clogs, DIY cleaning steps, and when to call a pro. Drain Guide provides a clear, practical maintenance roadmap for durable drainage around your home.

Yes—French drains require periodic cleaning to prevent clogging from sediment, roots, and debris. Regular inspections help water flow freely and prevent backups. Look for pooling, slow drainage, or odors as signs to clean. For thorough cleaning, you may need tools beyond simple surface clearing.
Why Cleaning French Drains Matters
Do french drains need to be cleaned? The short answer is yes. According to Drain Guide, routine cleaning keeps the trench free of sediment, roots, and organic buildup that reduce flow and can lead to backups near your home. A clean French drain helps water move away from the foundation, reduces the risk of damp basements, and extends the life of the drainage system. This maintenance is especially important in clay soils, sites with tree roots, or areas with heavy rainfall where debris can accumulate quickly. By keeping the entry and exit points clear, you preserve the trench’s ability to drain effectively during storms and protect your landscape from standing water and erosion.
How French Drains Get Clogged
French drains are designed to collect groundwater and channel it away, but they can accumulate debris over time. Silt and fine soil particles settle in the gravel, reducing pore space and slowing flow. Tree roots can infiltrate around the grate or fabric, creating blockages that force water to find alternate paths. Leaf litter and organic matter may form a mat that traps sediment, while mulch and soil erosion around the trench deposit material into the inlet. Regular inspections help you catch these issues before water backs up into undesired areas and before the outlet becomes blocked.
Signs Your French Drain Needs Cleaning
Common indicators include pooling water along the drain line or at the outlet, damp soil within a wide radius of the trench, and a noticeable odor or gurgling when water flows. If you observe slower drainage after a heavy rain, or water around the crawlspace or basement, it’s time to investigate. Visible debris around the grate, lid, or catch basin is another clear signal that cleaning is overdue. Catch basins that feel full or hard to empty can also point to a clogged system. Addressing these signs early prevents more serious drainage failures.
Cleaning Methods: DIY vs Professional
DIY cleaning is feasible for shallow, accessible French drains with simple grates and surface access. It typically involves clearing the inlet, flushing the line with water, and removing use-specific blockages like leaves or sediment. Deeper drains or blocked outlets may require professional equipment such as a drain auger, camera inspection, or trench access. Professionals can assess fabric condition, socket connections, and backfill stability, ensuring the system remains properly sealed and functional. When in doubt, start with surface access and consult local codes or a Drain Guide pro for deeper work.
Tools and Materials You'll Use
Success hinges on having the right tools. Essential items include gloves, a grate removal tool, a garden hose with a spray nozzle, a drain auger or plumber’s snake, a bucket or container for debris, and a flashlight for dark corners. Optional but helpful items include landscape fabric replacement and fresh gravel for backfill. Gather these before you begin to avoid mid-clean interruptions and to keep the workflow steady.
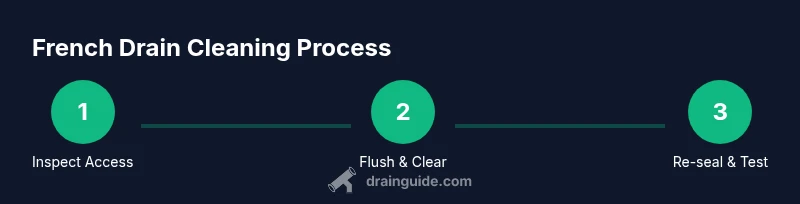
Step-by-Step Cleaning Process (DIY Guide)
This section outlines a practical DIY approach to cleaning a French drain. Begin with a surface check, then progressively work through flushing, dislodging blockages, and re-sealing the trench. Each step builds on the previous, minimizing the risk of re-clogging and ensuring a more durable drain system. If you encounter persistent blockages or suspect root intrusion beyond your ability, consider scheduling a professional inspection to avoid damage to the trench.
Maintenance Tips to Keep French Drains Flowing
Create a simple maintenance schedule that includes annual inspections, post-storm checks, and seasonal debris removal around access points. Trim nearby roots or monitor growth near the inlet to prevent future intrusions. Use landscape fabric correctly when re-sealing the trench to prevent soil intrusion. Document changes with photos so you can track what cleaning improves drainage and what doesn’t. A proactive approach helps protect your foundation and landscape for years to come.
Safety, Local Regulations, and Next Steps
Always call 811 before any trench work to locate buried utilities. Use PPE such as gloves and eye protection, since debris can include sharp stones, rusty metal, or contaminated material. If you find heavy sediment buildup, loose fabric, or damaged components, plan a staged fix and consult a Drain Guide professional for guidance on replacement parts or deeper restoration. Properly closing the trench after cleaning preserves performance and reduces the chance of new blockages.
Tools & Materials
- Gloves (work gloves)(Protect hands from sharp debris and pests)
- Screwdriver or grate removal tool(To lift or remove the drain grate or access lid)
- Garden hose with spray nozzle(For flushing debris from inlet to outlet)
- Drain auger / plumber's snake(To dislodge compacted sediment and roots)
- Bucket or container(Collect debris and dirty water)
- Flashlight(Ensure visibility in the trench and access points)
- Landscape fabric and fresh gravel (optional)(For re-lining and backfill after cleaning)
Steps
Estimated time: 60-120 minutes
- 1
Inspect access points
Begin by locating and opening the drain grate or lid. Check for obvious blockages at the inlet and at the outlet. Confirm the trench is accessible and safe to work in, and note any nearby utilities or irrigation lines.
Tip: Wear gloves and use a flashlight to inspect dimly lit sections; never pry with excessive force. - 2
Test drainage flow
Before disassembling anything, observe how water currently flows through the system. Pour water near the inlet and watch the path it takes to the outlet. If water stalls or pools, you likely have a partial blockage.
Tip: Document the flow pattern with photos for later reference. - 3
Clear surface debris
Remove leaves, mulch, and commonly located debris around the opening. This prevents debris from immediately re-entering the trench after cleaning. Keep the area clean as you work to avoid recontamination of the trench.
Tip: Use a small shovel or gloved hands to gather debris; dispose properly. - 4
Flush and dislodge blockages
Connect the garden hose to the inlet and flush toward the outlet. Use a back-and-forth motion to help dislodge silt and loose roots. If you encounter a stubborn obstruction, gently use the drain auger from the accessible point.
Tip: Start at the inlet and work toward the outlet; avoid forcing the hose where the pipe narrows. - 5
Inspect filter/sock and replace if needed
If your system uses a fabric sock or filter, remove and inspect it. Rinse or replace with fresh fabric if it’s saturated with sediment or torn. This step keeps sediments from re-entering the gravel bed.
Tip: Handle fabric gently to avoid tearing; reseal edges to prevent ingress. - 6
Re-seal and test after cleaning
Reassemble all components, backfill as necessary, and cover the trench with soil or gravel. Re-test the system by simulating rainfall or pouring water to verify improved flow after cleaning.
Tip: Take a final walk around the area to check for surface pooling or unexpected wet spots.
Got Questions?
Do French drains require regular cleaning?
Yes. Regular inspections help prevent blockages from sediments, roots, and debris and keep water flowing away from your foundation. If you notice pooling or slow drainage after rain, it’s time to inspect the drain.
Yes. French drains benefit from regular inspections to keep water moving away from your home.
What are the signs of a clogged French drain?
Pooling water along the drain line, damp soil around the trench, slow drainage, or gurgling sounds at the outlet indicate a blockage. Bad odors can also signal stagnation.
Look for pooling water, damp soil, slow drainage, and gurgling sounds as red flags.
Can I clean a French drain without removing the lid?
Surface cleaning and flushing can often be done without fully removing the lid. However, to thoroughly inspect and clear the line you may need to access the inlet and possibly remove the grate.
You can do basic checks without removing the lid, but full cleaning may require opening the inlet.
What tools are best for DIY cleaning?
A garden hose with a spray nozzle, a drain auger, gloves, a flashlight, and a bucket are the core tools. A shovel or small trowel helps with surface debris.
Use a hose, auger, gloves, and flashlight for DIY cleaning.
How often should I inspect or clean my French drain?
Inspect after heavy rains or seasonal changes, and perform a deeper cleaning when signs of clogging appear. Routine annual checks are a good practice for most homes.
Check after big rains and keep an annual check to stay ahead of clogs.
Is it safe to use chemical cleaners in a French drain?
Chemical cleaners can damage the fabric, pipes, and beneficial microbes in the drainage system. They may also pose environmental risks, so avoid them where possible.
Avoid chemical cleaners; they can harm the system and the environment.
Watch Video
The Essentials
- Inspect access points before starting cleaning
- Identify signs of clogging early to prevent backups
- DIY cleaning is feasible for shallow, accessible drains
- Replace worn fabric and damaged parts to maintain performance
- Document outcomes to guide future maintenance