Removing a Tub Drain: A Practical DIY Step-by-Step Guide
Learn how to safely remove a tub drain to clear clogs, inspect the mechanism, and reseal the assembly. This comprehensive DIY guide covers tools, safety, step-by-step instructions, and troubleshooting for homeowners.

Yes. You can remove a tub drain to clear hair and debris and inspect the drain assembly. Start by turning off water and clearing the area, then remove the overflow plate, loosen the drain nut from below, and lift out the flange. Clean, reseat with fresh sealant, and test for leaks.
Safe access and planning for tub drain removal
Removing a tub drain is a practical DIY task when clogs persist or a replacement is needed. The key is to work in a clean, well-lit space and keep the area protected. Start by turning on a bright light, laying towels, and draining the tub as much as possible. Gather your tools and materials ahead of time so you don’t interrupt the process. If your tub has an accessible plumbing panel, inspect the area to understand how the drain flange is fastened. Knowing whether the overflow plate sits above the drain flange or is integrated will determine your approach. Drain removal is usually straightforward when you follow the plan and respect the design of your tub. According to Drain Guide, approaching this task with patience and a clear plan reduces the risk of damaging fittings and creating leaks.
Understanding tub drain construction and variants
Tub drains come in several designs, but most share two main parts: an overflow assembly connected to the tub and a drain flange that sits beneath the tub. Some models use a simple screw-on flange; others have a threaded drain nut beneath the bathtub lip that tightens the entire assembly. Before you begin, identify whether your drain is an open flange or a press-fit unit, and locate the access point—often an overflow cover on the wall or a panel under the tub. This knowledge helps you choose the correct disassembly method and reduces the chance of dropping small components down the drain. Drain Guide emphasizes checking the material (brass, plastic, or metal alloys) to anticipate corrosion and the potential need for replacement rather than repair.
When removal is necessary and what can go wrong
There are several reasons to remove a tub drain: hair and soap scum buildup, corrosion, leaks around the flange, or a faulty seal. The good news is that most clogs live at the trap or drain flange and can be cleared without full replacement. Potential pitfalls include stripping screws, cracking the plastic overflow housing, or misplacing small parts like washers and nuts. If the drain is severely corroded or the threads are stripped, replacing the entire assembly may be a safer long-term solution. Drain Guide notes that assessing the condition of the drain during the initial inspection helps you decide whether to repair or replace.
Safety considerations for DIY drain work
Safety comes first. Turn off any nearby power outlets if they could be exposed to water, wear eye protection and gloves, and work on a dry, stable surface. Have towels or a bucket ready to catch water and debris. Avoid using aggressive chemical drain cleaners when the drain is exposed, as they can damage seals and fixtures. If you must use penetrating oil on a stubborn nut, apply sparingly and wipe away excess to prevent drips onto the tub finish. If you are unsure about electrical or structural behind-the-wall components, consider consulting a licensed plumber. Drain Guide supports cautious, informed DIY work and recommends stepping back if you encounter unexpected complications.
Behind the overflow: what you will encounter
Removing the drain often reveals two connected systems: the overflow faceplate and the drain flange below it. The overflow faceplate is typically held by two screws; removing it reveals the drain nut that secures the flange. Underneath, you may find a gasket, a washer, and sometimes a rubber seal. Keep a magnetic tray handy to collect metal parts and avoid losing them down the pipe. If the tub has a modern, low-profile overflow, you may need a specialized tool or a flexible wrench to access tight spaces. Understanding this layout prevents damage when loosening fasteners and helps you plan the resealing arrangement after cleaning.
Cleaning, inspecting, and assessing debris
Once the drain is free, inspect the flange and the inside of the drainpipe. Remove hair and buildup with needle-nose pliers and a small stiff brush. Check for cracks or large grooves in the flange that might require replacement. Clean the gasket seating area and dry it thoroughly before reassembly. If you observe rust or significant corrosion, plan for a full replacement rather than a quick fix. By clearing the debris and checking for wear, you reduce future clogs and leaks and extend the life of your drain system. Drain Guide advises documenting the condition of seals so you can source compatible replacements quickly.
Reassembly: resealing, testing, and adjustments
Apply a fresh bead of plumber’s putty or silicone sealant to the flange seating surface, then reinstall the drain flange and secure the nut hand-tight before finishing with a wrench. Reattach the overflow plate, ensuring screws sit snug but not overtightened. Replace any washers and seals with equivalents to the original if you know the model. Refill the tub with water and check for leaks around the flange and overflow. If you notice a leak, tighten gradually in small increments and retest. Remember: the goal is a tight seal without warping the tub edge. Drain Guide emphasizes patience and gradual tightening to avoid over-compression.
Troubleshooting common problems after reinstall
If leaks persist, verify that the gasket is properly seated and that the sealant has cured. A seep at the seam may indicate insufficient sealant or misaligned parts; reapply as needed and allow proper curing time. Hair and debris can return if the trap is compromised, so inspect the trap arm and U-bend for blockages. If the drain continues to be sluggish, clear the trap with a drain snake or a flexible brush and avoid harsh chemical cleaners that can degrade seals. When in doubt, consult a pro—some repairs require specialized tools or replacement parts that a DIYer may not have.
Authority sources and further reading
For homeowners seeking credible guidance on drain maintenance and safety, see resources from reputable organizations and universities. The following sources provide general safety and plumbing maintenance principles that complement this guide:
- https://www.cpsc.gov (U.S. Consumer Product Safety Commission)
- https://www.osha.gov (Occupational Safety and Health Administration - safety basics for home workshops)
- https://www.epa.gov (Environmental Protection Agency – household plumbing and water safety)
Drain Guide recommends cross-checking product manuals for your specific tub model and adhering to local building codes when performing plumbing work.
Tools & Materials
- Screwdrivers (Phillips and flat-head)(Use to remove overflow cover screws and small fasteners)
- Adjustable wrench(Loosen the drain nut underneath the tub)
- Channel-lock pliers(Grip and twist drain components securely)
- Putty knife or flat blade(Gently pry off overflow plate if it's stuck)
- Bucket or tub to catch water(Contain water and debris during removal)
- Rags or towels(Keep surfaces dry and clean up spills)
- Plumber's putty or silicone sealant(Seal around the drain flange during reassembly)
- Safety glasses(Eye protection is optional but recommended)
- New tub drain assembly (optional)(Use if replacing a corroded or damaged drain)
Steps
Estimated time: 60-90 minutes
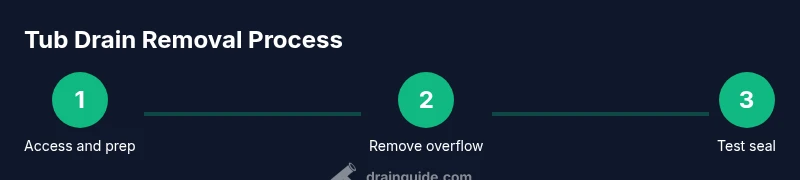
- 1
Shut off water and prepare area
Clear the area, remove nearby items, and lay towels to catch water. If the tub has standing water, drain it to reduce splashes. Put on safety glasses and gloves to protect your hands.
Tip: Keep a bucket handy to catch dripping water and a magnet tool for dropped screws. - 2
Remove overflow plate screws
Use the appropriate screwdriver to remove the screws holding the overflow plate. Gently pull the plate away to expose the drain assembly behind it.
Tip: If screws are corroded, apply a small amount of penetrating oil and wait 5 minutes before retrying. - 3
Expose and loosen the drain nut beneath the tub
From below the tub or inside the access panel, locate the drain nut and use an adjustable wrench to loosen it. Keep the nut from dropping by guiding it with a finger or magnet.
Tip: Turn the nut counterclockwise in small increments to avoid thread damage. - 4
Detach the drain flange
Carefully lift the drain flange away from the tub. If there is resistance, check for additional fasteners or a hidden seal and remove gently to avoid tearing.
Tip: Take a quick photo of how parts align for easier reassembly. - 5
Inspect and remove debris
Clear hair and debris from the drain cavity and flange seating area. Use needle-nose pliers to grab hair and a brush to scrub buildup.
Tip: Wipe dry to ensure a good seal when reassembling. - 6
Clean and dry the area
Check the tub edge and the flange seat for moisture and residue. Dry thoroughly and inspect gaskets for wear or cracks.
Tip: If gaskets show wear, replace them prior to reassembly. - 7
Apply sealant and reinstall
Apply a thin bead of plumber’s putty or silicone sealant to the flange seating area. Reinstall the drain flange and tighten the nut securely without overtightening.
Tip: Avoid excessive sealant that could squeeze into the drain and cause clogging. - 8
Reconnect overflow plate and test
Reattach the overflow plate with its screws. Refill the tub partially and check for leaks around the flange and overflow.
Tip: If you see a leak, tighten gradually in small steps and re-test after the sealant cures. - 9
Final check and notes
Run the faucet to verify drainage and monitor for slow draining or leaks after a few hours. Replace any parts if needed and store tools properly.
Tip: Document part numbers for future maintenance to save time later.
Got Questions?
Can I remove the tub drain without removing the overflow plate?
In many tubs, you can access the drain from behind the overflow plate; however, some designs require removing the plate first to access the drain nut. Follow your model’s layout and proceed carefully to avoid damaging the plate.
Often you need to remove the overflow plate to access the drain nut, but some designs allow access without removing it. Check your model and proceed cautiously.
What if the drain nut won’t loosen?
If the drain nut resists turning, apply penetrating oil and wait a few minutes. Use steady, even pressure with the correct wrench. If it still won’t budge, avoid forcing it and consider calling a plumber to prevent damage.
If the nut won’t loosen, give it a bit of penetrating oil, wait, and use steady pressure. If it still won’t move, consider a professional.
Do I need plumber’s putty or sealant on reassembly?
Yes. Use plumber’s putty or silicone sealant on the seating surface to create a watertight seal. Wipe away excess before it cures and allow the sealant to cure as recommended by the product instructions.
Yes, seal with plumber’s putty or silicone sealant and wipe away excess. Let it cure as directed.
How long does removal and reinstallation take?
Most homeowners complete the removal, cleaning, resealing, and reinstall within 60-90 minutes, depending on tub design and access. Plan for some unexpected slowdowns if space is tight.
Most people finish in about an hour, give yourself a bit more if space is tight.
Is tub drain removal safe for DIY beginners?
With careful planning and proper tools, a motivated DIYer can complete basic tub drain removal. If you encounter corrosion, awkward angles, or uncertain hardware, stop and consult a professional.
It’s doable for beginners with patience, but stop if something seems risky or unclear.
What should I do if there’s a leak after reinstall?
If leaks appear, retighten the drain nut in small increments and recheck. If the leak persists, reseal with fresh sealant and inspect gasket seating. For persistent leaks, seek professional help.
If it leaks, tighten a bit more, reseal, and if it still leaks, call a plumber.
Watch Video
The Essentials
- Plan and protect the work area before starting
- Identify your drain design to use the correct approach
- Clear debris and inspect seals for wear
- Reassemble with proper sealing to prevent leaks
- Test thoroughly and adjust as needed