Difference Between a Sink and a Toilet Plunger: A Practical Guide
Learn the key differences between sink plungers and toilet plungers, including design, usage, and maintenance. Drain Guide explains when to use each tool for effective DIY drainage.

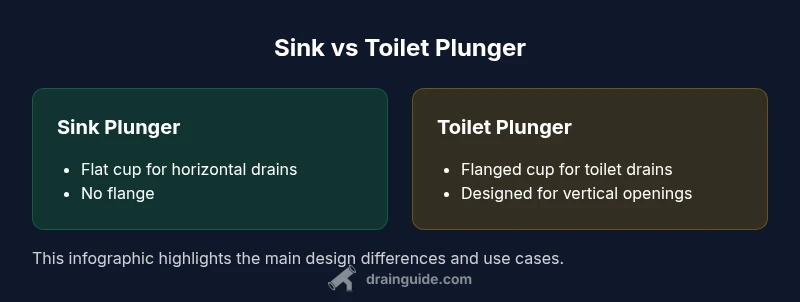
The difference between a sink plunger and a toilet plunger lies in design, function, and recommended use. Sink plungers have broad flat cups for horizontal drains, while toilet plungers include a flange that fits into a toilet's bowl opening for vertical drains. Using the correct tool improves pressure, reduces mess, and speeds up clearing clogs.
Understanding the difference between a sink and a toilet plunger
In any home repair toolbox, a plunger is a deceptively simple tool, yet the difference between a sink and a toilet plunger matters far beyond branding. According to Drain Guide, the difference between a sink and a toilet plunger is not merely size; it reflects the geometry of the drain, the direction of the clog, and the pressure needed to dislodge it. Sink drains are typically horizontal and narrower, so a plunger with a wide, flat cup can seal a flat surface and push air into the pipe. The toilet drain, by contrast, demands a flange that fits into a curved opening to create a seal inside the trap. When homeowners mix up these tools, the seal is poor, the suction weak, and the mess tends to spread. Understanding the intended use reduces frustration and speeds up relief of routine blockages. This article compares the two plunger types in practical terms and offers actionable steps so you can choose confidently when a clog strikes. Drain Guide emphasizes proper tool selection to minimize cleanup and maximize effect.
Key design differences between sink plungers and toilet plungers
Visually, the two tools look distinct, and the differences reflect their intended tasks. The sink plunger typically has a flat, wide rubber cup that can seal against a flat surface around a drain in a sink, tub, or shower. The toilet plunger includes an additional narrow flange that extends from the cup to seal inside the toilet's drain opening. The flange is essential for creating suction inside curved pipes. Material is often the same rubber compound, but handle length and stiffness can vary; many consumer plungers use a wooden or plastic handle of standard length. The seating surface around the cup also differs; the flat design reduces air resistance when used on horizontal drains, while the flange design improves suction strength when working against vertical toilets. For the difference between a sink and a toilet plunger, the trade-off is seal quality vs. ease of use; the right tool ensures both effective pressure and containment of waste.
How sink and toilet plungers work with typical clogs
Plungers rely on creating a temporary seal and then generating suction and pressure to move the clog. A sink plunger’s broad flat cup presses evenly against the drain lip, pushing air into a horizontal line of pipes. A toilet plunger’s flange projects into the drain, sealing against the inner walls of the toilet trap and allowing a stronger, more focused burst of pressure. In both cases, the goal is to convert downward force into upward thrust that loosens compacted debris, hair, soap scum, or mineral buildup. The physics are similar, but the effectiveness hinges on seal quality, drain geometry, and the user’s technique. Drain Guide notes that improper use—like using a toilet plunger on a flat sink drain—reduces suction and increases splash risk.
When to reach for a sink plunger vs a toilet plunger
The rule of thumb is simple: use a sink plunger for kitchen and bathroom sinks, tub, or shower drains where the opening is flat and broad. Use a toilet plunger for the toilet bowl, where the flange helps create a seal against the inner curve of the drain. If the clog is stubborn but located in a toilet, the toilet plunger offers the best chance of lifting the obstruction. For mixed or uncertain scenarios, start with the tool designed for the most likely drain geometry and only switch if the seal is poor or the clog remains unresolved. Drain Guide also recommends trying gentle plunging first to avoid splashing and follow with more decisive strokes as needed. In general, never mix plungers between drains without cleaning to maintain hygiene and effectiveness.
How to identify the right plunger for your drain
Labeling is your friend. Look for terms like “sink plunger” or “bath/plunge” and check the packaging for flange presence. A flange indicates toilet-capable design; a flat cup signals a sink-oriented tool. Confirm the material is flexible rubber with a robust handle, and inspect the seal around the rim for wear before use. If the drain has a curved or rounded interior, choose a toilet plunger; for flat surfaces and long horizontal pipes, a sink plunger is usually better. When in doubt, refer to the product description and, if available, Drain Guide’s guidance on tool selection for common household drains. Proper identification saves time and reduces mess.
Step-by-step: using a sink plunger safely
- Clear the area and ensure good ventilation. 2) Run water in the sink to cover the plunger cup about halfway. 3) Position the cup over the drain and seal firmly. 4) Use short, controlled thrusts to push and pull, maintaining the seal. 5) Pause and lift to assess whether the water flows freely. 6) Repeat in 15- to 30-second cycles until clearing occurs. 7) Rinse the area and clean the plunger after use to prevent contamination. Following these steps helps minimize mess and maximize suction efficiency when addressing sink clogs.
Step-by-step: using a toilet plunger safely
- Ensure the bathroom is dry and well-ventilated. 2) Add some water to the toilet bowl if it’s low, just to cover the cup. 3) Place the flange inside the drain opening and form a tight seal. 4) Push and pull in a controlled rhythm, keeping constant pressure. 5) Check progress every 20–30 seconds and repeat until the drain loosens. 6) Flush to test, then rinse the plunger and store it upright. 7) If the clog persists after several cycles, consider a mechanical auger or professional help.
Common mistakes and how to avoid them
- Using the wrong plunger for the drain type, which leads to a poor seal and splashback. - Not maintaining a clean seal due to debris on the cup. - Forgetting to rinse and dry the plunger, which can spread bacteria. - Leaning on the plunger handle, causing rod fatigue or breakage. - Ignoring safety: avoid mixing chemical cleaners with plungers. Drain Guide stresses proper technique and hygiene to prevent cross-contamination and improve results.
Maintenance, cleaning, and storage tips
After use, rinse plungers in clean water and allow them to dry completely before storage. Store each plunger in a separate, clean container or area to prevent cross-contamination. Inspect the rubber cup for cracks and the flange for wear, replacing as needed. A dry, cool storage location extends the life of both sink and toilet plungers, and regular checks help prevent unexpected failure during a household clog. Never store a damp plunger in a closed, unvented space where mold can grow.
Material considerations and durability
Most consumer plungers are made from natural rubber or blends with synthetic polymers that balance flexibility and strength. A thicker cup generally resists tearing and wears longer under repeated use, while a flexible flange ensures a better seal in toilets. Latex-free options are available for households with sensitivities. When evaluating the difference between a sink plunger and a toilet plunger, consider the durability of the cup, flange integrity, and handle rigidity. Higher quality materials tend to outperform budget options on repeated clog clearings and reduce the chance of cup cracks during aggressive plunging.
Cost considerations and value for homeowners
Prices for basic plungers are typically modest and vary by design and materials. Sink plungers and toilet plungers often fall within the same broad price range, with a modest premium for tools featuring durable flanges or premium rubber compounds. For homeowners, investing in two clearly labeled plungers—one for sinks and one for toilets—offers the best value over time, because it minimizes cross-contamination and ensures each tool is optimized for its drain. If you’re budgeting, plan for a small, upfront cost to prevent recurring difficulties during clogs and reduce the need for chemical cleaners or professional service.
Alternatives and practical tips for mixed drains
If you don’t want to maintain two separate plungers, consider a tool with a detachable flange that can be added or removed depending on the drain. However, confirm the tool’s seal integrity when using. For stubborn clogs, a hand auger (plumber’s snake) or a stiff, flexible rod can help clear debris that plunging alone cannot resolve. Always prioritize safety: wear gloves and eye protection if splashing occurs, and keep kids and pets away during use. Drain Guide suggests using plungers as a first-line approach, followed by more robust methods if necessary.
Comparison
| Feature | Sink plunger | Toilet plunger |
|---|---|---|
| Cup design | Flat, wide cup for horizontal drains | Flanged cup designed for toilet drains |
| Flange | Usually none | Integrated flange for seal inside bowl |
| Typical use | Sinks, tubs, and other horizontal drains | Toilets and bowl openings |
| Seal quality | Good on flat surfaces | Superior seal in curved toilet openings |
| Storage and handling | Often shorter handle, compact storage | Longer handle options with flange mechanism |
Positives
- Accurate tool for drain-specific jobs
- Simple, low-cost home remedy
- Reduces reliance on harsh cleaners
- Minimizes cross-contamination when used correctly
Cons
- Wrong tool wastes time and can create mess
- Requires proper storage to avoid cross-use
- Limited effectiveness on very stubborn clogs without other tools
Use the correct plunger for each drain; sink for sinks, toilet for toilets.
Select a sink plunger for flat drains and a toilet plunger with a flange for toilet bowls. This matching reduces mess and improves suction. Drain Guide recommends maintaining both tools for best results and hygiene.
Got Questions?
Can I use a sink plunger on a toilet?
No. A sink plunger lacks the flange that helps seal inside a toilet’s curved opening, making it less effective and more prone to splashing. Use the toilet plunger for toilet clogs.
No. A sink plunger isn’t designed for a toilet’s curved opening, so its seal and suction are limited. Use the toilet plunger for toilet clogs.
Can I use a toilet plunger on a sink?
Generally not recommended. A toilet plunger’s flange can seal poorly on a flat sink drain, reducing effectiveness and possibly spreading debris. Use a sink plunger for sinks.
Usually not recommended; a toilet plunger doesn’t seal well on flat sink drains. Use a sink plunger for sinks.
What’s the essential design difference?
The main difference is the flange. Toilet plungers have an integrated flange to seal the toilet’s curved drain, while sink plungers use a flat cup suited to flat drains.
The key difference is a flange on toilet plungers for toilets and a flat cup for sinks.
How should I clean plungers after use?
Rinse with hot water, soap, and disinfectant after each use. Let dry completely before storing in a clean area away from food contact surfaces.
Rinse with hot water and soap, disinfect, and let dry before storing.
Are plungers safe for septic systems?
Yes, most plungers are safe for septic systems when used as directed and cleaned afterward. Avoid harsh chemical cleaners that could disrupt septic bacteria.
Yes, but avoid harsh chemicals that can harm septic systems.
Do plungers work for all clog types?
Plungers work best for simple, mechanical clogs near the drain. Very stubborn or deep blockages may require an auger, chemical cleaners (carefully), or professional help.
They handle many typical clogs, but deep or stubborn ones may need an auger or pro help.
The Essentials
- Keep distinct plungers for sinks and toilets.
- Always ensure a good seal before plunging.
- Rinse and dry plungers after use to prevent contamination.
- Switch tools if the seal breaks or clog remains.
- Consider additional tools for stubborn clogs (drain snake).