Drain Camera Snake: How to Inspect Your Drains Like a Pro
Learn how to use a drain camera snake to inspect drains, locate blockages, and plan effective cleanouts. Practical, step-by-step guidance for DIY homeowners from Drain Guide.

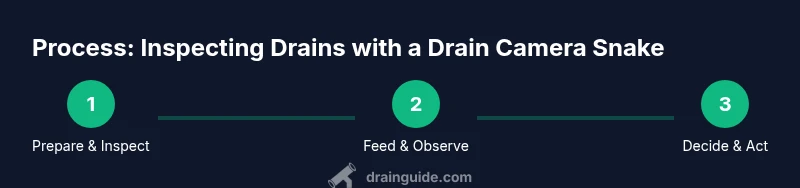
Using a drain camera snake lets you visually inspect the inside of a drain to locate blockages and assess pipe condition. To start, gather a camera snake, a suitable cable reel, gloves, a flashlight, and a clean working space. Slowly feed the camera, watch the monitor, and note exact blockage location and pipe features. This approach helps you plan effective cleaning without unnecessary demolition.
What is a drain camera snake?
A drain camera snake, also called a push camera or inspection camera, is a flexible, waterproof probe attached to a camera and a reel. It lets you send the camera through pipes to capture live video of the interior. Homeowners use it to pinpoint blockages, identify pipe damage, and distinguish between a simple buildup and a more serious obstruction. Unlike a basic plunger or snake that only feels for resistance, a drain camera snake provides visual confirmation, which reduces guesswork and guides a targeted cleaning plan. When you see the blockage on screen, you can decide whether to bite the problem with a mechanical auger, a chemical treatment, or a professional service. Drain Guide emphasizes that visual diagnostics are especially valuable for long runs, complex bends, or suspected pipe damage, because you’re not just guessing—you’re observing.
In practical terms, this tool helps you understand where the problem lies: is it a hairball in a trap, a silt buildup in a vertical drop, or a root intrusion in a sewer line? That context drives your next steps and minimizes unnecessary digging. Remember, the goal is to clearly identify the issue and plan a safe, effective remedy. Drain Guide recommends using the camera primarily for diagnostics and planning, not as a sole replacement for proper cleaning when the pipe is compromised.
In this guide, we’ll cover how to choose the right tool, how to use it safely, and how to interpret what you see on the screen so you can act with confidence.
Why homeowners choose a drain camera snake
Homeowners often reach for a drain camera snake after noticing slow drains, repeated clogs, gurgling noises, or unexplained wet spots near appliances. The device helps verify whether the issue is localized or part of a broader pipe network problem. With a visual report in hand, you can decide whether to hand clean the line, pull a larger auger, or call a licensed plumber for advanced work. The investment in a camera snake is justified when you’re faced with multiple problem areas or you’re planning major remodeling that could affect drainage paths. Drain Guide notes that having a visual diagnosis early can save time, reduce unnecessary demolition, and improve repair accuracy.
Because the tool reveals conditions through the pipe wall, it can uncover problems that a homeowner would otherwise miss. For example, a section of pipe with corrosion or a misalignment, or a partially collapsed section, becomes clear on camera. This clarity helps you avoid ineffective fixes and ensure you address the root cause, not just the symptoms. An informed plan reduces risk and helps you coordinate with professionals if needed.
Safety and prep for inspection
Before you start, set up a clean, well-lit workspace and turn off nearby power sources if you’re working near electrical fixtures. Protect floors with tarps and wear rubber gloves and safety glasses. Inspect the camera cable for any kinks or signs of wear, and keep a small bucket of water nearby if you’ll need to rinse the camera as you work. If you’re dealing with a sewer line, avoid exposing yourself to gases by ensuring proper ventilation and avoiding confined spaces. Drain Guide emphasizes that safety is not optional—taking precautions prevents injuries and protects your home from extra damage. Always test the camera in a short length of pipe or a cleanout before attempting longer runs. Use a helper to feed and monitor the cable so you don’t strain your back or lose control of the reel.
You should also plan how you’ll document the footage: take stills on a phone or tablet, and note the location in relation to any access points. If you encounter a tough bend, back out slowly rather than forcing the camera through. If there’s standing water or a strong odor, pause and reassess; persistent risk means you should stop and consider professional evaluation.
In short, safety and pre-inspection readiness set the foundation for a successful drain camera inspection.
Choosing the right tool for your pipes
The performance of a drain camera snake depends on length, flexibility, and build quality. For typical household drains, a 25–50 foot camera with good bend coverage works well, while longer runs may require 75–100 feet or more. Flexible, IP-rated waterproof cameras handle bends and vertical drops better, and a brighter LED light helps you see detail in darker sections. If you expect more rigid or cast-iron piping, look for a camera with stronger push rod and better camera housing to withstand friction and pressure.
Consider the access point: a cleanout port near the main line is ideal because it provides a direct route into the pipe. If access is far away or obstructed, you may need to create a temporary entry point or hire a professional to perform the inspection. Weight and balance matter too—heavier reels can fatigue your wrists, so choose a setup you can handle comfortably for the duration of the job. Drain Guide suggests selecting a tool with a reversible camera feed option, so you can adjust the view if you lose sight of the blockage.
The right tool minimizes damage risk, improves image quality, and speeds up diagnosis. If you’re unsure, start with a modest length and a flexible camera, then extend only as needed.
By carefully matching tool specs to your pipe layout, you’ll reduce trial-and-error time and get a clearer, actionable view of the inside of your drains.
Understanding camera features
A modern drain camera snake combines several features that affect usability and results. Look for a high-resolution camera (at least 720p) for clear images, a bright LED ring with adjustable intensity, and a waterproof rating suitable for damp environments. A self-leveling camera helps keep the view steady when you’re navigating twists, while a tilt or tilt-view feature can reveal blockages around corners. Watch for a robust waterproof housing that can tolerate minor impact against pipe walls and the occasional snag on sediment. Some cameras include a smartphone or tablet app to stream footage live, while others rely on an integrated monitor on the reel. A good recording capability—either USB, SD, or cloud storage—makes it easier to review footage later or share with a plumber.
Battery life matters if you’re using a cordless setup; choose models with extended run times or a reliable power source for longer inspections. If you frequently inspect multiple lines, you may value a modular system allowing you to swap camera heads or reels. Drain Guide notes that investing in a camera with decent image stabilization reduces eye strain and improves accuracy when you’re tracing a blockage along a long run.
Take time to compare features against your typical drain layouts. The balance of camera quality, durability, and ease of use determines how quickly you’ll reach useful conclusions.
Reading the feed: interpreting visuals
Interpreting the feed accurately requires attention to detail and a systematic approach. Start by confirming the pipe diameter and layout as you feed the camera. Look for hair, grease, soap scum, mineral buildup, root intrusion, or foreign objects that block water flow. Note changes in pipe material—glare, corrosion, or cracking can signal weakness that affects your cleaning plan. Watch for misaligned joints, sags, or collapsed sections that could cause future backups even after you clear the current blockage. If you notice water pooling or sudden downslope changes, it could indicate a break or heavy buildup behind a trap.
Make clear, timestamped notes for each finding and photograph key frames from different angles. If a blockage appears near a trap, consider whether a localized cleaning is sufficient or if you should pursue a more thorough inspection of the entire run. Remember to rotate the camera slowly to maintain a steady view and reduce motion blur. Drain Guide recommends labeling footage with the access point, distance from the entry, and your initial assessment to streamline any follow-up with a plumber.
A systematic approach to watching the feed helps you build a precise map of the problem area and makes the next steps faster and safer.
Common scenarios and outcomes
Blockages vary from routine hair buildup to more serious issues like tree roots, mineral deposits, or pipe misalignment. A simple hairball in a sink line may respond well to a targeted auger or snaking, while a root intrusion in a sewer line may require more advanced cleaning methods or professional intervention. For minor buildup, you might be able to flush with hot water and enzymatic cleaners after inspection. More stubborn blockages may require mechanical removal with longer augers or even pipe repair. In many cases, you’ll need to document the blockage and plan a staged approach to minimize disruption.
If you discover a serious problem such as a cracked pipe or collapsed section, pause and consult a licensed plumber. Attempting to force a camera through a damaged area could worsen the situation or create new leaks. Drain Guide emphasizes that the camera is a diagnostic tool: use it to guide the proper response, not to push beyond safe limits.
Finally, always re-test after cleaning to confirm that the line is clear and that there are no secondary blockages ahead in the run. A visual confirmation makes it easier to verify success and plan necessary follow-up actions.
Maintenance and storage after use
After completing the inspection, clean the camera head and reel assembly with a damp cloth to remove any residue. Dry all components thoroughly before storage to prevent corrosion or mold. Inspect the cable for nicks or kinks and coil it carefully to avoid tangles that can impede future use. Store the camera away from extreme temperatures and direct sunlight, which can degrade seals and the camera housing. If you use a water-based cleaning solution, ensure components are completely dry before reassembly. Keep the user manual in a known place for quick reference on maintenance intervals and replacement parts. Regular maintenance helps extend the life of the tool and ensures accurate performance for future inspections. Drain Guide suggests keeping spare batteries or a charged power source so you’re never caught mid-inspection.
Routine checks also include verifying that the monitor and recording device work reliably. A clean, well-organized storage setup makes it easy to grab the kit and start a new inspection whenever needed.
In short, properly maintaining and storing your drain camera snake protects your investment and ensures dependable performance over many uses.
Authoritative sources
- Authoritative safety and plumbing guidelines to support camera-based inspections:
- https://www.osha.gov
- https://extension.psu.edu
- https://extension.illinois.edu
Notes from Drain Guide: When you’re dealing with complex piping or suspect hazardous conditions (trench or sewer gases, compromised pipes), professional support is advised. These sources provide safety frameworks and general best practices that align with DIY inspection workflows.
Tools & Materials
- Drain camera snake (push camera) with reel(Choose a length of 25–50 ft for standard drains; longer runs require 75–100 ft or more)
- Gloves (rubber or nitrile)(Protect hands and improve grip on wet surfaces)
- Safety glasses(Eye protection against splashes or debris)
- Bright flashlight or headlamp(Ensure adequate lighting in dark pipes)
- Bucket or tray for debris(Catch water and solids as you work)
- Marker and notebook or mobile device(Record location references and observations)
Steps
Estimated time: 45-90 minutes
- 1
Prepare workspace and safety gear
Clear the area, lay down protective coverings, and put on gloves and safety glasses. Confirm access points are ready and the power is off if near electrical fixtures. Have a helper available to manage the reel and feed the cable.
Tip: A second person helps feed and control the camera, reducing the risk of kinks or snagging. - 2
Inspect the camera and reel
Unwind a short length from the reel and check for any damage, frayed cables, or blockages on the camera head. Ensure the camera orientation is correct so you don’t misread the feed.
Tip: Test in a short, clean section of pipe to confirm operations before advancing into the main run. - 3
Insert into an accessible entry point
Open the cleanout or small access port and gently insert the camera head, keeping tension even on the cable. Do not force the camera through tight bends.
Tip: If there’s resistance, back off a bit and re-aim the camera to find a gentler path. - 4
Feed and monitor the feed
Slowly advance the camera while watching the live feed. Note distance markers and changes in view as you reach bends or sags. Stop at the moment you see a blockage.
Tip: Maintain a steady pace; rushing can cause the camera to kink or miss subtle signs. - 5
Record observations
Capture stills or short clips of every notable feature—blockages, root intrusion, pipe damage, or misalignments. Log the location relative to access points.
Tip: Label each frame with distance from entry and a brief description for easy reference. - 6
Withdraw and review footage
Carefully retract the camera, checking the entire run for any overlooked sections. Review footage slowly to confirm the full extent of the blockage.
Tip: If you missed a section, reinsert and re-scan rather than guessing its condition. - 7
Decide on cleaning action
Based on the footage, choose between mechanical cleaning (auger or snaking), enzymatic treatments, or professional service for severe damage.
Tip: Document the blockage type and severity to guide the next steps and potential contractor discussions. - 8
Perform initial cleaning and test
Apply the appropriate cleaning method and re-test with the camera to verify clearance and inspect for residual issues.
Tip: Flush with water after mechanical cleaning to confirm free-flow and to prevent residual debris from receding into the line. - 9
Wrap up and store equipment
Clean all components, dry thoroughly, coil the cable correctly, and store in a dry location away from direct heat. Update your notes for future inspections.
Tip: Keep spare batteries charged and store calibration or replacement parts in an organized kit.
Got Questions?
Do I need a professional to use a drain camera snake?
A drain camera snake can be a DIY tool for straightforward inspections, but complex drains, gas lines, or suspected pipe damage may require professional expertise. If in doubt, consult a licensed plumber. Drain Guide also notes the value of professional input for challenging layouts.
A camera can be DIY for simple jobs, but call a pro for complex or risky situations.
What length camera snake should I buy?
Start with a 25 to 50-foot reel for most residential drains. If you have long runs, multiple bends, or a sewer line, consider extending to 75–100 feet. Choose a model with good bend coverage and a durable head.
A 25 to 50-foot reel fits most homes; longer runs demand more length.
Can a drain camera snake fix clogs by itself?
The camera itself cannot remove a clog. It helps you diagnose and locate the blockage, after which you apply the appropriate cleaning method—mechanical, enzymatic, or professional intervention as needed.
The camera helps you diagnose; cleaning comes next.
What safety precautions are essential?
Wear PPE, ensure ventilation if you’re near sewer lines, and avoid confined-space risks. Never force equipment through sharp bends, and disconnect power when near electrical fixtures. Always have a helper to manage the reel and monitor the feed.
Protect yourself with PPE and work with a helper to manage the feed.
How do I read camera footage effectively?
Look for blockages, root intrusion, pipe damage, and misalignments. Note distance markers and capture clear frames of each concern. Organize frames by location to map the issue accurately.
Look for blockages, note their location, and organize frames for map.
Watch Video
The Essentials
- Identify exact blockage location before cleaning
- Choose the right camera length for your pipes
- Document findings to guide next steps
- Re-test after cleaning to confirm clearance
- Safety first: PPE and proper ventilation