Fix Drainage Around Your House: A Practical Guide Today
Learn how to fix drainage around your house with a practical, step-by-step plan. This guide covers grading, gutters, downspouts, drains, and maintenance to protect foundations and landscapes in 2026.

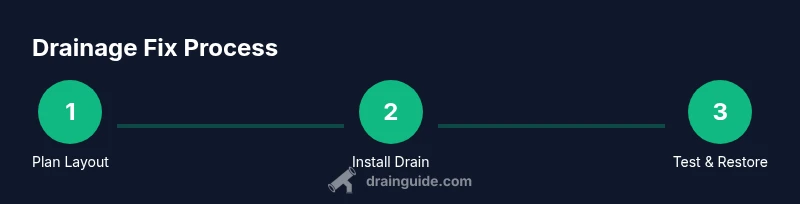
By following a proven plan, you can fix drainage around your house and prevent foundation flooding. Start with a basic assessment of slope, gutters, and downspouts, then implement grading, exterior drains, and selective trenching. The goal is a consistent away-from-foundation flow, reliable outlets, and regular maintenance to keep water away from your walls.
Why fix drainage around house matters
Water that pools around your foundation or leaks into the basement isn't just a nuisance. Poor drainage can lead to foundation settling, cracks, mold growth, flooded basements, and warped landscaping. A well-planned drainage system channels water away from the house and toward a safe discharge point such as a storm drain, low-lying lawn, or dry well. According to Drain Guide, the most durable drainage improvements start with a clear understanding of your property: soil type, slope, and existing water pathways. In DIY projects like fixing drainage around house, you’ll learn how a small amount of grading and a few strategic drains can make a big difference in your home's longevity. Investing in fix drainage around house reduces risk of damp basements, efflorescence on foundation walls, insect problems like drain flies, and soggy lawns that become muddy after rain. The principle is simple: move water away from your foundation at a safe rate and to a discharge location that won’t cause erosion or neighbor issues.
DIY drainage fixes save money and increase resilience, but they require planning, proper materials, and attention to safety. Start with a clear plan and realistic expectations, and you’ll avoid common mistakes that lead to ineffective or temporary results.
Core principles of yard drainage
Effective drainage hinges on four core ideas: grading, drainage paths, materials, and maintenance. Grading ensures the ground slopes away from the foundation; a typical goal is a gradual, consistent slope rather than a sharp drop. Drainage paths guide water to a safe exit like a street, storm drain, or dry well, avoiding driveways and basement openings. Materials such as perforated pipe, gravel, and geotextile prevent clogging and maximize infiltration. Maintenance means routine inspection after heavy rain and seasonal checks of gutters, downspouts, and outlets. The Drain Guide approach favors simple, robust solutions: redirect roof runoff through downspouts, create a shallow swale around critical areas, and keep soil porous by avoiding compaction in the root zone. The result is a durable system that works with natural infiltration rather than against it.
Soil type matters; clay soils hold water and may require more porous backfill, while sandy soils drain quickly but can carry sediment if not filtered. In all cases, plan for a discharge point that won’t cause erosion or neighborhood issues and that won’t flood nearby properties. A well-designed system also accounts for seasonal changes—winter freezes, spring thaws, and heavy rainfall events—so you don’t end up with new problem areas after a storm.
Pre-work audit: gutters, downspouts, and grading
Before you dig, perform a thorough audit of water sources and pathways. Clean gutters to remove debris and ensure downspouts extend away from the foundation, ideally 4-6 feet or more depending on your lot. Check for existing outlets, splash blocks, and any areas where water currently pools. Use a simple grading test: place a string line from the foundation edge to several feet outward and check the slope with a level. A steady away-from-foundation grade minimizes hydrostatic pressure on basement walls. Note drainage changes visible from rain or irrigation—if water ponds in the yard, you’ll likely need to alter grading or install a trench drainage system. Safety note: mark utilities and avoid shallow irrigation lines by calling your local “Call Before You Dig” service before starting any trench.
Drainage solutions explained
There are three common approaches to fixing drainage around house: (1) surface drainage to redirect water quickly away from the foundation (swales, shallow ditches); (2) perimeter drainage with a perforated pipe set in gravel inside a trench (French drain) that collects groundwater and carries it to a safe discharge; and (3) dry wells or splash blocks to absorb and dissipate water at a controlled rate. A well-placed perimeter drain often solves chronic basement moisture issues, while a surface swale can be a low-cost first step for redirecting roof runoff. Dry wells are effective when discharge points are far from the house but must be sized correctly to prevent standing water. For DIY projects, start with a plan that emphasizes safety and gradual water movement, then add subsurface components if needed. Drainage system layouts should be designed to handle the heaviest expected rainfall in your region.
Planning and layout: designing your drainage path
A clear layout reduces guesswork and ensures the system meets your yard’s needs. Start by drawing a simple map of the house footprint, slopes, and potential discharge points. Identify the strongest water pathways—roof runoff, yard runoff, and sump or foundation drain lines—and plan a continuous route that ends away from the foundation. When choosing between a French drain and a surface trench, match the solution to the problem: use a French drain where groundwater collects around the foundation, and a surface trench where water sits promptly on the surface. Include access points for maintenance and consider future landscaping changes that might redirect runoff unintentionally. Finally, verify that your plan complies with local codes and doesn’t affect neighbors’ property.
Installation considerations and safety
Safety and compliance are essential. Always call 811 or your local utility locator before digging to identify buried cables and pipes. Wear appropriate PPE, and avoid digging near water lines, gas lines, and wiring. Depending on soil type, you may need professional equipment or pro assistance to maintain proper backfill compaction. If you encounter clay or bedrock, or you’re channelling water underneath slabs, stop and consult a pro. For simple DIY jobs, lightweight projects like adding downspout extensions or installing splash blocks can be done safely without heavy equipment. Finally, ensure you have a discharge point that won’t erode soil, flood neighbors, or create ice hazards in winter.
Maintenance and monitoring
Once your drainage system is installed, ongoing maintenance prevents failure. Routinely clean gutters and downspouts so water flows freely. After heavy rains, inspect the trench and outlets for clogging, sediment buildup, or pooling. Replenish backfill or gravel if signs of settling appear, and re-check the slope periodically after landscaping changes. A well-maintained system lasts longer and minimizes the chance of basement moisture or yard drainage issues. Drain Guide recommends scheduling a yearly inspection and a post-storm review to catch problems early.
Common mistakes to avoid
Avoid redirecting water toward a neighbor’s property or toward areas with poor soil drainage. Don’t neglect downspout extensions or fail to consider winter ice buildup around discharge points. Skipping a proper discharge location can simply move water from one problem area to another. Also, don’t over-compact backfill; too-compact soil reduces infiltration and creates puddles. Finally, always verify that the drainage path remains continuous and free of obstructions after lawn or landscape changes.
Tools & Materials
- Shovel or trenching shovel(Choose a long-handled shovel for efficiency in deep trenches)
- Tape measure(Minimum 20 ft; optional 50 ft for larger yards)
- Carpenter’s level or laser level(Use to verify slope away from foundation (aim for a gentle grade))
- Perforated drainage pipe (drain tile)(Schedule 160 or SDR pipe; 4 in diameter is common)
- Gravel (clean, well-graded)(Provide base and backfill for the pipe trench)
- Geotextile fabric(Wrap around pipe to prevent sediment infiltration)
- Landscape fabric under gravel(Optional for extra filtration)
- Geogrid or backfill fabric(Optional under heavy soils)
- Gravel or crushed stone backfill(Crushed stone 3/4 in to 1 in size for good drainage)
- Downspout extensions/dispersal outlets(Extend water away from foundation by at least 4-6 ft)
- Splash blocks or splash pads(Help direct water away from foundation at discharge point)
- Digging safety gear: gloves, glasses, knee pads(Personal protective equipment)
- Waterproof sealant or foundation crack epoxy (optional)(Use if you identify cracks needing sealing)
Steps
Estimated time: 8-12 hours
- 1
Call 811 to locate buried utilities
Before any digging, contact your local 811 service to map underground utilities. This protects you from hitting gas lines, electrical cables, or communication lines. Waiting for clearance is a necessary step to ensure safety and prevent costly interruptions.
Tip: Accumulate the utility map provided by the locator and keep it handy during the project. - 2
Assess property and plan layout
Survey grading, water flow, and potential discharge points. Create a rough sketch showing foundation edges, downspouts, and any flood-prone zones. This plan will guide trench placement and ensure water moves away from the house.
Tip: Mark a clear line for slope using string and a level so you can visualize the path before digging. - 3
Clean gutters and extend downspouts
Remove debris from gutters and ensure downspouts directs water away from the foundation. Attach extensions long enough to reach your planned discharge area. This step prevents existing runoff from undermining your new drainage plan.
Tip: Test water flow from each downspout after extension to confirm full clearance. - 4
Mark trench lines and slope targets
Outline trench paths with spray paint or chalk, focusing on 1-2% away-from-foundation slope. Use a level to confirm gradual decline away from the house. This ensures consistent drainage rather than concentrated flows.
Tip: Keep trenches at a safe distance from foundations and utilities. - 5
Dig trench and lay base fabric and pipe
Dig the trench at the planned depth, lay landscape fabric, then install perforated pipe with holes facing downwards. Cover with gravel to form a stabilized bed and improve filtration. Wrap fabric over the gravel to minimize sediment entering the pipe.
Tip: Check for level and continuous slope as you lay the pipe. - 6
Backfill and compact in stages
Backfill with gravel around the pipe, then complete with soil to original level. Avoid overly compacting soil near the trench, which can reduce infiltration. Ensure the surface remains slightly mounded to encourage drainage away from the foundation.
Tip: Lightly compact only where necessary to prevent sinking later. - 7
Install surface drainage and outlets
Place splash blocks, trenches, or pull-up outlets to collect and direct water to an appropriate discharge area like a storm drain or low-lying area. If using a French drain, connect to a discharge point that won’t cause erosion.
Tip: Position outlets to minimize erosion and ensure safe pedestrian paths. - 8
Test system with rainfall simulation
Simulate rainfall using a hose or wait for a storm to observe drainage performance. Look for pooling, unusual erosion, or backflow toward the foundation. Make adjustments if necessary.
Tip: Run the test over a moderate duration to mimic real rain patterns. - 9
Review foundation and consider seals if needed
Inspect foundation walls for new cracks or seepage and seal if necessary. If significant moisture appears, reevaluate slope and discharge location or consult a pro for more advanced solutions.
Tip: Address structural signs early to prevent long-term damage.
Got Questions?
How far should drainage slope away from the foundation?
Aim for a gradual slope away from the foundation, commonly around 1-2% grade (roughly 1/8 to 1/4 inch per foot). This helps water move away without creating new low spots.
Aim for a gentle slope away from the foundation, about 1-2% grade. This helps water move away without creating new low spots.
What’s the difference between a French drain and a trench drain?
A French drain is a perforated pipe surrounded by gravel in a trench, designed to collect groundwater. A trench drain is a surface channel that carries water away quickly. The right choice depends on whether the issue is subsurface water or surface runoff.
A French drain uses perforated pipe and gravel underground, while a trench drain handles surface water flow. Choose based on whether you’re handling groundwater or surface runoff.
Do I need a permit to fix drainage around my house?
Permit requirements vary by location. Small DIY projects often don’t require a permit, but major trenching or work near utilities may. Check your local building department or HOA rules before starting.
Permits vary—check with your local building department to confirm what you need.
How can I tell if the drainage is working after installation?
Observe the discharge area during a rain event or use a controlled water test. Look for pooling near the foundation and ensure water flows away from the house smoothly.
Watch the system during rain or simulated rain to confirm water moves away from the foundation without pooling.
Can I install drainage around a finished landscape?
Yes, but it’s more challenging. You’ll need to trench carefully without disturbing utilities, then restore soil and vegetation while maintaining slope. In some cases, professional help is advisable.
Yes, but it’s harder with finished landscaping; plan extra restoration time or hire a pro for best results.
Are there eco-friendly drainage options?
Yes. Permeable pavers, swales, and dry wells using natural infiltration reduce runoff. Choosing native plants and maintaining soil health also helps groundwater absorption.
Yes—permeable surfaces, swales, and dry wells can be eco-friendly options that improve infiltration.
Watch Video
The Essentials
- Plan a clear drainage layout before digging
- Slope water away from the foundation to reduce hydrostatic pressure
- Use perforated pipe and gravel to move groundwater effectively
- Test the system after rain to confirm it works as intended
- Maintain gutters, downspouts, and discharge paths regularly