How to Fix a Blocked Drain: A Practical Guide for Homeowners
Learn how to fix a blocked drain with safe, proven steps. This Drain Guide tutorial covers plungers, drain snakes, natural methods, and prevention tips for every home.

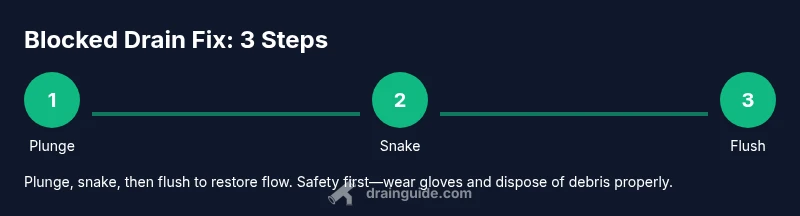
Goal: fix a blocked drain by safely clearing the clog using a plunger, a drain snake, or natural methods. Start by choosing the right approach for your drain type, gather essential tools, and wear gloves. Then follow a step-by-step sequence: plunge, snake, flush, and test for flow to confirm success.
What Causes Blocked Drains
A blocked drain is usually the result of everyday use accumulating material over time. In kitchen drains, grease, food particles, and starchy residues can stick to pipes and harden, forming a stubborn clog. In bathroom drains, hair, soap scum, and mineral buildup are common culprits. Over time, small blockages merge into a larger one that resists simple rinsing. External factors like a tree root intruding into older sewer lines or a misrouted pipe can create sudden, severe blockages that require professional intervention. According to Drain Guide, most residential clogs form from a combination of hair, grease, soap, and mineral buildup, especially in areas with hard water. Regular maintenance, such as screening with a mesh strainer and flushing with hot water, can slow these processes. When the blockage sits at or near the trap, you’ll often notice a slow drain first, followed by gurgling or backups during heavy use. Identifying where the clog is located helps you choose the right removal method without unnecessary digging or disassembly.
Assessing the Drain Type
Drain location matters. Is the clog in a kitchen sink, bathroom sink, shower, tub, or toilet? Each has a different trap and access point, which dictates how you approach clearance. Start with the simplest, least invasive method and move toward more involved tools if needed. For example, toilets require a flange plunger and careful alignment to avoid splashing or seal leaks. If multiple fixtures drain slowly, the blockage may be closer to the main line, and you should stop and consider professional help. Drain Guide guidance suggests starting with a plunger or a natural method for minor clogs and reserving mechanical tools for more stubborn obstructions. Knowing where the clog resides helps you choose the right tool and avoid unnecessary disassembly.
Safety First: What Not To Do
Before you reach for chemicals or powerful equipment, cover basic safety rules. Do not mix chemical drain cleaners with other cleaners or with bleach, as this can release dangerous gases. Avoid using high-pressure jetting on ceramic or PVC pipes unless you are trained. Always wear gloves and eye protection when handling sludgy debris, and never push objects with your hand into the drain. If you smell sewage, notice a strong backup, or see standing water after attempts to clear the clog, stop and call a licensed plumber. Drain Guide emphasizes safety as the first step in any unclogging effort and recommends opting for mechanical methods over harsh chemicals whenever possible.
Quick Fixes You Can Try Right Away
Some clogs respond to simple, non-invasive methods. Start with hot water flushes—pour boiling water in stages to avoid damaging PVC pipes. If there is grease buildup, a mixture of baking soda followed by hot water can help loosen residue. A safer approach is to combine baking soda and vinegar in a short fizzing reaction, then flush with hot water. Avoid relying on chemical cleaners as a first line; they can damage pipes or traps if used improperly. Always test drainage after each method to evaluate progress and prevent overexposure to cleaning agents. Drain Guide notes that patient, incremental attempts are often more effective than aggressive chemical solutions.
Plunging: When and How
Plunging is often the first line of defense for sinks and tubs. Use a cup plunger for sinks or a flange plunger for toilets. Create a tight seal, position the plunger above the drain, and use short, firm strokes to develop pressure. If air leaks around the seal, reseat and try again. Plunging works best when the clog is near the opening and not tightly packed in the pipe. Be patient and repeat several cycles, pausing to assess whether water begins to drain.
Using a Drain Snake (Auger) Effectively
A drain snake is useful for deeper or more stubborn clogs. Feed the cable into the drain while turning the handle clockwise to advance the tip. When you feel resistance, rotate and push gently to loosen debris, then pull back to remove it. Clean out the debris at the trap or drain opening and reinsert to improve the bite. Don’t force the snake; forcing can bend the cable or damage pipes. Drain snakes are most effective on hard clogs like hair, soap scum, or tight mineral deposits.
Natural Alternatives and When They Help
Natural methods like baking soda and vinegar or enzyme-based cleaners can help with light buildup and routine maintenance. They are not guaranteed to clear deep or hard clogs, but they are gentler on pipes and the environment. Enzyme cleaners work best when used regularly as a preventive measure, not as a one-off fix for a severe blockage. If the clog remains after multiple attempts, stop and consider professional assistance to prevent pipe damage. Drain Guide encourages using natural methods for maintenance and combining them with mechanical approaches for stubborn clogs.
Aftercare and Prevention
Once you restore flow, protect against future clogs by using drain strainers, not pouring grease down the drain, and running hot water through drains regularly. Clean traps and accessible pipes during routine maintenance, and schedule annual inspections if you have older plumbing. For shared or complex systems, create a simple maintenance schedule to catch problems early. Prevention is often easier and cheaper than repeated unclogging, and it helps maintain optimal drainage across all fixtures.
Authority Sources
For reliability and safety guidance, consult reputable sources such as OSHA for safety practices, CDC for health considerations, and EPA guidelines on household cleaners. These references help homeowners make informed decisions beyond anecdotal advice. Always prioritize safety and seek professional help for complex or repeated clogs.
Tools & Materials
- Plunger (cup or flange)(Choose depending on drain type; ensure a tight seal.)
- Drain snake / auger(Manual hand auger length 3–25 ft depending on pipe length.)
- Bucket(Place under trap to catch water and debris.)
- Gloves(Rubber or latex; protects skin from grime.)
- Flashlight(Inspect traps and pipe junctions.)
- Adjustable wrench(Loosen trap nuts if you plan to remove the trap.)
- Old towels or rags(Contain spills and keep area clean.)
- Dish soap or degreaser (optional)(Lubricates and helps with initial clearing.)
- Enzyme-based drain cleaner (optional)(For maintenance, not heavy clogs.)
Steps
Estimated time: 45-75 minutes
- 1
Shut off water and prepare the area
Before you begin, turn off the drain's water source if applicable and clear the area. Place a bucket, towel, and flashlight nearby. If you’re working under a sink, position a bucket to catch standing water and remove the trap cover after placing it securely.
Tip: Having towels ready prevents a soggy mess and helps you spot leaks early. - 2
Try a plunger first
Position the plunger to cover the drain opening, create a tight seal, and plunge with steady pressure for 15–30 seconds. For toilets, use a flange plunger and maintain the seal throughout the strokes. Repeat as needed until the water drains or the clog loosens.
Tip: If you feel air around the seal, reseat the plunger and try again for better suction. - 3
Clear the trap and remove debris
Place the bucket under the trap, loosen the slip nuts, and carefully remove the trap. Inspect for hair, soap scum, or debris. Clean the trap thoroughly, reassemble, and test flow by running water for a moment.
Tip: Keep track of the trap parts and wash them separately to avoid recontaminating the drain area. - 4
Send the drain snake into the pipe
Insert the auger into the drain and rotate the handle clockwise as you feed the cable. Push gently until you feel resistance, then twist while pulling back to break up debris. Remove the cable and clean it before reusing.
Tip: Never force the snake; if it won’t go further, back off and reposition your angle. - 5
Flush and test the drain
Pour hot water or a kettle down the drain in stages to flush loosened debris. Run water for 30–60 seconds to ensure a steady, unrestricted flow. If the water still backs up, repeat steps 3–5 or escalate.
Tip: Watch for new leaks while testing to catch hidden damage early. - 6
Know when to call a professional
If the clog persists after your best effort or if you notice sewage backflow, multiple fixtures affected, or unusual odors, contact a licensed plumber. Persistent clogs may involve deep pipe damage or main line issues.
Tip: Professional tools can clear stubborn clogs without causing pipe damage.
Got Questions?
Are chemical drain cleaners safe for all pipe types?
Not always. Many chemical cleaners can damage PVC and old metal pipes, and they may react with other cleaners to produce harmful gases. Use them as a last resort and follow label directions closely.
Chemical cleaners can harm pipes and create dangerous fumes—use them sparingly and follow the label.
How can I tell if the clog is in the main sewer line?
If several fixtures are draining slowly or backing up at the same time, the clog may be in the main line. In this case, avoid repeated plunging and contact a licensed plumber to inspect the sewer line.
If multiple fixtures back up together, the problem might be the main sewer line; call a professional.
Can baking soda and vinegar really unclog a drain?
Baking soda and vinegar can help with light buildup but may not clear stubborn clogs. They’re safe for routine maintenance, but rely on mechanical methods for deeper blockages.
Baking soda and vinegar can help light buildup, but for stubborn clogs you may need plungers or a snake.
Should I remove the P-trap to clear a clog?
Removing the P-trap can help access clogs in sinks, but it requires caution and proper reassembly to prevent leaks. If unsure, consult a guide or a professional.
You may need to remove the P-trap, but do so with care and be prepared to reseal to prevent leaks.
How long does it take to fix a typical clogged drain?
Most residential clogs can be addressed in under an hour with plunger and snake methods. More stubborn blockages or main line issues may take longer or require a professional visit.
Most fixes take under an hour, but persistent clogs may need pro help.
When should I call a professional plumber?
Call a professional if you smell sewage, experience persistent backups after multiple attempts, or suspect a main sewer line issue. A licensed plumber has tools to diagnose and safely clear complex clogs.
Call a plumber if you smell sewage or the clog stays after several attempts.
The Essentials
- Identify the clog location to choose the right method
- Start with safe, simple fixes before heavier tools
- Use proper PPE and handle tools carefully
- Test drainage after each method to confirm progress
- Prevent future clogs with routine maintenance