How to Get Hair Out of a Shower Drain: A DIY Guide
Learn safe, step-by-step methods to remove hair from a shower drain using common tools. This DIY guide covers mechanical removal, safer alternatives to chemical cleaners, and prevention tips from Drain Guide.

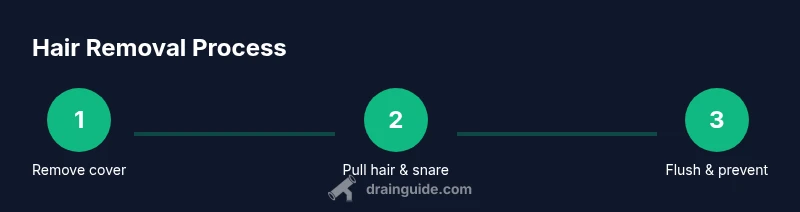
To clear a hair-clogged shower drain, start with mechanical methods you can perform at home. Remove the drain cover, pull out visible hair with pliers or a hair Grabber, then try a drain snake or heavy-duty plunger. Finish with a hot-water flush and a baking soda–vinegar treatment, and install a hair catcher to prevent future clogs.
Why hair clogs form in shower drains
Hair clogs are a common, persistent bathroom problem. Hair strands, soap scum, and mineral deposits combine and tangle over time, gradually narrowing the drain opening. In showers, loosened hair from shaving and grooming is constantly rinsed away, which makes it easy for strands to collect into a dense mat. This mat hooks onto soap scum and dries into a plug that slows or stops water flow. According to Drain Guide, understanding the physics of a hair clog helps homeowners choose removal methods that protect pipes rather than cause damage. If you’re asking how to get hair out of drain shower, begin by distinguishing surface hair from deeper buildup: surface hair is usually accessible with hands or pliers, while deeper strands require mechanical tools like a snake or auger. With the right approach, you can restore drainage without costly repairs.
Safety and prep: Tools, PPE, and setting up
Before you start, gather your tools and protect yourself. Hair and soap scum harbor bacteria; gloves and eye protection keep hands and eyes safe. Clear the bathroom floor, lay down towels, and place a bucket to catch water. Remove the shower mat to avoid slips, and open a window or turn on the exhaust fan for ventilation if you use any cleaners. Check the drain for standing water; if the tub is full, remove some water with a cup first. Having a plan reduces mess and speeds up the process. Drain Guide emphasizes safety: never improvise with sharp tools near the skin or eyes, and never mix different cleaners in the drain. With PPE and a clean workspace, you can focus on effective removal rather than hazards.
Mechanical removal methods: Cover removal, hair pull, grabber
Begin by removing the drain cover to access the trap. Use a flathead screwdriver or a drain cover tool to lift it without bending the cover. Look into the opening and grab visible hair with long-nose pliers or a dedicated hair grabber. Gently pull out hair clumps, discarding them in a trash bag rather than the tub. If the clog resists, switch to a flexible grabber and reach deeper into the drain. This stage reduces the bulk of the clog and buys time for deeper methods. Remember, patience matters: forcing hair out can push it further into the pipe or compact it. If you can see hair that’s easily reachable, remove it before proceeding to more advanced tools.
Using a drain snake or auger effectively
A drain snake, or auger, is designed to reach deeper hair accumulations. Insert the snake into the drain and rotate the handle to advance the head. When you feel resistance, twist and pull back slightly to hook the hair, then retrieve it. Remove sections of hair periodically to prevent tangling on your tool. After pulling, slowly retract the snake while continuing to rotate to minimize hair shedding back into the drain. This step often clears deposits that pliers can’t reach and restores water flow more reliably than plunging alone. If you’re new to using a snake, work slowly and maintain gentle pressure to avoid pipe damage.
Chemical considerations: when to avoid and alternatives
Chemical drain cleaners are hard on pipes and can emit fumes in a small bathroom. Avoid caustic or acidic formulas in showers, especially if you have metal pipes or a PVC system. Safer alternatives include enzyme-based cleaners used according to label directions, or the classic baking soda and hot water flush. A gentle flush with boiling water after removing hair can help dissolve soap scum without harsh chemicals. If you do consider a cleaner, choose products labeled safe for septic systems and never mix cleaners, which can cause dangerous reactions. In most cases, mechanical methods plus a safe flush are sufficient and less hazardous.
Post-cleaning flush and test for drainage
After removing hair, flush the drain with a generous amount of hot water for 60–90 seconds to push out remaining particles. Refill and reclean the area around the drain cover, then reattach the cover securely. Run several cycles of lukewarm water to confirm the drain clears promptly. If water still pools or drains slowly, repeat the snake or plunger steps, then perform another hot-water flush. A successful test means you can continue showering with minimal risk of immediate re-clogging.
Preventive habits to reduce future hair clogs
To keep your shower drain flowing freely, install a hair catcher or drain screen to intercept strands before they enter the trap. Brush or comb long hair before showering to remove loose hairs, and clean the screen weekly to prevent buildup. Run a quick hot-water flush after each shower to clear residual soap scum, and consider a monthly baking soda flush to minimize mineral deposits. Regular maintenance saves time and reduces the likelihood of major clogs requiring tools or professional help. By adopting these habits, you extend the life of your plumbing and avoid surprise backups.
Troubleshooting common issues
If hair resists removal after multiple attempts, take a step back and reassess. If the drain remains slow even after cleaning, check the trap for standing water or signs of a deeper clog in the pipe line. Try plunging from the drain opening again, ensuring a good seal to apply effective suction. If the problem persists, you may have a more extensive blockage or venting issue that requires professional guidance. Remember, safety first: stop if you feel resistance while turning a snake too aggressively, and avoid forcing tools into the line. Drain Guide recommends moving methodically and documenting what you try for future reference.
Tools & Materials
- Gloves(Nitrile or rubber gloves; protect hands from debris and bacteria)
- Flathead screwdriver or drain cover tool(To lift the cover safely without bending)
- Long-nose pliers or tweezers(For grasping hair and debris close to the opening)
- Drain snake / auger (3-6 ft)(Manual preferred; cordless drill attachment optional for deeper reach)
- Cup or flange plunger(Use for initial suction and loosening of shallow clogs)
- Bucket and towels(Catch and contain water; protect the floor)
- Hot water(Boiled or very hot; ready to flush after removal)
- Baking soda(Optional; use with hot water for non-chemical flush)
- White vinegar(Optional; use with baking soda if desired, but avoid mixing with existing cleaners)
- Hair catcher / drain screen(Install after cleaning to prevent future clogs)
- Flashlight(Helpful for inspecting inside the drain)
Steps
Estimated time: 60-90 minutes
- 1
Remove the drain cover
Use the appropriate tool to lift the cover without bending it. Set the cover aside and inspect the opening for obvious hair balls.
Tip: Keep the cover in a safe place to prevent losing small parts. - 2
Inspect and expose the trap
Look into the drain with a flashlight to identify how deep the hair buildup runs. This helps you decide whether a grabber or snake is needed.
Tip: If visibility is poor, lightly tap the drain to encourage loose debris to loosen. - 3
Pull out visible hair
Use long-nose pliers or tweezers to grab and pull out hair chunks you can see near the surface.
Tip: Work gradually to avoid tearing hair into smaller pieces that can slip back into the drain. - 4
Work with a hair grabber
Slide a hair grabber into the opening and retrieve clumps that are out of reach of pliers.
Tip: Rotate the tool as you withdraw to capture tangled strands. - 5
Deploy the drain snake
Insert the snake, push gently, and rotate the handle to break up or snag deeper hair.
Tip: Do not force the snake; if you feel strong resistance, back up slightly and try another angle. - 6
Retrieve and clean the snake
Pull back the snake gradually, removing hair as you go. Clean any hair from the head before reinsertion.
Tip: Wipe the head clean to prevent re-depositing hair into the drain. - 7
Flush with hot water and baking soda
Pour 1/2 cup baking soda into the drain, then follow with hot water. Allow 5–10 minutes for natural loosening.
Tip: This method reduces chemical exposure while helping dissolve residues. - 8
Rinse and re-test drainage
Run hot water for several minutes to confirm the flow is clear. Reinsert the drain cover when satisfied.
Tip: Re-test after a few minutes of drainage to confirm stability. - 9
Install hair catcher and finalize
Place a drain screen over the opening to capture hairs. Wipe down surrounding surfaces and store tools for next time.
Tip: Regularly clean the catcher to maintain efficiency.
Got Questions?
Why do shower drains clog so easily with hair?
Hair naturally accumulates in the drain, especially with soap scum and minerals. Over time, these strands form a mat that narrows the opening and traps debris, causing slow drainage or backups.
Hair in showers can collect with soap scum and minerals, forming a mat that narrows the drain and slows water flow.
Can I use chemical drain cleaners for a hair clog in a shower?
Chemical cleaners can be harsh on pipes and can create fumes in bathrooms. Use enzyme-based products or mechanical methods first, and only follow label directions if you choose cleaners.
Chemical drain cleaners can be harsh on pipes and fumes in bathrooms; use enzymes or mechanical methods first.
What tools do I need to remove hair from a shower drain?
Common tools include gloves, pliers or tweezers, a drain snake, a cup plunger, and a hair catcher. A flashlight helps with inspection.
Gloves, pliers, a drain snake, a plunger, and a hair catcher are typically enough for a DIY hair-removal job.
Is it safe to use a drain snake in a shower drain?
Yes, when used carefully. Insert gently, rotate to grab hair, and avoid forcing the snake through bends or hard resistance to prevent pipe damage.
Yes, if used gently and with care not to force it through tight bends.
How often should I clean my shower drain to prevent clogs?
Inspect and clean the drain screen weekly, and perform a thorough hair-removal check every 1–2 months depending on hair exposure and usage.
Check the drain weekly and clean, with a deeper cleanup every month or two depending on hair exposure.
What should I do if the drain remains slow after cleaning?
If slow drainage persists, there may be a deeper clog or vent issue. Repeat removal steps, then consider consulting a plumber if the problem continues.
If drainage is still slow after cleaning, repeat the steps and consider a professional if the issue persists.
Watch Video
The Essentials
- Identify the clog and prep the area.
- Start with mechanical removal before chemicals.
- Use a drain snake for deeper hair buildup.
- Flush thoroughly and test drainage after each method.
- Drain Guide recommends mechanical removal first, then prevention.