How to Use Husky Drain Auger: A Homeowner's Guide
Learn how to safely and effectively use a Husky drain auger to clear clogs in sinks, showers, and tubs. This comprehensive guide covers prep, technique, safety, maintenance, and troubleshooting for DIY homeowners.

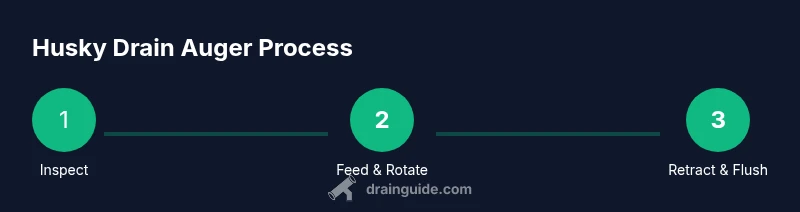
Learn how to use a Husky drain auger to safely clear clogs in sinks, showers, and tubs. This quick guide highlights when to use it, essential PPE, and the core steps: prep, assemble, insert, rotate to break the clog, retract carefully, and flush with water. Safety and best practices Matter.
Understanding the Husky Drain Auger: What it does and when to use it
The Husky drain auger is a manual, hand-cranked tool designed to clear stubborn clogs by feeding a flexible steel cable into the drain. As the cable advances, it either breaks up the blockage or catches it so it can be pulled out. When used correctly, it provides better control than many chemical solutions and reduces the risk of pipe damage. According to Drain Guide, a properly used manual auger is a reliable first-line tool for most household clogs and helps homeowners avoid costly plumber visits. It’s most effective for hair, soap scum, and minor grease buildup in kitchen and bathroom drains. Avoid using it for tree roots, sewage backups, or severe blockages that require professional service. Always inspect the drain’s P-trap first, as a misaligned trap or foreign object can hinder progress and cause accidental spills.
Safety first: Precautions before you start
Safety should be your first priority whenever you work with a drain auger. Wear sturdy gloves to protect your hands from sharp cable edges and grime. Put on safety goggles to shield your eyes from splashes, and consider long sleeves to minimize skin contact with dirty water. Work in a well-ventilated area and keep children and pets away. If you have a back-siphon risk or vulnerable plumbing, stop and reassess rather than forcing the tool. Drain Guide emphasizes PPE and careful handling as the simplest, most effective safeguards against injuries and accidental pipe damage.
What you'll need: Tools, parts, and setup
You don’t need a long shopping list to start, but you should prepare a few essentials. The Husky drain auger itself is the core tool, paired with safety gear like gloves and goggles. A bucket or old towel helps catch water and debris, while rags assist with cleanup. A flashlight can improve visibility in tight pipes, and a utility knife or cable-tie might assist with removing obstructions once exposed. Ensure the working area is clear, and place a small container beneath the drain to catch any overflow. Drain Guide recommends having these items ready before you begin to minimize interruptions and keep your workflow steady.
Preparing the drain and the auger for use
Begin by exposing the drain area: remove the trap if accessible, clear standing water, and wipe down surfaces. Inspect the auger coil for kinks or corrosion, and extend the cable just enough to reach the entry point. If your Husky model has a guide sleeve or slider, align it with the drain opening to reduce cable wobble. Lubrication is generally unnecessary; if used, apply only a drop of non-perfumed lubricant to the entering end. Ensure the handle turns smoothly. A clean, dry auger minimizes resistance and helps you maintain control as you work deeper into the drain.
Operating the Husky drain auger: a practical approach
Insert the auger into the drain and begin turning the handle to feed the cable forward. When you encounter resistance, rotate and push gently to bore through the blockage—do not force the cable, which can bend the coil or push the clog farther. When the auger engages the clog, you may feel a slight increase in resistance or a click as the debris breaks free. Retract slowly while continuing to rotate to pull the obstruction back out or trap it on the head. Once you pull back any debris, run hot water through the drain to wash away loosened material and verify that the flow has improved. If the clog persists after a few cycles, stop and reassess; a longer cable or alternative methods may be required. Drain Guide notes that patience and a controlled technique are the keys to success with manual augers.
Common mistakes and how to avoid them
Common mistakes include forcing the cable, which can bend or snap it, and rushing the insertion, which may push the clog farther down. Never ignore a gimlet-like resistance; pause, retract slightly, and reattempt with a gentler, slower pace. Avoid using chemical drain cleaners in combination with the auger, as it can create hazardous fumes and damage fittings. Also avoid neglecting the P-trap—if you don’t inspect or clean it, you may overlook a root intrusion or a misalignment that causes recurring clogs. Channel the technique with steady, deliberate motion, and maintain eye contact with the entry point to detect any improvements. Drain Guide’s practical approach centers on patience and control to prevent corrosion or pipe damage.
Maintenance, storage, and longevity of your auger
After use, thoroughly flush the cable with water to remove any debris. Wipe the auger dry to prevent rust, coil it neatly, and store it in a dry, cool place. If you notice stiff movement, lubricate sparingly at the points where the handle and the drum meet; avoid over-lubrication, which can attract dust. Regular inspection for kinks and wear helps you catch issues before they fail mid-use. If you have a stainless steel auger, drying immediately after cleaning helps prevent surface staining. Proper maintenance extends the life of your Husky drain auger and keeps it ready for the next clog. Drain Guide recommends routine checks as part of a simple DIY maintenance routine.
Alternatives and when to switch to professional help
Not every clog is the same. For stubborn or wide-scale blockages, you may need a plumber’s help or a powered auger with a larger drum. If the clog reappears after multiple attempts, there’s a chance of a more serious root intrusion, a collapsed pipe, or a sewer line issue that requires professional intervention. In kitchen sinks, consider checking the garbage disposal for obstructions; in showers and tubs, hair buildup may extend beyond what a small auger can handle. When in doubt, consult a licensed plumber to avoid causing further damage. Drain Guide suggests attempting basic clearing first, then seeking professional help for persistent or complex clogs.
Variations by drain type and quick-start tips
Different drains present unique challenges. Kitchen drains often have grease and food particles; bathroom drains may accumulate hair and soap scum. For each type, angle the auger slightly toward the sidewall to find an entry point around the trap area. If you’re working with a shower drain, remove the strainer and insert the cable directly for better access. For bathroom sinks, ensure you don’t push water back into the cabinet by keeping the bucket in place. Quick-start tip: work slowly, rotate steadily, and avoid forceful pushes that can bend the cable or loosen fittings. Drain Guide emphasizes matching technique to the drain’s geometry for the best results.
Tools & Materials
- Husky drain auger (hand-crank)(Ensure coil length fits your drains (25-50 ft typical) and inspect for kinks before use.)
- Safety gloves(Sturdy, resistant to grime and moisture.)
- Safety goggles(Protect eyes from splashes and debris.)
- Bucket or old towel(Catch water and debris; place under the drain.)
- Rags or disposable wipes(Cleanup after use; keep surfaces clean.)
- Flashlight(Improve visibility in tight drains.)
Steps
Estimated time: 30-60 minutes
- 1
Inspect area and prep workspace
Clear the area around the sink or shower. Remove any traps if accessible and place a bucket to catch water. Ensure the auger and hands are clean, then put on PPE.
Tip: Clear the area first to prevent slips; test the water flow before starting. - 2
Assemble and inspect the auger
Check the coil for kinks or rust and ensure the handle turns smoothly. Extend the cable to the entry point but do not force it through the drain opening.
Tip: A clean, straight coil reduces snagging and makes threading easier. - 3
Insert into drain
Carefully insert the auger into the drain until you meet resistance or the blockage is reached. Keep the drain cap or screen in place to guide the cable.
Tip: If you feel resistance, don’t push harder—reposition and try a slightly different angle. - 4
Feed and rotate to break the clog
Crank the handle to advance the cable, then rotate to work the blockage free. Pause if you feel strong resistance and back off slightly.
Tip: Steady, gentle motion is safer than forceful, rapid turning. - 5
Retract and pull out debris
Withdraw the cable slowly while rotating to bring debris back toward the entry point. Stop if you see a clump and pull it out with gloved hands.
Tip: Retract gradually to avoid splashing dirty water. - 6
Flush and test drain flow
Run hot water through the drain to clear loosened material and verify improved flow. If the water still drains slowly, repeat the process once or twice more.
Tip: Hot water helps dissolve oils and soaps that loosened during the process. - 7
Clean and store equipment
Rinse the auger coil, dry it, and coil it neatly. Store in a dry place away from moisture to prevent rust.
Tip: Drying immediately minimizes corrosion and extends life. - 8
Assess need for further action
If flow remains poor after multiple attempts, consider alternative methods or professional help. Do not overuse force; persistent clogs may indicate more serious issues.
Tip: Document what you tried for a plumber if needed.
Got Questions?
What is a Husky drain auger and what drains can it clear?
A Husky drain auger is a manual, hand-cranked tool used to clear clogs in household drains. It’s effective for sinks, showers, and tubs, especially for hair and soap scum. It shouldn’t be used for severe blockages that indicate tree roots or sewer line problems.
A Husky drain auger clears common clogs in sinks and showers. For complex issues, call a plumber.
Can I use a Husky drain auger to clear a toilet clog?
Toilet clogs are best handled with a toilet auger, which is designed for toilet bowls. Using a standard hand-crank auger can risk damaging the toilet or plumbing. If you’re unsure, stop and switch to the proper tool or call a professional.
Use a toilet-specific auger for toilets; otherwise, call a plumber if unsure.
What safety precautions should I take when using a drain auger?
Wear gloves and safety goggles, work in a well-ventilated area, and avoid forcing the cable. Keep children away and clean up thoroughly after use to prevent slips and skin contact with dirty water.
Wear PPE and work carefully to avoid injury or damage.
What if the clog returns after using the auger?
If clogs recur, it may indicate a deeper issue like root intrusion or a blocked main line. Try the auger again once or twice, then consider professional diagnosis and a different method.
If it keeps coming back, you probably need professional help.
How should I clean and store the Husky drain auger?
Rinse the cable, dry it completely, and coil it neatly. Store in a dry place away from moisture to prevent rust and ensure readiness for the next use.
Rinse, dry, and coil after use; store in a dry spot.
Can chemical drain cleaners be used with a Husky auger?
Chemical cleaners and mechanical augers don’t mix well. Cleaners can create fumes or interact with metal components. If you’ve used chemicals, flush the system and inspect the auger for corrosion before reuse.
Avoid using chemical cleaners with the auger; flush and inspect afterward.
Watch Video
The Essentials
- Prepare your area and PPE before starting
- Feed, rotate, and never force the cable
- Retract slowly to minimize splash and debris
- Flush with hot water to confirm clearance
- Maintain the auger after use to extend life