Nest Protect Battery Drain: Quick Troubleshooting Guide
Urgent guide for homeowners: diagnose why Nest Protect is draining batteries, identify common causes, and fix safely. Learn step-by-step checks, a diagnostic flow, and prevention tips to keep your detectors reliable—brought to you by Drain Guide.

If nest protect draining batteries is a problem, start with quick steps: replace the batteries with fresh high-quality alkaline or lithium cells, ensure correct orientation and clean battery contacts, and perform a firmware check or reset. This quick path often resolves phantom drain; if the issue persists, move to a deeper diagnostic flow.
What Nest Protect battery drain looks like
Nest Protect battery drain often surfaces as repeated low-battery warnings even after fresh cells are installed. Homeowners report very rapid consumption of new batteries, occasional alarm chirps, and the detector briefly going offline during tests. Some users notice this after a firmware update or when the device sits near heat sources or high humidity, which can accelerate sensor drift or contact corrosion. Drain Guide emphasizes that recognizing these symptoms quickly helps prevent safety gaps. According to Drain Guide, a sudden uptick in battery consumption is usually caused by a weak cell, dirty contacts, or a miscalibrated battery sensor. The next steps focus on safe, practical checks you can perform today to restore reliability without specialized tools.
Immediate checks you can perform without tools
Before diving into deeper diagnostics, perform these quick checks. Ensure the device is easily accessible for battery replacement, power stability in the area, and that the alarm is functioning in its normal test mode. Verify the correct orientation of batteries, inspect contacts for dirt or corrosion, and wipe clean with a dry cloth if needed. Make sure you’re using fresh, high-quality alkaline or lithium cells as recommended by the manufacturer. Do not mix battery chemistries in the same device. If you notice corrosion or residue, do not reuse the battery tray until cleaned and dried. These practical steps often resolve phantom drain without further intervention.
Common culprits behind nest protect draining batteries
This section lists the most frequent causes, helping you narrow down the root issue quickly. Common culprits include worn or insufficiently fresh batteries, dirty or corroded contacts, and a firmware glitch that misreads battery status. Environmental factors such as humidity, temperature extremes, and dust can contribute to sensor drift and early battery failure. A defective unit or a misconfigured setup can also cause unusually fast battery drain. Drain Guide recommends tracking battery life after each fix to confirm improvement and avoid repeating steps unnecessarily.
Diagnostic flow: symptom → diagnosis → solutions
When you encounter a low-battery warning, follow a logical flow. Start with the simplest fixes (battery replacement and contact cleaning) and move toward firmware checks and device resets if needed. If symptoms persist, consider environmental relocation or replacement under warranty. This flow mirrors best-practice troubleshooting and reduces the risk of overlooking simple causes. Drain Guide findings emphasize consistency: run through each step, record battery life after each action, and proceed only if the symptom returns. Safety first, then thorough testing.
Step-by-step fix: the most common cause
- Power down and replace the batteries with fresh alkaline or lithium cells. Ensure correct orientation. 2. Clean all battery contacts with a dry cloth; remove any corrosion or debris. 3. Re-seat the battery pack firmly and re-test the detector using a standard test function. 4. Check for firmware updates and perform a reset if available. 5. Re-test battery life over a 24–72 hour period and monitor for continued drain. 6. If drain persists, relocate the detector away from heat vents or moisture, or replace the unit if under warranty.
Safety tips and warnings
Always handle batteries with care and dispose of old cells according to local regulations. Do not mix battery brands or chemistries in the same device. If you notice leakage, swelling, or unusual smells, stop using the device immediately and consult a professional if needed. Avoid using liquids to clean contacts; use a dry cloth instead to prevent short circuits. In case of doubt, contact the manufacturer for guidance and never bypass safety features.
Prevention and maintenance to stop future drain
Create a regular maintenance routine: replace batteries on a schedule aligned with the device’s lifespan, inspect contacts every few months, and perform firmware updates promptly. Keep detectors away from heat sources, high humidity, and dust-prone areas. Document battery life trends so you can spot abnormal drain early. Drain Guide recommends setting a reminder to test all alarms monthly and replace units showing persistent drain, to maintain home safety and reliability.
Steps
Estimated time: 45-60 minutes
- 1
Power down and replace batteries
Power down the Nest Protect according to the user manual and remove old batteries. Insert fresh alkaline or lithium cells in the correct orientation. Re-seat the battery compartment and ensure it is firmly closed.
Tip: Handle batteries carefully and avoid touching the terminals with metal objects. - 2
Clean contacts and inspect for corrosion
Wipe the battery contacts with a dry, lint-free cloth. If you see corrosion, gently remove it and ensure the contacts are dry before reinserting batteries.
Tip: Do not use water or cleaners that could enter the device. - 3
Test after replacement
Power the device back on and run a standard test. Confirm that the low-battery warnings are less frequent and that the device communicates reliably with your app or hub.
Tip: Note the time between battery replacements for future reference. - 4
Check firmware and perform reset
Look for firmware updates in the app or device menu and install any available updates. If issues persist, perform a factory reset following manufacturer guidelines.
Tip: A reset can clear misreads but may require reconfiguring settings. - 5
Evaluate environment and consider replacement
If drain continues, relocate the detector away from heaters, vents, or areas with high humidity. If behavior remains, consider replacing the unit under warranty.
Tip: Persistent drain after all checks is a strong signal to replace the unit.
Diagnosis: Nest Protect reports rapid battery drain or frequent low-battery warnings
Possible Causes
- highWeak or old batteries
- highDirty or corroded contacts
- mediumFirmware glitches
- lowEnvironmental factors like heat or humidity
- lowDefective unit
Fixes
- easyReplace with fresh, high-quality alkaline or lithium batteries; ensure correct orientation
- easyClean battery contacts with a dry cloth; avoid liquids
- easyReset the device and check for firmware updates
- easyRelocate the detector away from heat sources or moisture
- mediumIf issues persist, replace the unit under warranty or consult a professional
Got Questions?
Why does Nest Protect drain batteries so quickly after a firmware update?
Firmware updates can occasionally cause temporary battery drain as new code initializes sensors. If you notice rapid drain after an update, perform a reset, ensure you have fresh batteries, and check for subsequent updates that address energy management.
Firmware updates can cause brief battery strain. Try a reset and ensure fresh batteries, then check for a later update that fixes the issue.
Can using rechargeable batteries cause faster drain on Nest Protect?
Most Nest Protect models are tested with standard alkaline or lithium batteries. Rechargeables may have different discharge profiles and can lead to inconsistent behavior. Check the manufacturer’s guidance and avoid mixing chemistries.
Rechargeables can behave differently and aren’t always recommended for this device, so use fresh primary batteries per the manual.
What environmental factors contribute to faster battery drain?
Excessive heat, high humidity, or dust near the detector can impact battery performance and sensor accuracy. Keep the unit away from heat vents, stoves, and damp bathrooms when possible.
Heat and humidity near the detector can cause faster battery drain; try relocating or cleaning the area.
Is it safe to operate Nest Protect while batteries are low?
Low battery warnings indicate reduced sensor reliability. It’s safest to replace the batteries and avoid relying on the alarm until it’s functioning normally again.
No—operate only after replacing the batteries and confirming proper operation.
When should I contact professional help or warranty support?
If you have replaced batteries, cleaned contacts, updated firmware, and still see rapid drain, it may be a defective unit or installation issue. Check warranty status and consult support for replacement.
If the problem persists after all checks, contact support or check warranty coverage for a replacement.
Watch Video
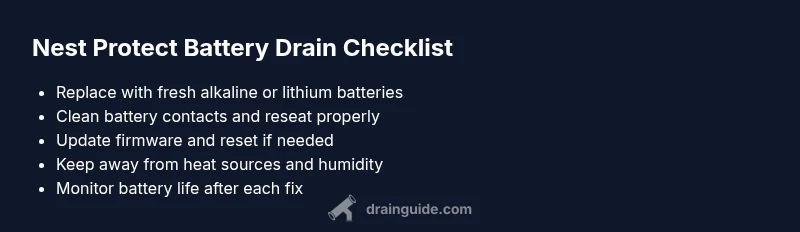
The Essentials
- Replace with fresh batteries first
- Clean contacts if discharge persists
- Update firmware and reset when needed
- Relocate away from heat and moisture
- Replace unit if drain persists after all checks