Tub Drain Plumbing: A DIY Guide for Homeowners
Learn practical, safe steps for plumbing for tub drain—from diagnosing clogs to reassembling the stopper and testing for leaks. A homeowner-friendly DIY guide by Drain Guide.

You can diagnose and fix a tub drain clog or slow drainage by inspecting the overflow, removing hair buildup, clearing the P-trap, and testing the drain after reassembly. This guide covers safe DIY steps, necessary tools, and when to call a professional if issues persist.
Understanding the basics of plumbing for tub drain\n\nA tub drain is more than a simple hole in the wall; it is a mini plumbing system with an overflow, a stop mechanism, a drain tailpiece, a trap (P-trap), and a vent. The goal of plumbing for tub drain is to allow wastewater to flow freely while preventing sewer gases from entering the bathroom. Knowing how these pieces interact helps you diagnose issues quickly and safely. According to Drain Guide, starting with a clear map of components reduces guesswork and speeds up repairs. As you work, always label parts you remove and document their placement to simplify reassembly and avoid leaks. Proper inspection also reduces the chance of damaging seals, which can lead to drips after reassembly.\n
Diagnosing common tub drain problems\n\nSlow drainage, standing water, gurgling noises, and foul odors are signs something isn’t right with your tub drain. Start with a simple check: run water for a short period and observe how quickly it clears. Hair and soap scum are the usual culprits in bathroom drains, especially in the overflow area where a stopper and tailpiece collect debris. If drainage is only slightly slow, the clog may be near the stopper or within the tailpiece; if it’s consistently slow or completely blocked, the P-trap or trap arm could be the issue. A careful diagnosis saves time and avoids unnecessary parts.\n
Tools and materials you’ll need (before you start)\n\nHaving the right tools on hand reduces frustration and speeds up the repair. You’ll need an adjustable wrench, screwdrivers (flathead and Phillips), a drain snake or auger, a zip-it hair clog remover, a bucket, rags, rubber gloves, replacement gaskets/washers, and Teflon tape. Depending on your tub, you may also need a replacement stopper assembly. Keep a towel nearby for spill cleanup and a flashlight to inspect dark corners of the drain assembly.\n
Safety-first: preparing for the work (2-3 minutes of setup)\n\nSafety comes first in any DIY plumbing project. Shut off the bathroom water supply and place towels to catch spills. If your setup shares a shutoff with another fixture, verify which valve controls the tub. Wearing gloves protects your hands from sharp edges and dirty water. If you suspect a leak or broken pipe beyond the trap, pause and reassess; attempting complex repairs without proper access can cause more damage. Drain Guide emphasizes planning and safety as the foundation of any tub drain project.\n
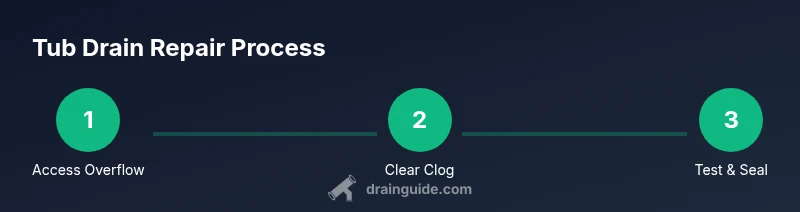
Step-by-step overview of the typical repair approach\n\nMost tub drain fixes follow a familiar sequence: access the overflow and stopper, remove obstructions, inspect the P-trap, and reassemble with a tight seal. This approach minimizes disruption to the bath area while ensuring all components are inspected for wear. After reassembly, test the drain with water to confirm flow and check for leaks around the connections. If the drain still runs slowly, the obstruction may be deeper in the line or the vent may be blocked.\n
Chemical cleaners: when they help and when they harm\n\nChemical drain cleaners can dissolve organic clogs but can damage PVC pipes and gaskets if used improperly. For tub drains, mechanical methods (snaking, hair removal) are often safer and more effective for hair and soap scum. Avoid mixing cleaners with other chemicals, and never use a chemical cleaner if you see metal components or if the pipe material is unknown. Drain Guide recommends prioritizing mechanical methods first and reserving cleaners for stubborn, non-organic blockages only after you’ve identified the problem.\n
How to inspect and clean a P-trap safely\n\nThe P-trap is your drain’s first defense against sewer gas. Always disconnect the trap carefully and place a bucket below to catch wastewater. Clean the baffles and remove any hair, soap, or mineral buildup using a bottle brush or rag. Reassemble with new gaskets and sealant where needed, ensuring the connector nuts are snug but not overtightened. This step often resolves slow drainage if the clog sits in the trap.\n
Reassembling and testing the tub drain\n\nReassembly should follow the reverse order of disassembly. Reconnect the stopper and overflow linkages, install new gaskets, and apply Teflon tape to threaded connections for a tight seal. Once everything is in place, slowly run water and observe for leaks around joints and the stopper. If you notice any leaks, re-tighten connections and inspect for misaligned seals. A proper test confirms the repair and prevents future drips.\n
Long-term maintenance to prevent clogs\n\nPreventive maintenance saves time and reduces the frequency of DIY tub drain fixes. Regularly remove hair from the overflow and stopper area, flush with hot water, and consider a yearly trap cleaning. Use a drain screen to catch debris before it reaches the trap, and schedule a simple inspection after heavy use seasons (e.g., spring and fall). Consistent maintenance keeps plumbing for tub drain functioning smoothly and minimizes odor issues.\n
When to call a professional\n\nIf you encounter persistent slow drainage after a thorough mechanical clean, suspect a significant blockage beyond the trap, or notice persistent leaks after reassembly, it’s wise to contact a licensed plumber. Complex venting issues, deteriorated piping, or damaged fixtures may require professional tools and expertise beyond DIY capabilities. Drain Guide recommends evaluating the cost and risks before continuing a lengthy DIY project.
Tools & Materials
- Adjustable wrench(To loosen drain nuts and fittings under the tub)
- Screwdrivers (flathead & Phillips)(Remove overflow cover screws and stopper hardware)
- Drain snake / auger(Clear hair clogs deeper in the lines)
- Zip-it hair clog remover(Pull out hair and debris from the overflow area)
- Bucket(Catch water and debris during disassembly)
- Rags or towels(Cleanup and grip during work)
- Rubber gloves(Protect hands from dirty water and sharp edges)
- Replacement gaskets and washers(Seal joints when reassembling to prevent leaks)
- Teflon tape(Seal threaded connections for a leak-free fit)
- Replacement tub stopper assembly(Optional if stopper is worn or damaged)
- Flashlight or headlamp(Improve visibility inside cramped drain area)
Steps
Estimated time: 60-90 minutes
- 1
Shut off water and prepare workspace
Before you start, shut off the bathroom water supply to prevent accidental flooding. Place towels and a bucket nearby to catch spills. Wear rubber gloves for protection and keep a flashlight handy to inspect dark corners. This step prevents accidents and helps you work cleanly.
Tip: Double-check you’ve shut off the correct valve; a secondary shutoff may exist in the bathroom. - 2
Remove the overflow cover and stopper
Use the appropriate screwdriver to remove the overflow cover screws. Gently detach the stopper linkage from the overflow and set all parts in a labeled container so you can reassemble them correctly.
Tip: Keep screws separate to avoid mixing parts from different fixtures. - 3
Inspect stopper, tailpiece, and riser
Check for signs of wear, cracks, or misalignment in the stopper and tailpiece. Note how the stopper attaches to the linkage so you can reinstall it in the same position and function.
Tip: If the stopper is gummed up with soap scum, soak it in warm water before reassembly. - 4
Loosen drain nut and remove stopper rod
Gently loosen the drain nut under the tub and detach the stopper rod. This creates access to the drain pathway and helps you reach the clogs without forcing parts.
Tip: Do not overtighten the nut during reassembly; snug is enough to prevent leaks. - 5
Clear hair and debris with snake or zip-it
Insert the snake or zip-it into the drain along the tailpiece and twist to pull out hair and soap scum. Retrieve as much debris as possible and wipe the tool clean before pulling it back.
Tip: Work slowly to avoid pushing clogs deeper into the pipe. - 6
Inspect and clean the P-trap
Place the bucket below the P-trap, loosen the trap nuts, and remove the trap. Clean the interior surfaces, remove residue, and inspect for corrosion or damage. Reassemble with fresh gaskets and ensure proper alignment.
Tip: Pour a little water into the trap before reattaching to verify a proper seal. - 7
Reassemble the drain and stopper
Reconnect the stopper rod, overflow linkage, and drain components. Apply a small amount of Teflon tape to threaded connections to ensure a leak-free seal, and tighten nuts firmly without over-tightening.
Tip: Make sure the stopper seats correctly to prevent slow drainage after reassembly. - 8
Test drainage and check for leaks
Run water to test the drain. Look for steady flow and monitor all joints for leaks. If you see drips, reseat components and reapply tape as needed.
Tip: Give the system a few minutes of steady running to confirm a true fix. - 9
Clean up and finalize maintenance
Wipe down tools and store spare parts. Document the steps you took and schedule a routine maintenance check to prevent future clogs. Proper housekeeping reduces the need for emergency fixes.
Tip: Create a simple maintenance calendar to stay on top of tub drain care.
Got Questions?
Do I need to remove the entire tub to fix a drain?
Not usually. Most tub drain issues are localized to the overflow, stopper, tailpiece, or P-trap. A full tub removal is typically unnecessary unless there is a larger plumbing problem behind the wall.
In most cases, you don’t need to pull the whole tub; focus on the overflow, stopper, and trap first.
What is the best way to clear a hair clog without chemicals?
Use a drain snake or zip-it tool to reach and pull the hair. A flexible rod can break up the clog if it’s firm. Finish by flushing with hot water and a light cleaners-free rinse.
Try a hair-removal tool and a quick hot-water flush before resorting to chemicals.
Are chemical cleaners safe for tub drains?
Chemicals can damage pipes and gaskets, especially with PVC. Mechanical cleaning methods are safer for tub drains and should be tried first.
Chemicals can harm pipes; mechanical methods are usually safer and effective first.
How do I know when the P-trap needs replacement?
If you notice persistent leaks after resealing, rust, or cracks visible in the trap, replacement is likely the best option. A worn trap can allow odors and leaks to continue.
If the trap is cracked or leaking after a proper seal, replace it.
Can I reuse an old stopper assembly after cleaning?
Yes, if the stopper and linkage are undamaged and reassemble cleanly with proper alignment. If you see wear or wobble, replace the stopper parts.
You can reuse the stopper if it’s in good shape and fits well.
How often should I maintain a tub drain?
Aim for a simple check every few months and a more thorough clean seasonally or after heavy use. Regular maintenance prevents major clogs.
Do a quick check every few months and a deeper clean a couple times a year.
Watch Video
The Essentials
- Diagnose before disassembly to target the right component
- Use mechanical methods for clogs first to minimize damage
- Seal threaded connections to prevent leaks after reassembly
- Maintain a simple upkeep routine to prevent recurring clogs
- Call a professional if you hit recurring leaks or venting issues