When to Replace Tub Drain: A Practical Home Guide
Learn how to tell when your tub drain needs replacement, what parts wear out, and how to replace it safely with practical DIY steps or professional help. A clear, actionable guide for homeowners focused on durability, safety, and long-term performance.

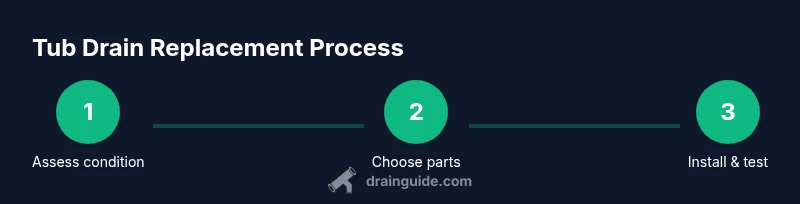
If you're unsure when to replace tub drain, this guide helps you decide. You’ll assess wear on the flange and gasket, leaks around the drain, and seal integrity. By the end you'll know whether to repair or replace, and you’ll have a clear plan for a safe, code-compliant tub drain replacement.
Why replacing tub drain matters
A tub drain is a critical barrier against water damage in any bathroom. Over time, the drain assembly experiences corrosion, gasket degradation, and seal wear that can lead to persistent leaks, sewer gasses, or foul odors if ignored. Even when a drain appears to work, small leaks or a compromised seal can allow water to seep into the subfloor and cabinetry, eventually causing mold growth and structural damage. According to Drain Guide, proactive replacement when wear is evident reduces the risk of costly repairs later and helps maintain bathroom hygiene and resale value. Understanding the long-term benefits of replacement—not just repair—empowers homeowners to act before a failure occurs. A well-installed drain also improves overall drainage performance, helping you avoid slow draining tubs and standing water that can attract mold and bacteria.
Signs you should replace vs repair
Not every tub drain needs replacement at the first sign of trouble. Start by evaluating the most common failure points: the flange where the drain meets the tub, the gasket or seal, and the overflow connection. Indicators that replacement is warranted include: persistent leaks after tightening, corrosion on metal components, a warped or damaged flange, persistent sewer odor despite cleaning, and a drain that won’t seal properly when the stopper is engaged. If the drain detaches easily, if you notice cross-threading or stripped screw holes, or if the drain material shows significant rust or pitting, replacement is usually the safer option. Drain Guide notes that while some repairs extend life briefly, progressive wear almost always benefits from a full replacement to restore watertight integrity.
How to inspect for wear and damage
A thorough inspection starts with a visual check of the drain assembly from above and beneath the tub. Look for rust, corrosion, and any moisture around the flange and gasket. Remove the stopper or strainer to inspect the inner tailpiece and the connection to the drain body. Use a flashlight to check for hair buildup that could indicate ongoing drainage issues. Gaskets should be intact, pliable, and free of cracks. If the seal feels brittle or cracked, or if you see mineral buildup that cannot be scraped away, replace the gasket and, if necessary, the entire drain kit. When you push on the flange, it should sit flat against the tub surface without rocking; any movement can signal a degraded seal or warping. Drain Guide’s 2026 analysis emphasizes assessing both cosmetic wear and functional integrity to decide between repair and replacement.
Replacement options: DIY vs professional
DIY replacement is feasible for confident homeowners with basic plumbing skills, correct tools, and a dry, well-ventilated workspace. Materials typically include a new tub drain kit, gasket, plumber’s putty or silicone sealant, and adjustable wrenches. If the tub surround or tilework is damaged, or if you encounter stubborn corrosion, professional installation ensures the job complies with local codes and avoids leaks that could compromise the bathroom. A licensed plumber can also inspect adjacent components, such as the P-trap and venting, to ensure the entire drainage system is in good shape. Consider your comfort with tools, the age of the plumbing, and access to shutoff valves when deciding.
Scheduling and timing: when to act
If you notice any of the red flags—visible leaks, persistent odor, damp cabinet framing, or loose fittings—plan a replacement soon rather than later. Delaying replacement increases the risk of water damage and mold, particularly in homes with wooden subfloors or aging plumbing. For DIY projects, set aside a weekend and create a dry work area; for professionals, obtain at least two quotes and verify references. Seasonal timing can matter: aim for dry weather if you must work in a basement or unheated space where cold can affect sealants. By scheduling promptly, you minimize risk and disruption to your daily routine.
Maintenance to extend life and prevent future clogs
After replacement, perform a quick maintenance routine to prolong the life of the tub drain. Clean the strainer monthly to remove hair and soap scum, inspect the gasket annually for softening or cracking, and reseal with silicone if you notice any minute gaps. Use a mild, non-acidic cleaner to avoid degrading rubber seals, and avoid chemical drain cleaners that can corrode metal components or plastic parts over time. A simple maintenance cadence reduces the chance of future leaks and keeps drainage running smoothly.
Tools & Materials
- Tub drain kit (including flange, stopper assembly, and tailpiece)(Choose a kit compatible with your tub drain size (1 1/2)
Steps
Estimated time: 60-120 minutes
- 1
Prepare the work area
Clear the bathroom area, place towels to catch drips, and shut off the household water supply or at least the tub shutoff if present. Remove items from the tub and cover nearby surfaces. This prevents damage and makes the replacement safer and neater.
Tip: Have a helper hold components as you disassemble to avoid losing small parts. - 2
Remove overflow cover and drain stopper
Carefully remove the overflow plate and the drain stopper. Clean the area around the assembly to reduce debris. Take note of screw types and placement for reassembly.
Tip: Photograph the setup before removal to guide reassembly. - 3
Inspect the existing flange and gasket
Check for corrosion, cracks, or worn threads. If the flange moves or the gasket is hard and brittle, replacement is recommended. Inspect the tailpiece for cracks or leaks.
Tip: If you can’t easily access the tailpiece, plan for a longer extending tool or a maneuverable wrench. - 4
Remove old drain and clean mounting surface
Unscrew and lift out the old drain assembly. Clean any residue, mineral buildup, or silicone from the tub surface to ensure a watertight seal with the new components.
Tip: Wipe a small amount of silicone primer on the surface before applying new sealant. - 5
Install new drain and gasket
Install the new drain flange, gasket, and tailpiece according to the manufacturer’s instructions. Use plumber’s putty or silicone sealant as directed and avoid overtightening that could crack the tub.
Tip: Hand-tighten first, then snug with a wrench—do not overtighten. - 6
Reassemble overflow and test for leaks
Reconnect the overflow plate, reinstall the stopper, and fill the tub to test for leaks around the new seal. Check from above and beneath the tub for any signs of moisture.
Tip: Run the water for several minutes and inspect for any slow leaks under the tub before finishing. - 7
Final check and cleanup
Wipe away excess sealant, replace any trim pieces, and ensure the stopper operates smoothly. Keep an eye on the drain over the next 24-48 hours for hidden leaks.
Tip: Label the area with a note indicating date of replacement for future maintenance.
Got Questions?
When should I replace a tub drain rather than repair it?
Replace the drain when the flange is corroded, the gasket is cracked, or leaks persist after a repair attempt. If there’s significant rust or warping, replacement is safer and more reliable.
If the flange or gasket is corroded or leaks persist after repair attempts, replace the drain. Large rust or warping means replacement is safer.
Can I replace a tub drain myself?
Yes, with basic plumbing tools and careful following of the installation instructions. Ensure you can access shutoffs and have a dry workspace. If you encounter stubborn corrosion or a tiled surround, hire a professional.
Yes, many homeowners replace tub drains themselves with the right tools. If you hit stubborn corrosion or damaged tile, consider a pro.
How long does tub drain replacement take?
A typical DIY replacement takes about 60 to 120 minutes depending on access and material condition. Professional work may be faster but depends on site specifics.
Most replacements take about an hour to two hours, depending on access and condition.
What parts wear out first?
The gasket, flange, and tailpiece are most prone to wear. Corrosion on metal parts and hair buildup around the overflow can also signal the need for replacement.
Gasket, flange, and tailpiece usually wear first; check for corrosion and buildup around the overflow.
Do I need a plumber if the tub is tiled around?
Not always, but if removing tiles or dealing with a stubborn surround is required, a professional ensures a proper seal and avoids cosmetic damage.
You can replace it yourself if you’re comfortable, but around tiled areas a pro helps ensure seal integrity and avoids damage.
How do I test for leaks after replacement?
Fill the tub partially and inspect above and below the drain for moisture. Tighten connections if leaks appear, then re-test after a short cure time for sealants.
Fill the tub a bit and check for moisture around the drain and underneath. Re-test after sealants cure.
Watch Video
The Essentials
- Assess wear before replacement and start with the flange and gasket.
- Choose DIY or professional path based on skill and safety.
- Proper sealant and careful reassembly prevent leaks.
- Schedule regular maintenance to extend drain life.