Yard Drain Guide: Install, Maintain, and Protect Your Yard
Learn how to prevent standing water in your yard with a practical yard drain system. This step-by-step guide covers problem areas, system types, installation, maintenance, safety, and cost considerations for DIY success.

Learn how to design, install, and maintain a yard drain that prevents standing water and soil erosion. This guide covers identifying problem areas, selecting drainage components (catch basins, French drains, and perforated pipe), sizing, trenching, backfilling, and routine maintenance. You’ll know required safety gear, typical costs, and when to call a pro.
Identify problem areas in your yard
You may notice pooled water after rain, soggy soil, erosion near the foundation, or damp patches that don’t dry quickly. According to Drain Guide, these symptoms point to insufficient drainage and poor surface runoff management. Start by surveying your yard on a calm day after a moderate rain and marking low spots with chalk. Map the water flow by placing temporary flags or measuring where water pools for longer than a day. Consider soil type: clay soils drain slowly, sandy soils shed water quickly but may require longer trenches. If you have a driveway or patio, check for downspout outlets that discharge into the yard; improper spout placement can overwhelm the soil. This phase helps determine whether you need a simple surface grate, a French drain, or a catch-basin system. The goal is to move water away from structures, paths, and foundations, reducing erosion risk and mosquito habitat. Drain Guide’s field observations show homeowners often miss subtle grade problems that cause long-term damage; addressing these early saves time and money.
Choose the right yard drain system
There are several options: catch basins for standing water at slow inflow points, French drains for collecting and channeling subsurface water, and trench drains for long, linear runs along driveways or sidewalks. The best choice depends on slope, soil, available space, and future landscaping plans. For most homes, a hybrid approach works: a catch basin at the low spot connected to a perforated pipe that runs to a discharge area. Drain Guide recommends evaluating the pros and cons: French drains tolerate variable soils but require proper grading; channel/trench drains are quick to install on smooth surfaces but less adaptable to irregular terrain. Local codes may require permits or inspections; always verify before digging.
Plan slope and drainage path
A successful yard drain requires a deliberate slope to move water away from structures. In residential settings, aim for a 1-2 percent gradient away from foundations, adjusting for soil type and landscape features. Use string lines and a level to map the planned route and avoid crossing utility lines. Identify discharge locations that won’t create new problems (such as flooding a neighbor’s yard or pooling near sidewalks). Drain Guide emphasizes documenting the path and ensuring the route remains clear of roots, rocks, and future landscaping plans. An explicit plan reduces surprises during trenching and backfilling.
Materials and components overview
A typical yard drain system combines several components for reliability: a catch basin or inlet, perforated drainage pipe, filter fabric, gravel bedding, and backfill soil. The crucial choice is the pipe diameter and material (PVC or corrugated tubing) rated for outdoor use. Geotextile fabric helps keep sediment out of the pipe, while clean gravel provides bedding and a coarse reservoir for water to flow through. Additional fittings, end caps, and a discharge zone (like a storm drainage line or dry well) complete the system. Drain Guide notes that selecting compatible components reduces clogs and simplifies maintenance. Always verify compatibility with local codes and existing landscape features.
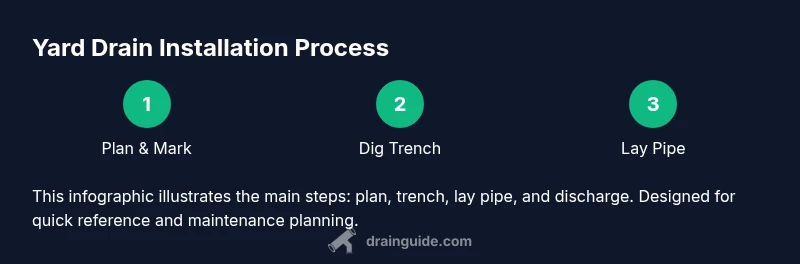
Step-by-step installation workflow
This section provides an overview of the installation process, focusing on planning, trenching, laying pipe, and finishing. Before you dig, ensure you have permission if utilities are present and wear proper safety gear. The workflow typically includes marking lines, digging a trench with the correct slope, laying fabric and gravel, installing the pipe with perforations facing down, adding the catch basin, connecting to the discharge, backfilling, and finishing with topsoil and lawn restoration. Drain Guide highlights the importance of testing the system after installation to confirm water is moving away from critical areas and that there are no leaks or misalignments.
Maintenance and seasonal care
Maintaining a yard drain is about preventing sediment buildup, avoiding root intrusion, and ensuring flow remains free of blockages. Schedule seasonal inspections after heavy rains or freeze-thaw cycles. Clear leaves and debris from catch basins and check visible joints for signs of leakage. Use a plumber’s snake or flexible rod to clear minor clogs in the pipe, and consider a professional cleaning for longer pipe runs or difficult sections. Drain Guide stresses that early intervention minimizes expensive repairs and keeps drainage functioning year-round.
Common mistakes and troubleshooting
The most frequent mistakes include skipping a proper slope, using inappropriate pipe materials, and neglecting to install geotextile fabric. These lead to clogs, standing water, and soil erosion. If you notice gurgling noises, slow drainage, or water backing up into the yard, recheck the slope, clean the outlet, and ensure the discharge area is not blocked. Always verify that the discharge point is appropriate and won’t create new water issues for neighbors or public property. Drain Guide urges homeowners to revisit planning documents if problems persist and to seek professional advice when encountering utilities or complex layouts.
Cost considerations and DIY vs pro
Costs depend on yard size, depth, materials, and whether you DIY or hire a pro. DIY projects typically involve material costs for pipe, gravel, fabric, and basins, while professional installation adds labor and potential permit fees. Drain Guide suggests obtaining multiple quotes and clearly specifying trench length, pipe diameter, and discharge method to compare apples-to-apples bids. For larger or more complex systems, professional design and installation can save time and reduce risk of failure, especially near foundations or utilities.
Safety and local codes
Trenching can pose risks to you and underground utilities. Always call your local utility company to mark lines before digging and obtain any necessary building permits. Wear appropriate PPE, including gloves, eye protection, and sturdy footwear. Follow local codes for drainage discharge, slope requirements, and yard grading. Drain Guide emphasizes compliance to avoid fines, ensure safety, and guarantee that drainage systems perform as intended.
Authority Sources
- https://www.epa.gov/sustainability/learn-about-stormwater-management
- https://www.extension.purdue.edu
- https://extension.oregonstate.edu
Tools & Materials
- Measuring tape(at least 25 ft to plan long drainage run)
- Chalk line or string line(for straight trench alignment and slope)
- Trenching shovel(flat blade, long-handled if possible)
- Geotextile fabric(prevents soil intrusion into gravel)
- Perforated drainage pipe (4-inch)(PVC or corrugated; ensure outdoor rating)
- Catch basin or inlet(select size for expected water volume)
- Washed gravel (3/4-inch to 1-inch)(for base and trench fill)
- Sand or fine gravel bedding(level and protect pipe)
- PVC solvent cement and primer(for pipe connections)
- Safety gear (gloves, goggles)(protective equipment)
- Utility marker spray or flags(mark utilities before digging)
Steps
Estimated time: 4-6 hours
- 1
Assess site and plan route
Survey the yard after a rain event, identify low spots, and decide where the drain will run to, considering foundations and utilities. Document the plan with measurements and a drawn line.
Tip: Confirm no utilities intersect the planned trench; call before you dig. - 2
Mark trench line and slope
Use chalk or string to mark the exact path and slope away from structures. A consistent 1-2% grade helps water move efficiently.
Tip: Double-check with a level and measure several points along the line. - 3
Dig the trench
Excavate the trench to the required depth, ensuring the bottom is flat to support the pipe. Remove roots and sharp rocks that could puncture the pipe.
Tip: Avoid over-digging; use a ruler to maintain uniform depth. - 4
Lay fabric and base layer
Line the trench with geotextile fabric and add a base layer of gravel to create a stable foundation for the pipe.
Tip: Fabric should extend beyond the trench edges to prevent sediment intrusion. - 5
Install pipe and fittings
Place perforated pipe along the trench, with perforations facing down. Attach elbows and fittings as needed to navigate the route.
Tip: Use solvent cement where required and test fit before final assembly. - 6
Install catch basin and discharge
Connect the pipe to the catch basin and route the outlet to a safe discharge point. Ensure outlet is clear and directed away from structures.
Tip: Seal connections to prevent groundwater intrusion into the trench. - 7
Backfill and compact
Cover the pipe with bedding gravel, then backfill with soil and lightly compact to prevent settlement. Restore surface with lawn or mulch.
Tip: Compact in layers to avoid air gaps around the pipe. - 8
Test drainage flow
Run water through the system to verify flow and identify any leaks or blockages. Observe discharge point for proper water movement.
Tip: Address any slow spots or sags immediately. - 9
Finalize landscaping and safety checks
Finish by reseeding or regrading soil and ensuring the system remains accessible for maintenance. Review safety and local code compliance.
Tip: Keep a maintenance schedule and document the installation for future repairs.
Got Questions?
What is a yard drain and when do I need one?
A yard drain is a system that moves surface and groundwater away from your yard to prevent pooling and erosion. You typically need one if you notice standing water, persistently soggy soil, or erosion near the home's foundation after rain. Drain Guide notes that proper drainage protects landscaping and foundations.
A yard drain moves water away from your yard to prevent pooling and damage. You need one when you see standing water or soggy soil after rain.
How deep should a yard drain trench be?
Depth varies by site, but trenches are dug deep enough to accommodate the pipe and bedding while maintaining slope. In general terms, plan for a depth that places the pipe slightly below the frost line and allows for gravel bedding, with final grading to match the lawn.
Depth depends on your site, but aim to keep the pipe below the frost line with proper bedding and grading.
Can I install a yard drain myself or should I hire a pro?
Many homeowners can install straightforward yard drains using a clear plan and basic tools. For complex layouts, near foundations, or when utilities are involved, hiring a licensed professional is wise to prevent costly mistakes.
You can DIY simple drains, but for complex layouts or near utilities, hire a pro.
Do yard drains require permits?
Permit requirements vary by location. Check with your local building department or homeowners association to confirm whether a permit or inspection is needed for trenching, discharge, or new drainage routes.
Check with your local building department to see if a permit is required.
What is the typical discharge point for a yard drain?
Discharge should direct water to an appropriate area such as a storm sewer, dry well, or a natural drainage path away from foundations and neighbor properties. Do not direct water toward structures or areas that can flood.
Discharge should go to an appropriate outdoor drainage area, away from buildings.
How do I test a yard drain after installation?
Pour water at the inlet and watch for steady movement through the pipe to the discharge. Check for gaps or leaks at joints and ensure no backflow occurs. If water pools, recheck slope and connections.
Test by running water and watching for proper flow and no leaks.
Watch Video
The Essentials
- Plan and measure accurately before digging
- Ensure proper slope to move water away from your home
- Choose the right components and ensure tight connections
- Test the system after installation for effective drainage
- Maintain the yard drain to prevent clogs and failure