Kitchen Drain Leak: Quick Home Fix Guide (2026)
Learn to diagnose and fix a kitchen drain leak quickly with step-by-step checks, safety tips, and when to call a pro. Drain Guide's practical guide helps homeowners save time and prevent water damage.

Most kitchen drain leaks stem from loose connections, worn gaskets, or a compromised P-trap. The quickest fix is to tighten joints and reseal with a new gasket, then test with water. If moisture returns, inspect the dishwasher drain hose and supply lines for cracks or improper routing. If you’re uncomfortable, consult a professional.
Quick orientation: what causes a kitchen drain leak
According to Drain Guide, kitchen drainage issues are among the most common home plumbing annoyances, but they’re usually straightforward to diagnose. The Drain Guide team found that leaks typically start at the P-trap, slip joints, or gasket connections rather than hidden pipes behind walls. Understanding these failure points helps homeowners act quickly to prevent water damage. In most cases, a leak is a sign that a simple maintenance step—tightening a fitting or replacing a worn washer—will stop the drip. This article walks you through a practical, step-by-step approach you can follow this weekend, with safety reminders and clear checks to avoid costly mistakes.
Inspect the obvious culprits first
Begin with the lowest-hanging fruit: physically inspect the area under the sink. Look for loose slip-nut connections at the P-trap, the trap arm, and where the tailpiece meets the sink basin. Check the rubber gaskets on the P-trap and at washer edges; a worn gasket is a frequent source of slow leaks. Also examine the dishwasher drain hose for kinks, improper height, or detachment. A quick wipe-down while you simulate water flow will help you spot a drip more clearly. By starting here, you often fix the issue without delving into behind-the-wall pipes. Drain Guide notes that most leaks respond to this simple, quick sequence.
Tools, safety gear, and prep steps you’ll need
Before you touch pipes, assemble a basic toolkit: adjustable wrench, bucket, towels, replacement washers or gaskets, plumber’s tape, and a flashlight. Wear gloves to keep things sanitary, and shut off the cold-water valve under the sink (and the main valve if needed) to avoid a flood. Place a bucket under the P-trap and keep rags handy to catch minor spills. Disconnecting joints can release pressure and reveal the source; take photos as you go so you can reassemble accurately. If you’re unsure about pipe material (PVC vs metal), consult a quick guide or your local hardware store for the right parts. Safety matters: never work with water on exposed live electrical outlets or devices nearby.
Diagnostic checks and solution path
Symptom-driven checks help you identify the likely cause without guessing. Start by a visual inspection for dampness around slip-nut joints and washers. If the P-trap fittings are dry after wiping, tighten the slip-joint nuts a quarter-turn at a time and re-test. If drips persist, the issue may be a cracked pipe or degraded gasket that needs replacement. Drain Guide analysis shows that most leaks originate at fittings and traps rather than behind-wall pipes, so prioritize those areas. For hose connections, ensure clamps are secure and the hose isn’t kinked. When in doubt, isolate components one by one to pinpoint the source.
Cleaning, resealing, and testing the fix
Once you’ve located the leak source, disassemble the affected joints and replace worn washers or gaskets. Apply plumber’s tape to male threads and reassemble with snug but not overtightened fasteners. After reassembly, run cold water for several minutes and observe the joints closely for any signs of moisture. If you notice a slow drip returning, re-check the gasket seating and the pipe alignment. It’s important to keep the surrounding area dry during testing to avoid water damage and to clearly see where drips originate.
Maintenance to prevent future leaks
Regularly inspect the P-trap, supply lines, and dishwasher connections every 6–12 months. Replace washers and gaskets whenever you disassemble a joint, and avoid overtightening plastic fittings that can crack. Install a small drain screen to reduce debris that can cause clogs and pressure build-up. Use a p-trap seal preventive product if your area experiences frequent dry-out issues. Finally, keep a simple maintenance kit handy: wrench, spare gaskets, thread seal tape, and paper towels for quick cleanups. By adopting these habits, you reduce the likelihood of future leaks and water damage.
When to call a pro and safety reminders
If you discover hidden damage behind cabinet panels, corroded metal pipes, or a persistent leak that doesn’t respond to basic fixes, it’s time to call a licensed plumber. Complex configurations or dual-leak scenarios can require professional assessment and specialized tools. Always remember to shut off the water supply before any work, ventilate the area if you smell sewer gas, and avoid using corrosive cleaners that can mask leaks or harm pipes. Drain Guide emphasizes safety first; when in doubt, opt for a professional evaluation.
Steps
Estimated time: 60-90 minutes
- 1
Shut off water & prep area
Turn off the cold-water valve under the sink and, if needed, the main shutoff. Place a bucket and towels to catch spills. Take photos of each connection before loosening any parts so you can reassemble accurately.
Tip: Pro tip: label each part as you remove it to avoid mix-ups. - 2
Inspect and tighten P-trap nuts
Disassemble the P-trap, inspect rubber gaskets, and replace worn washers. Clean the mating surfaces and reassemble, ensuring the nuts are snug but not over-tightened.
Tip: Pro tip: tighten in small increments and re-test after each adjustment. - 3
Check tailpiece, trap arm, and sink connections
Inspect all joints for wear and moisture. Replace any cracked gaskets and re-seal with plumber’s tape on threaded connections. Ensure the tailpiece is aligned with the sink drain.
Tip: Pro tip: use a flashlight to reveal slow leaks you might miss by sight. - 4
Inspect dishwasher drain hose
Confirm the hose is securely connected to the disposal or drain port, with no kinks or sharp bends. Clamp or reattach as needed and route the hose above the water line to prevent backflow.
Tip: Pro tip: a loose hose is a frequent source of leaks; recheck after reassembly. - 5
Test the system
Run cold water for several minutes and look for drips at each connection. If a drip persists, re-check seating and consider gasket replacement.
Tip: Pro tip: keep paper towels handy to detect tiny leaks early. - 6
Decide on repair vs replacement
If you notice cracks, heavy corrosion, or repeated leaks after checks, replacement is often safer and longer-lasting than repeated reseals.
Tip: Pro tip: when in doubt, consult a professional for a guaranteed fix.
Diagnosis: Water pooling or dripping under the kitchen sink after running water
Possible Causes
- highLoose P-trap connection or slip joint
- mediumWorn gasket or washer in trap/connection
- lowCracked or corroded drain pipe or fixture
Fixes
- easyTighten slip-joint nuts and replace worn washers
- hardDisassemble, inspect and replace damaged pipe or fittings
- easyInspect dishwasher drain hose for kinks or detachment; reseat and secure
Got Questions?
What is the most common cause of a kitchen drain leak?
The most frequent culprits are loose joints, worn gaskets, or a damaged P-trap. Start by tightening connections and replacing the washers, then inspect the hose connections for the dishwasher.
The most common causes are loose joints, worn gaskets, or a damaged P-trap. Start by tightening connections and checking the washers, then inspect the dishwasher hose.
Can I fix a kitchen drain leak myself?
Yes, many leaks are DIY-friendly if you have basic tools and turn off the water; avoid attempting major pipe replacements yourself.
Yes, many leaks are DIY-friendly if you have basic tools and shut off the water, but avoid major pipe work.
What tools do I need for a kitchen drain leak repair?
Common tools include an adjustable wrench, bucket, towels, replacement washers, and plumber’s tape.
You'll need an adjustable wrench, bucket, towels, washers, and tape.
When should I replace rather than repair a drain pipe?
Replace if you see cracks, corrosion, or repeated leaks after tightenings and reseals.
If you see cracks or corrosion or leaks return after fixes, replacement is usually the safer option.
Is it safe to use chemical drain cleaners for leaks?
Chemical cleaners are not a fix for leaks; they can damage pipes and are not recommended for active leaks.
Chemical cleaners won't seal a leak and may damage pipes; avoid using them for leaks.
What if the leak is behind the wall or under cabinets?
Leaks behind cabinets may require removing panels to access joints; assess for hidden damage and consider a plumber.
Leaks behind walls usually mean more extensive work; you may need to access behind the wall and call a pro.
Watch Video
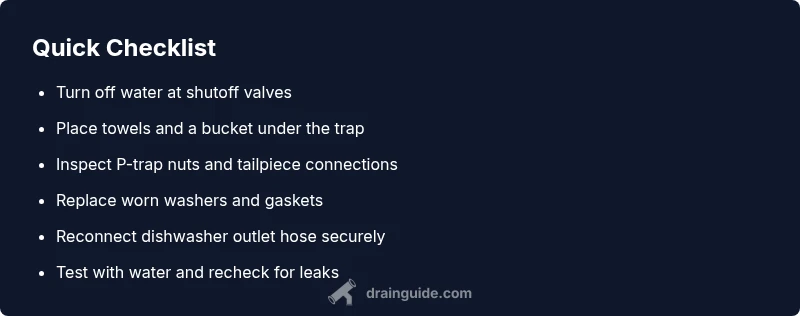
The Essentials
- Shut off water and inspect obvious leaks first.
- Tighten P-trap connections and replace worn washers.
- Test with water after each fix and reseal as needed.
- Call a professional if corrosion or hidden damage is suspected.