Drain a Water Heater: Do You Need to Drain to Change the Element?
Discover whether draining your water heater is required to replace the heating element. Learn safe, practical steps for electric and gas models, with tools, step-by-step guidance, and troubleshooting tips from Drain Guide.

Short answer: In most residential setups you do not need to drain the entire tank to replace a heating element. Drain only enough water to lower the water level below the element or follow the heater manufacturer’s guidance. Always shut off power (electric) or fuel supply (gas), relieve pressure, and respect safety precautions to avoid scalding or leaks.
Do You Need to Drain a Water Heater to Change the Element?
The question many homeowners ask is not just about the mechanics of removing an old element, but about safety and whether a full tank drain is necessary. The practical answer centers on the element location and the type of heater. In most electric residential water heaters, the heating element sits behind an access panel near the top portion of the tank. Accessing it typically requires the water level to be lower than the element, but that doesn't always mean draining the entire tank. Some installations allow you to drain only a portion of water sufficient to expose the element and its gasket. Always check the manufacturer’s guidance for your specific model, and follow a cautious approach to avoid scalding, leaks, or electrical shock.
Do You Need to Drain a Water Heater to Change the Element?
This question is not just about water level; it also hinges on your heater type. Electric water heaters have at least one heating element inside a junction box. Gas models do not use electric elements, so their maintenance differs. If you own a gas-fired unit, you’ll typically focus on the burner, thermocouple, and flue diagnostics rather than an element replacement. Understanding your heater type helps you decide whether a partial drain is sufficient or if a more comprehensive drain is warranted. Drain guides emphasize cautious assessment before you begin, ensuring you stay within safety boundaries and manufacturer recommendations.
Do You Need to Drain a Water Heater to Change the Element?
For many homeowners, the safest path is to methodically evaluate the required water level. You may find that the water can be lowered just enough to expose the element screws and gasket, allowing you to replace the element without emptying the tank. If the element is particularly corroded or if you encounter sluggish drainage or unusual noises, pausing to re-check the instructions is wise. This approach minimizes water waste, reduces the risk of sudden water surges, and keeps your repair aligned with best practices recommended by Drain Guide.
Do You Need to Drain a Water Heater to Change the Element?
Finally, remember that some scenarios require a more thorough drain, especially if the unit is old, the gasket has deteriorated, or you notice a leak around the element port. If the tank is full of sediment, or if the element is deeply embedded, consider draining to a level that provides generous clearance and a clean working area. The key is to stay within the manufacturer’s specifications and your safety comfort level, avoiding unnecessary water loss or exposure to hot surfaces.
Do You Need to Drain a Water Heater to Change the Element?
In practice, the best approach is to plan for contingencies. Start by turning off power, shutting the cold-water supply, and draining to a safe working level. Then proceed with the element swap, test for leaks, and return the tank to full operation. By thinking through the process and following manufacturer guidance, you reduce the chance of scalding, electrical hazards, or post-replacement leaks.
Tools & Materials
- Electrical power off (breaker/fuse)(Trip the dedicated breaker to the water heater and verify no voltage.)
- Gas shutoff valve (for gas heaters)(Close only if accessible and you are working on a gas unit.)
- Flexible drain hose(Attach to the tank's drain valve and direct water into a bucket or floor drain.)
- Drain pan or bucket(Place to collect water; avoid spills on floors or electrical components.)
- Adjustable wrench and screwdrivers (Phillips/flat-head)(Loosen the drain valve and remove element screws; keep gasket handy.)
- Rags, gloves, and eye protection(Protect hands and eyes from hot water and sharp edges.)
- Gasket replacement kit (optional)(Replace old gaskets to prevent leaks at the element port.)
- Teflon tape or thread sealant (optional)(Used on threads if needed for a tighter seal.)
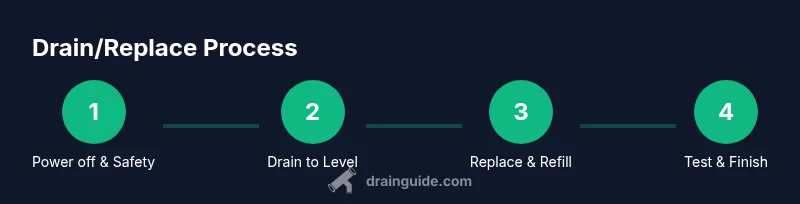
Steps
Estimated time: 45-90 minutes
- 1
Power off and verify
Turn off the electrical supply to the water heater at the breaker and confirm there is no voltage at the access panel. This prevents accidental shocks while you work on the element or its screws.
Tip: Use a non-contact voltage tester to double-check before touching wires. - 2
Shut off water and relieve pressure
Close the cold-water supply valve to stop new water from entering the tank. Open a hot water faucet somewhere in the home to relieve residual pressure and allow air to escape during draining.
Tip: Relieving pressure reduces the risk of a sudden burst of water when you open the drain valve. - 3
Attach drain hose and prepare collection
Connect the drain hose to the tank’s drain valve and place the other end into a bucket or floor drain. Have towels ready for any minor spills and keep the area dry.
Tip: If you have multiple drain locations, choose the one closest to the heater to minimize hose length. - 4
Drain to below the element level
Open the drain valve slowly to let water out until the water level is below the depth of the element. Do not drain the entire tank unless required by the manufacturer or the situation dictates.
Tip: Check the element location in your model’s manual to determine the safe exposure depth. - 5
Remove and replace the element
Loosen and remove the screws securing the element, pull the element out, and replace with a new one. Install a fresh gasket and tighten to spec. If replacing an upper and lower element, repeat as needed.
Tip: Take a quick photo for reference before removing components to ensure correct reconnection. - 6
Refill, purge air, and test
With the drain valve closed, reopen the cold-water inlet to refill the tank. Once full, restore power and slowly open the hot faucet to purge air. Check for leaks around the element and port after pressure returns.
Tip: Bleed air by opening a hot faucet until water runs steadily; this prevents air locks.
Got Questions?
Do I need to drain the entire water heater to replace the element?
Not usually. Many replacements can be done by draining only to below the element depth, while following the manufacturer’s instructions.
Usually you don’t need to drain the whole tank; drain to the element level and follow the manual.
What safety steps should I take before starting?
Shut off power to the heater, close the cold-water valve, relieve pressure, and keep a dry working area. Wear gloves and eye protection.
Power off, close the water, relieve pressure, and wear protective gear.
What if I smell gas during the process?
If you smell gas, stop immediately, evacuate, and contact your gas utility or a professional. Do not operate electrical controls in that situation.
If you smell gas, stop, evacuate, and call a pro immediately.
Can I reuse the old gasket after replacement?
It’s best to replace the gasket to ensure a proper seal and prevent leaks; use the manufacturer’s gasket kit if available.
Better to replace the gasket for a reliable seal.
How do I know the element needs replacement?
No heat after proper checks, inconsistent temperatures, or a burned smell can indicate a failing element. A multimeter test can confirm continuity.
If there’s no heat after steps, test the element with a meter.
When should I hire a professional?
If you’re unsure, dealing with gas heaters, or uncomfortable with electrical work, hire a licensed plumber or technician to avoid safety risks.
If you’re unsure, it’s safer to hire a pro.
Watch Video
The Essentials
- Assess whether partial drain is sufficient before starting
- Power down and isolate the unit to prevent shock
- Drain just enough water to access the element safely
- Replace gaskets to prevent future leaks
- Test thoroughly and watch for leaks after re-filling