How to Fix a Drain: Step-by-Step DIY Guide for Homeowners
Learn safe, practical steps to diagnose and fix common drain issues at home. This Drain Guide tutorial covers tools, step-by-step actions, maintenance, and safety, with clear guidance for homeowners.

According to Drain Guide, a slow or stopped drain is usually caused by hair, grease, soap scum, or mineral buildup. This guide shows you how to diagnose safely and fix the problem with common tools, completing a clear, step-by-step process. Gather a plunger, gloves, a bucket, a flashlight, and a drain snake to begin, and know when to call a pro for stubborn clogs.
Why fixing drain matters
A functioning drain is essential for a clean, safe home. Drains that drain slowly or back up can lead to hygiene issues, foul odors, and water damage if left unchecked. Fixing a drain promptly reduces the risk of mold growth and damaged fixtures, preserving your home’s value and comfort. The Drain Guide team emphasizes proactive maintenance because many clogs are caused by everyday use items like hair, soap scum, cooking grease, and small food particles that accumulate over time. By addressing the problem early, you prevent bigger costs later and maintain a healthier living environment for your family.
In practice, a well-maintained drain improves drainage flow, reduces the likelihood of sewer gas entering living spaces, and minimizes the need for disruptive plumbing work. A little preventive care—like monthly hot-water flushes, careful disposal habits, and keeping traps clean—goes a long way toward extending the life of your plumbing system.
Common causes of drains clogging or gurgling
Most interior drains clog due to routine household use. Hair and soap scum are frequent culprits in bathroom sinks and showers, where fibers and minerals mix with detergents to form stubborn clogs. In kitchen drains, grease and food particles bind with starches, forming solid obstructions that trap more debris. Over time, mineral buildup from hard water can also narrow pipes, causing gurgling sounds as air struggles to pass. Tree roots may intrude older outdoor lines, producing backups that manifest in toilets and lower fixtures. Identifying the dominant cause helps you choose the right method—mechanical clearing for hair and grease, chemical or enzymatic solutions for organic buildup, or professional assessment for structural damage.
Quick diagnostics you can do safely
Before taking tools to the pipe, perform simple checks that reveal the problem without invasive work. Start by running hot water and observing drainage speed in different fixtures to determine if the issue is localized or systemic. Listen for gurgling sounds and check for standing water after flushing toilets or running sinks. Inspect visible traps for signs of leakage or loose connections. If you can access the P-trap beneath a sink, place a bucket underneath, loosen the slip nuts with a wrench, and inspect for debris. Never force fittings beyond their intended tightness. A simple, careful diagnostic saves time and reduces the risk of accidental damage.
How drains work and what to look for
Understanding the basics helps you pick the right approach. A typical P-trap holds water to block sewer gases while allowing wastewater to flow to the main line. If the trap dries out or is blocked by debris, odors and slow drainage can follow. Proper slope of drain pipes is essential for gravity-assisted flow; a slight misalignment can cause standing water and repeated clogs. When diagnosing, note where water backs up first—this points to the downstream section of the line. Always turn off nearby water valves if you need to handle any exposed pipes and protect floors with a mat or towel for any accidental spills.
Safe, effective tools and how to select them
Choose tools that fit the job without overdoing it. A basic plunger creates a strong seal and hydraulic pressure to loosen blockages. A compact drain snake or hand-crank auger reaches into the trap and immediate drain line to dislodge hair and soft debris. For stubborn buildup, enzymatic cleaners can help break down organic material over time without harsh chemicals. Avoid metal tools that might scratch porcelain or damage piping, and never mix chlorine bleach with other cleaners due to hazardous gas production. Having a flashlight, gloves, and a bucket keeps the process clean and safer.
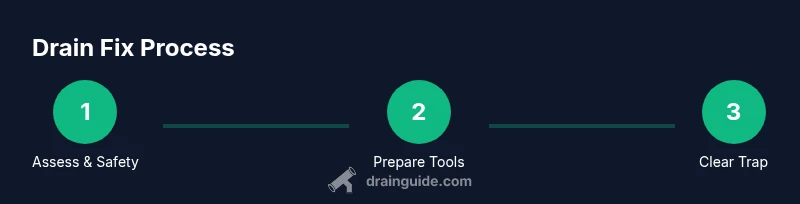
Step-by-step approach to fixing a drain (overview)
This section outlines the logical flow you’ll follow when you’re ready to act. Start with safety and access, then clear the trap, attempt mechanical clearing, and finally test the drain’s flow. If you encounter a stubborn clog, switch from physical methods to a longer-term solution and plan for a professional assessment if needed. Proper sequence minimizes mess and reduces the chance of re-clogging.
Common mistakes to avoid
Rushing through steps can damage seals, traps, or pipes. Don’t over-tighten slip nuts or apply excessive force to remove a trap; this can crack fittings. Avoid using chemical drain cleaners as a first option, especially in homes with septic systems or older pipes, since these chemicals can damage pipe joints and harm beneficial bacteria in septic tanks. Do not pour hot water down a cold PVC line after using a chemical cleaner, as reactions can occur. Taking time to observe, test, and re-test after each action reduces the risk of a costly error.
Maintenance routines to prevent clogs
Proactive maintenance keeps drains flowing smoothly. Flush sinks with hot water or a simple mix of baking soda and hot water monthly to dislodge minor buildup. Use a drain screen to catch hair and food scraps, and dispose of grease in the trash rather than the sink. For households with hard water, consider periodic enzyme-based cleaners that target organic matter without harsh chemicals. Finally, schedule an annual inspection if you notice recurring clogs or slow drainage, since early detection is more cost-effective than major repairs.
Final checklist and when to call a pro
End with a concise, actionable checklist: confirm the area is safe, gather tools, test drainage after each step, and confirm that water runs freely in all affected fixtures. If the clog persists beyond mechanical clearing or involves multiple fixtures, there may be a more extensive blockage or damaged piping. In those cases, Drain Guide recommends consulting a licensed plumber to avoid further damage or wasted effort.
Tools & Materials
- Plunger (cup or flange)(Ensure a tight seal; use a plunger suited to the fixture (sink/shower vs. toilet).)
- Bucket(To catch standing water or debris during trap work.)
- Rubber gloves(Protect hands from dirty water and bacteria.)
- Flashlight(Better visibility when inspecting traps and pipes in dim areas.)
- Drain snake / hand-crank auger(Length depends on fixture; 3-6 ft is common for sinks, longer for toilets.)
- Adjustable wrench(Useful if you need to loosen slip nuts; avoid over-tightening.)
- Towels or rags(Protect floors and catch drips during work.)
- Vinegar and baking soda(Mild, enzyme-friendly cleaners for maintenance; avoid chemical-only approaches.)
Steps
Estimated time: 60-90 minutes
- 1
Assess safety and access
Put on gloves and clear the workspace. Turn off under-sink valves if working near water lines. Inspect the area visually to identify the likely point of obstruction and the trap location.
Tip: Take a photo of connections before disassembly to aid reassembly. - 2
Prepare the trap
Place a bucket under the P-trap. Loosen the slip nuts with an adjustable wrench or by hand, then remove the trap carefully to inspect for debris.
Tip: Wear eye protection; water and debris may spill when trap is removed. - 3
Clear the trap
Remove hair and scale from the trap with gloved hands or a small brush. Rinse the trap with clean water to ensure it’s clear before reassembly.
Tip: If the trap is corroded or cracked, replace rather than reuse it. - 4
Use the drain snake
Insert the snake into the drain opening and rotate to break up the blockage. Feed gradually and pull back to capture debris.
Tip: Avoid forcing the snake too hard; friction can damage pipes. - 5
Flush the line
Run hot water through the drain to clear loosened material. If flow remains slow, repeat the snake or proceed to a secondary area if needed.
Tip: A short baking soda and hot water flush can help with minor buildup. - 6
Reassemble and test
Reconnect the trap, tighten nuts snugly (not overtight), and run water to test drainage. Check for leaks around joints and replace washers if necessary.
Tip: Keep a rag handy to wipe away minor leaks during testing. - 7
Consider maintenance
Implement a routine: monthly hot-water flush, screen the drain, and avoid dumping grease or fibers down the drain.
Tip: Use enzyme cleaners periodically if you have a septic system. - 8
Evaluate next steps
If clog recurs or affects multiple fixtures, there may be a larger blockage or vent issue requiring professional help.
Tip: Document symptoms and attempts to share with a plumber for efficient service.
Got Questions?
What is the quickest way to unclog a sink drain?
Begin with a tight-sealing plunger to build hydraulic pressure, then move to a drain snake if the clog remains. Avoid chemical cleaners as the first line of defense.
Start with a plunger, then a drain snake if needed.
Can chemical drain cleaners be used safely?
Chemical cleaners can damage pipes and septic systems and may be hazardous if misused. Use them only as a last resort and follow the label precisely.
Chemicals should be a last resort and used with caution.
When should I call a plumber?
If multiple fixtures back up, if you hear sewer gases, or if a snake doesn’t clear the blockage after careful attempts, it’s time to consult a licensed plumber.
Call a plumber if multiple fixtures back up or the clog persists.
Is it safe to use a DIY drain snake?
Yes, a drain snake is generally safe when used carefully and correctly. Do not force it through bends or resist stubborn resistance.
A drain snake is usually safe if used carefully.
Why does my drain gurgle after attempting to fix it?
Gurgling often indicates air trapped behind a blockage or a vent issue. If it continues, there may be a more complex problem.
Gurgling usually means air is trapped or a vent issue.
How often should I maintain drains to prevent clogs?
Aim for monthly maintenance: hot-water flushes, screens, and careful disposal. Periodic enzyme cleaners can help with organic buildup in septic systems.
Perform monthly maintenance to prevent clogs.
Watch Video
The Essentials
- Identify the clog origin before acting.
- Start with mechanical methods first (plunger, snake).
- Protect yourself and the environment when using tools.
- Test drainage after each step to confirm progress.
- Maintain drains to prevent future issues.