How to Fix Drain in Sink: A DIY Guide
Learn a practical, step-by-step method to fix a clogged or slow sink drain. This DIY-friendly guide covers traps, plungers, snakes, and prevention tips to keep your drains flowing freely.

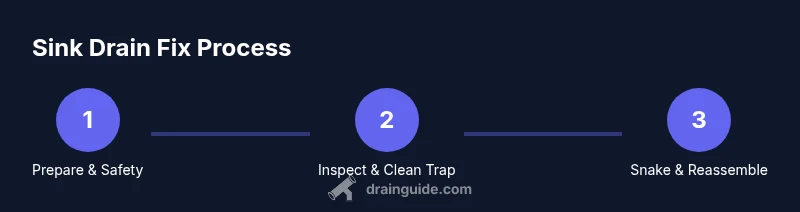
Fixing a sink drain involves inspecting the P-trap, clearing debris, and using a plumbing snake for deeper clogs. Choose mechanical methods first, reserve chemical cleaners, and test the drain after each step. Follow Safety reminders and stop if the drain still won’t clear.
The sink drain: how it works and what goes wrong
Your sink drain is the final path for wastewater from your sink. Water flows through the strainer into the tailpiece, down to the P-trap, and into the house plumbing. Clogs typically form in the P-trap or the horizontal drain line after the trap, where hair, soap scum, grease, and food particles accumulate. Understanding this flow helps you pick the right approach and avoid unnecessary disassembly. Drain Guide suggests starting with mechanical fixes first and reserving chemicals as a last resort to protect pipes and seals.
Diagnosing the problem: slow drain vs complete clog
If water drains slowly, the blockage is partial, often in the tailpiece or trap. A quick test: run water for 15-20 seconds and observe the drainage rate, listening for gurgling or air bubbles. A complete clog stops water entirely; you’ll notice standing water after a few seconds. In both cases, the P-trap is the first component to inspect since it’s the most common choke point. Proper diagnosis saves time and reduces risk of pipe damage.
Safety first: precautions and setup
Before you begin, put on gloves and safety glasses. Place a bucket or basin under the P-trap to catch water. Have towels ready for spills and a flashlight to inspect dark corners. If you’re using chemical cleaners, read the label and ventilate the area. Avoid mixing cleaners with bleach or ammonia, and never mix acids with other chemicals. Drain Guide recommends a cautious, methodical approach to minimize mess and avoid injury.
Step-by-step plan for clearing a sink drain
A clear plan helps you stay organized and reduces repeated trips to the toolbox. The plan below combines trap inspection, mechanical cleaning, and a test run. After each major action, run water to check progress. If you see leaks at any joint, stop and re-tighten with care. This sequence applies to most kitchen and bathroom sinks.
Mechanical fixes you can try first
- Plunging: A standard cup plunger can dislodge small clogs from the drain line. Ensure a tight seal and push-pull steadily.
- Boiling water and dish soap: For grease-based clogs, flush hot water with a squirt of dish soap to loosen fats.
- Baking soda and vinegar: A short, controlled fizz can help break up minor buildup. Rinse with hot water afterward.
- Manual inspection: Wipe down the strainer and tailpiece; clean any debris you see before reassembly.
When and how to use a drain snake
Use a hand auger or drain snake to reach beyond the trap. Insert slowly, rotate to grab hair and gunk, and pull out slowly. Avoid forcing the snake to prevent pipe damage. After use, flush with clean water and inspect the trap for debris. If resistance persists, proceed to deeper cleaning or call a professional.
How to check the P-trap and reassemble properly
Place a bucket under the P-trap, loosen the slip nuts, and remove the trap. Clean the interior, check for cracks, and replace worn washers. Reassemble in the opposite order, making sure all joints are tight but not overtight. Finally, run water to confirm the drain drains smoothly and there are no leaks.
Maintenance to prevent future clogs
Regularly clear the strainer and trap every few months. Avoid pouring grease down the sink; wipe pans with paper towels instead. Use hot water and a small amount of soap weekly to keep the pipes free of residue. If you have a garbage disposal, run cold water while grinding and reset if you notice slow drainage.
Tools & Materials
- bucket or basin(Place under the P-trap to catch water during disassembly.)
- old towels(Protect surfaces and mop up spills.)
- gloves(Protect hands from sharp metal and dirty water.)
- safety glasses(Shield eyes from splashes.)
- plunger (cup plunger)(For initial dislodging of clogs.)
- flashlight(Inspect dark corners and inside the trap.)
- adjustable wrench or pliers(Loosen slip nuts on the P-trap.)
- drain snake/hand auger(Reach deeper clogs beyond the trap.)
- baking soda(Optional gentle cleaner.)
- white vinegar(Optional, helps with minor buildup.)
- dish soap(Use with hot water for grease-based clogs.)
- replacement washers/gaskets(Replace worn parts to prevent leaks.)
Steps
Estimated time: 30-60 minutes
- 1
Prepare the workspace
Put on gloves and safety glasses. Place a bucket under the P-trap and lay towels around the area. This keeps water contained and reduces mess while you work.
Tip: Have a clean, dry surface to place removed trap parts so you don’t lose small components. - 2
Locate the P-trap access
Identify where the trap is under the sink. Take a quick photo of the existing setup before you loosen anything so you can reassemble accurately.
Tip: A photo saves you from guessing during reassembly. - 3
Loosen and remove the P-trap
Loosen the slip nuts with your wrench or pliers and carefully remove the trap. Let the water drain into the bucket. Inspect for cracks or worn washers.
Tip: Keep the bucket in place to catch dirty water as the trap comes loose. - 4
Clean and inspect the trap
Remove debris from the trap interior with a brush. Check gaskets and washers; replace any worn parts to prevent future leaks.
Tip: Soap scum and hair are common culprits; a quick scrub can improve flow. - 5
Snake the drain beyond the trap
Insert the drain snake into the drain line and slowly rotate to catch hair or buildup further down. Retrieve the snake and wipe away debris. Run water to test.
Tip: Avoid forcing the snake; gentle, steady pressure works best. - 6
Reassemble and test the drain
Reconnect the P-trap with tightened slip nuts, ensuring seals are snug but not overtight. Run cold water for several seconds to check for leaks and confirm flow.
Tip: If you see leaks, tighten gradually or replace washers as needed. - 7
Final cleanup and maintenance
Wipe surfaces, store tools, and consider regular maintenance steps to prevent future clogs.
Tip: Schedule routine checks (every 1-3 months) to keep drains clear.
Got Questions?
What is the most common cause of a clogged sink drain?
Hair, soap scum, grease, and food debris are typical culprits. Start with cleaning the P-trap and checking for obvious blockages before moving to deeper fixes.
Hair and soap buildup are the usual culprits. Start with the trap and only move deeper if needed.
Can I fix a clogged sink without removing the P-trap?
Sometimes yes for shallow blockages in the tailpiece. If water still pools after clearing the trap, you’ll likely need to remove the trap or use a snake.
Sometimes you can fix it without removing the trap, but often you’ll need to inspect or clear beyond the trap.
Is it safe to use chemical drain cleaners?
Chemical cleaners can damage pipes and seals if misused. They should be a last resort, and you should follow the product instructions carefully or opt for mechanical methods first.
Chemical cleaners can damage pipes. Use them only if mechanical methods fail and follow the label carefully.
How often should I maintain my sink drain to prevent clogs?
Perform quick maintenance every 1-3 months: clean the strainer, flush with hot water, and inspect the trap for buildup.
Regular maintenance every few months keeps drains flowing smoothly.
When should I call a professional plumber?
If you hear sewage smells, there’s a strong leak, backups, or after attempting fixes the drain still won’t clear, it’s time to call a professional.
If there’s sewage smell or ongoing backups, call a pro.
Watch Video
The Essentials
- Inspect the P-trap first for clogs and leaks
- Use a drain snake for deeper blockages if plunging fails
- Clean and inspect the trap, replace worn washers
- Test the drain thoroughly after each major step
- Prevent future clogs with regular maintenance