How to Remove Hair from Shower Drain: A Step-by-Step Guide
Learn a proven, safe method to remove hair from shower drains, prevent clogs, and keep your bathroom plumbing flowing smoothly with simple tools and clear steps.

With this guide, you will learn how to remove hair from shower drain safely and effectively, without damaging pipes. You only need a few basic tools, some patience, and a plan to prevent future buildup. The steps cover inspection, mechanical removal, rinsing, and simple maintenance to keep your drain flowing freely and reduce the chance of recurring clogs.
Understanding Hair and Clogs in Showers
Hair is one of the most common culprits behind slow-draining showers and unpleasant backups. When strands accumulate, they form a tangled mat that traps soap scum, dirt, and minerals, gradually reducing the pipe’s capacity. The Drain Guide team notes that hair is the leading cause of bathroom drain clogs in many homes, especially in showers where hair sheds consistently during grooming. A basic flow path runs from the drain surface through a strainer or stopper, down a trap, and into the P-trap and main line. If the trap isn’t cleaned regularly, or if the drain opening is oversized, hair can catch on debris and create a stubborn clog. Understanding this process helps you target the right area and choose the most effective removal method. A proactive approach—regular cleaning and screen maintenance—dramatically reduces the chance of a major clog emerging.
Safety and Prep: PPE, Workspace, and Timing
Before you start any hair-removal effort, protect your eyes and skin, sample the work area, and set aside ample time. Wear rubber gloves and eye protection to shield against splashes and hair fibers. Clear the area around the shower and place a towel or liner to catch hair and debris. If you’re working with a long or deep drain, plan for a longer session; hair clogs can wind around elbows and bends in the pipe, making extraction more challenging. Ventilate the space to avoid fumes if you’re using cleaning agents, and keep a bucket handy for collecting water and debris. Establish a safe workflow: inspect first, remove visible hair, then proceed to deeper cleaning if needed. Remember, patience pays off when dealing with hair-clogged drains.
Tools and Methods: What You’ll Use for Hair Removal
To remove hair effectively, you’ll need a mix of mechanical tools and simple household items. A drain snake or zip-it tool helps you grab and pull hair from the drain line. A plunger can dislodge hair clogs from the opening, especially if the blockage isn’t fully entrenched in the trap. A flashlight will assist in spotting hair and debris inside the drain. A bucket, old towels, and a stiff brush can help you collect and clean, while rubber gloves protect your hands from grime and bacteria. Optional but useful are baking soda and white vinegar for occasional flushing to minimize odor and residue. Keeping mesh screens in place after cleaning drastically reduces future hair buildup.
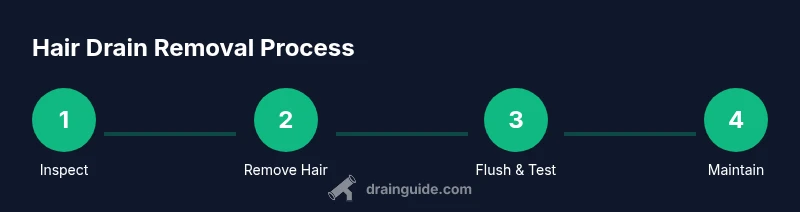
Step-by-Step Overview: A High-Level Roadmap
This section provides a high-level view of the removal process so you know what to expect before you start. Begin with a visual inspection of the drain cover and visible hair. If hair is clinging near the surface, use a gloved hand or a small tool to detach it. Next, employ a drain snake or zip-it to access deeper clumps and gently pull them out in sections. After removing the majority of hair, flush the drain with hot water to move remaining debris toward the trap. Finally, reassemble the cover and test the drain by running water to confirm normal flow. If fouling persists, it may be necessary to repeat the steps or switch to a different tool.
Flushing and Verifying Drain Flow: Ensure the Path is Clear
Flushing is a critical step after hair removal. Run hot water for several minutes to wash away residual hair and soap scum. If your plumbing allows, use a cup of baking soda followed by vinegar to help breaking grime and deodorize the drain naturally. Observe the flow rate: a well-cleared drain should empty within a few seconds after water is released. If the flow remains slow, repeat the mechanical removal steps or check the P-trap for any trapped hair. In some cases, running a high-pressure spray or using a plunger again can finalize the flush. Document the results and plan for routine maintenance.
Maintenance Tips to Prevent Future Hair Clogs
Prevention is easier than cure. Install a fine-mesh screen or hair catcher over the drain to physically trap hairs before they enter the pipe. Clean the screen weekly during high-hair seasons (for example, after shaving or intense hair washing). Schedule a monthly flush with hot water to move along soap scum and minor buildup. If you notice slow drainage recurring weekly, investigate the drain path and consider trimming longer hair or adjusting grooming routines near the drain. Small investments in routine maintenance save time and avoid bigger clogs later.
Troubleshooting When Hair Won’t Budge: Next Steps
If you’ve attempted the removal steps and the drain remains slow, the clog may be more stubborn or located further down the line. Revisit the snake approach, ensuring you’ve extended the tool into the pipe and rotated to anchor the fibers. Avoid forcing the tool, which can push debris further into the system or damage the pipe. If you cannot clear the clog after multiple attempts, it’s prudent to pause and contact a licensed plumber. Persistent clogs can indicate more serious drain or vent problems that require professional assessment.
Quick Post-Cleaning Checks: Final Confirmation
After you complete the removal and flushing steps, perform a few checks to confirm a successful clean. Reinstall the drain cover securely, run warm water for 2–3 minutes, and observe the rate of clearance. If the water clears quickly and consistently, you’ve likely removed the hair clog effectively. If not, consider repeating the process with a different tool or method, or move to professional support. Regular maintenance and the right tools reduce the likelihood of future clogs and minimize downtime in your bathroom routines.
Tools & Materials
- Rubber gloves(Non-slip, waterproof; choose long gloves to protect forearms)
- Drain snake / hair removing tool(Manual auger or zip-it tool for hair removal)
- Plunger (cup or flange)(Use the appropriate size for your drain)
- Bucket(To collect hair and debris during removal)
- Old toothbrush or stiff brush(For scrubbing and loosening buildup)
- Flashlight(Inspect inside the drain cavity)
- Vinegar and baking soda(Optional for maintenance flushing)
- Goggles or eye protection(Protect eyes from splashes)
Steps
Estimated time: 60-90 minutes
- 1
Prepare the area and gear
Put on gloves and goggles. Clear the area, remove any obvious debris, and lay a towel to catch spills. This prevents slips and keeps your workspace clean.
Tip: Wear eye protection if using a drain auger near your face - 2
Inspect the drain opening
Remove the drain cover or stopper. Look for visible hair clumps and collect them with fingers or a tool. This helps you target the right area and avoids half-measures.
Tip: Use good lighting to spot hair deep in the opening - 3
Loosen hair with a tool
Gently insert the drain snake or zip-it and rotate to grab hair. Work hair in sections, pulling upward slowly to minimize splashback.
Tip: Do not force the tool; if resistance persists, pause and switch technique - 4
Flush the drain
After removing hair, rinse with hot water or a strong stream. This moves debris toward the trap and clears the liner path.
Tip: If possible, run hot water for 1-2 minutes to finish the flush - 5
Reassemble and test
Replace the stopper/cover, run the faucet to test drainage. Check for slow flow. If still slow, repeat steps or try a different method.
Tip: Avoid over-tightening the drain cover
Got Questions?
What is the most effective tool for removing hair from a shower drain?
A drain snake or zip-it is often most effective for hair; follow with a rinse. Pair with a plunger if needed.
The best tool is usually a drain snake or zip-it, followed by a rinse.
Can I prevent hair clogs without professional help?
Yes. Use a fine-mesh screen, clean hair regularly, and flush with hot water and baking soda routine.
Yes. Use a mesh screen and regular flushes to prevent clogs.
Are chemical drain cleaners safe for hair clogs?
Chemical cleaners can damage pipes and often don't remove hair completely. Mechanical methods are safer and usually more effective.
No, chemical cleaners can harm pipes; mechanical removal is safer.
How long does it typically take to clear a hair clog?
DIY hair clog removal typically takes 30-60 minutes, depending on clog size and access.
Typically 30 to 60 minutes.
What if water remains slow after cleaning?
Repeat the removal steps and flush again; if still slow, check the P-trap and consider calling a pro.
If still slow, repeat the process or consult a plumber.
Should I remove the P-trap to check for hair?
Only if you’re comfortable; unplug and clean the trap, then reassemble carefully.
Only if you're comfortable removing the P-trap.
Watch Video
The Essentials
- Identify hair as a leading cause of shower clogs.
- Use mechanical methods first (snake/zip-it) before chemicals.
- Inspect, remove, and flush for clear drainage.
- Prevent future clogs with screens and regular maintenance.