Broken Drain Pipe Under Basement Floor: Urgent Troubleshooting Guide
Urgent guide for homeowners tackling a broken drain pipe under the basement floor. Learn safety steps, diagnostic flow, and repair options to prevent water damage and mold. Contains a step-by-step plan, visuals, and expert tips from Drain Guide.

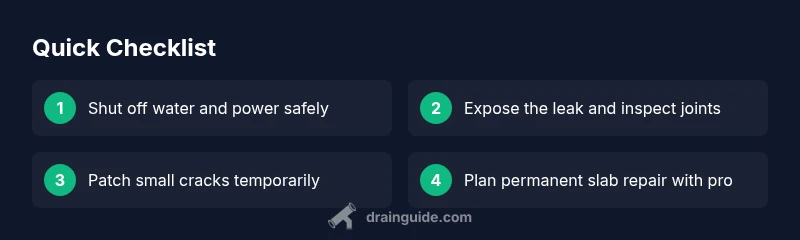
A broken drain pipe under basement floor is usually caused by a fractured slab or shifting foundations, leading to water pooling and dampness. Immediately shut off the water supply to the affected area and, if safe, cut power to nearby outlets. Next, identify obvious leaks and plan a repair path; for most slab leaks, professional slab leak repair is required, though temporary patches can slow a drip while you prepare.
Understanding the scope of a broken drain pipe under basement floor
When a drain pipe runs beneath the basement floor, a small crack or joint failure can escalate quickly. The keyword here is urgency: a broken drain pipe under basement floor can lead to ongoing moisture, mold growth, and structural damage if left untreated. The most common signals are wet concrete patches, visible dampness on the slab, a musty odor, or slight water seepage around basement walls after heavy rain. Early detection matters because slab leaks can involve buried lines that are difficult to access. The Drain Guide team notes that proactive inspection and safe containment are essential first steps. Regular basement maintenance and an annual moisture check help prevent hidden leaks from becoming costly problems.
In many homes, the leak originates where the pipe transitions from the main line to localized branches. Over time, corrosion, ground movement, or poor backfill can cause fractures. If you notice sulfide odors or unusual humidity, treat it as a potential plumbing emergency and start a systematic check of nearby fixtures, including the laundry tub, floor drain, and condensation lines. Clear documentation of any active leaks supports faster repairs and insurance claims if needed.
Immediate safety steps and quick checks
A broken drain pipe under basement floor demands immediate attention to safety and containment. Start with the simplest, lowest-risk actions first:
- Shut off the water supply to the affected area to prevent further leakage. If you can’t locate the shut-off valve quickly, a whole-house shut-off will protect the entire system.
- If moisture is present, switch off electrical power in the basement area to reduce shock risk. Do not touch wet outlets or appliances.
- Remove valuables and place tarps or buckets to contain runoff. Keep children and pets away from the damp area.
- Document the scene with photos and notes. This helps when discussing repairs with a plumber or a contractor.
Next, perform non-invasive checks:
- Look for obvious cracks on exposed pipes and around the slab edge where the pipe enters the basement wall.
- Listen for gurgling sounds in nearby drains that could indicate air gaps or backflow.
- Check for slow drains elsewhere in the basement to determine whether the issue is localized or part of a broader system problem.
Tools, safety gear, and prep work
Preparing the right tools and personal safety gear reduces risk and speeds up the repair process. Gather:
- Personal protective equipment: rubber gloves, goggles, and a dust mask. If you’re handling concrete debris, wear a hard hat and sturdy gloves.
- Basic plumbing tools: adjustable wrench, plungers for backflow checks, a pipe cutter or reciprocating saw for precise cuts, and a manual or power auger if you suspect a main line clog.
- Temporary containment: buckets, absorbent cloths, plastic sheeting, and a durable tarp to protect stored items.
- Repair materials: epoxy putty for small seal patches, concrete patch or hydraulic cement for slab repair, rubber couplers or clamps for temporary joint sealing, and replacement pipe segments if needed.
Always verify that the work area has good ventilation. If moisture is heavy or you encounter sewer gas, evacuate and call a pro. Drain Guide emphasizes that slab leaks and pipe repairs beneath concrete require careful planning and proper safety protocols.
Common failure modes in basement-floor drains and how they happen
Understanding how a broken drain pipe under basement floor occurs helps you choose the right repair. Common failure modes include:
- Cracked or corroded pipe sections from long-term wear, especially in older homes with cast iron or clay sewer lines.
- Joint failures where fittings meet the slab, allowing seepage into the concrete.
- Sabotage or damage from root intrusion that gradually crushes smaller pipes beneath the slab.
- Backfill settlement after construction that stresses the pipe and creates voids or misalignment.
- Ground movement due to temperature changes or shifting foundations, which can stress the pipe over time.
Each mode has distinct repair approaches, and diagnosing the exact cause requires careful inspection, sometimes including pressure testing and camera inspection by a licensed plumber.
Temporary remedies and field tests you can perform safely
While permanent repairs require a professional, you can deploy temporary measures to reduce damage:
- Apply hydraulic cement over visible cracks from the surface after cleaning and drying the area. This can slow down leaks, but it is not a fix for a fractured pipe beneath the slab.
- Use epoxy putty at accessible joints to seal minor leaks. Cure time and compatibility with your pipe material must be checked.
- Install a temporary drain sleeve or coupling if you can access a damaged section without breaking concrete.
- Perform a gentle water test by running a limited amount of water through nearby fixtures and watching for changes in moisture levels.
- Maintain good ventilation to minimize mold risk while preparing for a permanent repair.
Note that these steps are stopgap measures. A slab-leak repair requires a more robust solution and professional oversight, as advised by Drain Guide.
Long-term repair options and when to hire a professional
Permanent repair depends on the root cause and the pipe type. Options include:
- Epoxy or polyurethane lining to seal cracks from inside the pipe when access is limited but the pipe wall is still structurally sound.
- Replacement of a damaged section with modern piping, possibly using sleeving or trenchless techniques if feasible.
- Slab excavation and replacement of the affected pipe segment, which is more invasive but often necessary for extensive cracks or root intrusion.
- Concrete repair and waterproofing to restore floor integrity and prevent future moisture intrusion.
Hiring a licensed plumber or a drain contractor is strongly recommended for slab-leak scenarios. They can perform camera inspection, pressure tests, and structural assessments to determine the safest, most durable fix. Homeowners should also consider foundation inspection if leaks appear after ground movement.
Steps
Estimated time: 4-6 hours
- 1
Secure the area and shut off utilities
Turn off the main water supply to prevent further leakage and disconnect any electrical devices in the damp area. Use a moisture meter to assess extent and wear protective gear before touching any concrete. This initial safety check keeps you or family from shock or electrocution.
Tip: Never work in standing water near electrical outlets. - 2
Locate the leak source
Inspect visible pipes and the slab edge for cracks. If you can access a cleanout or a visible joint from the basement, use a flashlight and a mirror to trace moisture along the line. Document findings with photos.
Tip: A camera inspection from a licensed pro may be needed if the leak is hidden. - 3
Outline repair plan
Decide between a temporary patch and a permanent repair. If you expect slab access, plan for concrete cutting and careful pipe replacement. Consider whether trenchless methods are feasible in your space.
Tip: Temporary fixes buy time but do not replace structural issues. - 4
Prepare the repair area
Clear debris, mark the work zone, and set up containment. Dry the surface as much as possible to ensure patch materials cure properly. Gather epoxy putty, hydraulic cement, or sleeve repair materials as appropriate.
Tip: Ventilate well to reduce humidity during patch curing. - 5
Apply patch or replace section
If patching, apply epoxy or cement patch per manufacturer directions. If replacing, carefully cut and remove the damaged segment and install a new pipe or sleeve, ensuring tight joints.
Tip: For replacement, avoid creating new leaks by ensuring clean, deburred pipe ends. - 6
Test the system
Reintroduce water slowly to observe for leaks. Place towels and a bucket to catch drips. Check the repaired area over several hours; look for new moisture or stains.
Tip: Conduct a test in stages to isolate the leak if it persists. - 7
Repair concrete and restore floor
If you exposed concrete, rebuild the slab edge with cement and proper waterproofing. Allow adequate curing time before heavy use and recheck for moisture after backfill.
Tip: Use a waterproof coating on concrete surfaces to reduce future moisture migration. - 8
Monitor and plan prevention
Set up a moisture log and inspect annually. Consider trench drains, foundation waterproofing, or improved drainage to prevent future slab leaks.
Tip: Addressing foundation movement early saves expensive repairs later. - 9
Know when to call a professional
If you encounter gas odors, sewage backup, complex slab access, or structural concerns, contact a licensed plumber or drainage contractor immediately.
Tip: Early professional input reduces risk and ensures code-compliant work.
Diagnosis: Water pooling or damp concrete around a basement floor drain after rainfall or use of nearby fixtures
Possible Causes
- highCracked or corroded drain pipe under slab
- mediumLoose joints or failed couplings
- lowBackflow from sewer line due to clog or pressure
- lowPoor backfill or foundation movement causing pipe stress
Fixes
- easyShut off water supply and perform a controlled test to confirm leak source
- easyExpose the damaged pipe segment and inspect joints for cracks or looseness
- easyApply epoxy or cement patch to exposed cracks and use a temporary clamp for joints
- mediumReplace damaged pipe section or sleeve the line if cracks are extensive
- hardCoordinate with a licensed plumber for camera inspection and slab repair
Got Questions?
What causes a broken drain pipe under a basement floor?
Common causes include slab settling, pipe corrosion, and damage from tree roots or improper backfill. Aging pipes in older homes are particularly prone to cracking.
Typically, slab leaks come from aging pipes, settlement, or root intrusion. Regular checks help catch these early.
Is it safe to attempt a repair myself?
Simple surface patches may slow a small leak, but most slab leaks require professional equipment and access. Do not attempt extensive repairs under the slab without proper training.
Extensive slab repairs usually require a licensed plumber.
Will epoxy patches fix a cracked pipe under concrete?
Epoxy can seal small, accessible cracks, but it is not a guaranteed long-term fix for a breached slab pipe. A professional assessment is advised.
Epoxy patches sometimes work, but deeper slab issues need pro evaluation.
How long does a typical slab-leak repair take?
Duration varies by method; a patch might take a few hours, while full slab replacement or trenchless repair can take a day or more depending on access and curing times.
Smaller patches are quick; full slab work takes longer.
What are signs a basement leak is getting worse?
New damp patches, increased musty odors, warped flooring, and higher humidity levels signal a growing issue. Monitor moisture and address promptly.
Watch for growing dampness and musty smells as leaks worsen.
Watch Video
The Essentials
- Identify leak sources quickly and shut off utilities.
- Differentiate patching vs. full-slab repair to choose the right approach.
- Use professional services for slab leaks and foundation concerns.
- Document problems and monitor after repair to prevent recurrence.
- Invest in preventive waterproofing to protect the basement long-term.