Broken Drain Pipe: Quick Home Troubleshooting Guide
A practical, step-by-step guide to diagnosing and safely fixing a broken drain pipe, with quick checks, safety notes, DIY options, and guidance on when to hire a professional.

Most likely a broken drain pipe or serious blockage is behind the problem. Signs include backups, wet walls, gurgling, or foul odors. If you suspect a leak, stop using water, shut off the main supply if safe, and call a licensed plumber immediately. Temporary containment and early diagnosis save material costs and reduce risk.
Understanding the problem and urgency
A broken drain pipe can unleash water where it shouldn’t, causing rapid damage to floors, walls, and foundations. In many homes the pipes run behind walls or under slabs, so a leak may not be obvious until you notice damp spots or a sudden sewage odor. Drain Guide's experience shows that early recognition matters: the sooner you identify a broken drain pipe, the more you can limit water waste, mold growth, and costly repairs. If you see water appearing where it doesn’t belong, or hear unexpected gurgling from drains, treat it as urgent and begin safety steps immediately. This guide helps distinguish between a simple clog and a more dangerous pipe failure, so you can act decisively.
Signs and what they indicate
Look for backups in multiple fixtures, damp patches on walls or ceilings, and a strong sewer smell. Gurgling sounds when flushing or running water can signal air trapped in a cracked line. Visible leaks near bases of toilets or under sinks are clear indicators, but be aware that concealed cracks behind drywall can escape detection for weeks. Drain failures are more common in homes with older copper or galvanized pipes, shifting foundations, or intrusive tree roots. If you notice any combination of these symptoms, treat it as a likely broken drain pipe and start a careful inspection.
Safety first: immediate actions you can take
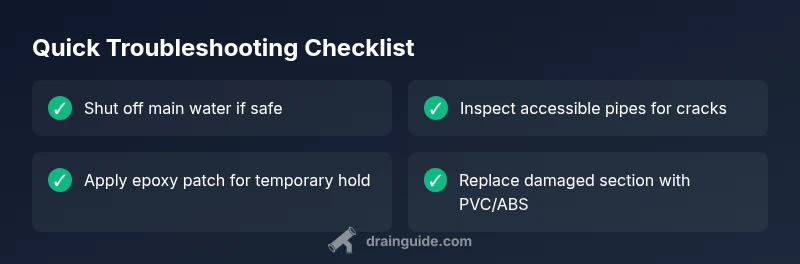
Priority safety steps come before any repair work. If you see standing water near electrical outlets or appliances, shut off the electricity to that area and contact a licensed electrician. Wear rubber-soled shoes, gloves, and eye protection before touching damp surfaces. Minimize water use and avoid running drains that could overflow into living spaces. Place towels or a basin to catch drips and maintain a clear work zone so you or a plumber can access the pipe safely. Finally, locate the main water shutoff valve so you can turn off water quickly if the leak worsens. Drain Guide emphasizes cautious, controlled actions over panic.
How we diagnose a broken drain pipe
Diagnosis starts with a careful visual sweep of accessible areas, such as basements, crawl spaces, or under sinks. Check for corrosion or cracks along exposed piping, look for water stains, and test by briefly running water in nonessential fixtures while watching for damp spots. If pipes are hidden behind walls, a professional may perform a pressure test or camera inspection to pinpoint the exact location of the crack. Odors, mold, and high humidity are red flags that require prompt action. A failed trap seal or a clogged line can mimic a broken pipe, so verify the source before major repairs.
Do-it-yourself options you can safely attempt
If you are comfortable and the area is accessible, you can perform a dry, limited repair to buy time. Step 1: shut off the main water supply and drain the system to reduce pressure. Step 2: dry the area and remove any debris around the leak. Step 3: apply a temporary epoxy putty or pipe sealant to cover a small crack, following the product’s instructions. Step 4: for a longer-term fix, replace the damaged section with a properly sized PVC/ABS segment using appropriate couplings and solvent cement. Step 5: test by slowly restoring water and monitoring for leaks. If the leak persists after a temporary patch, stop and contact a professional plumber; DIY fixes may not withstand pressure in older lines.
Long-term prevention and maintenance
To reduce the risk of future breaks, schedule periodic inspections of exposed pipes, replace aging sections with modern materials, and prevent root intrusion by trimming trees near the line. Insulate outdoor or crawl-space pipes to prevent freezing damage. Use a drain-safe cleaner sparingly and avoid chemical solvents that can corrode metal pipes. Keep a basic maintenance kit on hand and address minor leaks promptly. Drain Guide’s approach combines prompt action, practical DIY steps when safe, and professional follow-up to protect your home from water damage.
Steps
Estimated time: 60-120 minutes
- 1
Prioritize safety and shut off water
Locate and shut off the main water valve to stop any more water from entering the system. If you suspect electrical hazards, switch off power to affected areas and avoid wet areas. Confirm there is a safe dry path for access before proceeding.
Tip: Know your main shutoff location before emergencies strike. - 2
Identify the leak source
Check accessible pipes under sinks, basements, and crawl spaces for cracks, corrosion, or damp stains. If pipes are hidden, consider a temporary external inspection and note any signs around the area. Do not attempt to force panels or walls to see behind them.
Tip: Use a flashlight and a mirror to inspect tight spots without forcing any panels. - 3
Choose a repair path
Decide between a temporary patch (epoxy or sealant) and a permanent replacement with PVC/ABS. If you lack the tools or the area is not easily accessible, plan for a professional repair.
Tip: Temporary fixes buy time but are not substitutes for proper piping. - 4
Prepare and fit replacement material
Measure the damaged section precisely, cut a clean replacement length, and deburr edges. Dry-fit couplings to ensure alignment before applying cement or adhesive.
Tip: Dry-fit first to avoid surprises during final assembly. - 5
Install and secure the new section
Connect the new pipe with appropriate couplings, apply solvent cement per product instructions, and hold for the recommended set time. Wipe away excess cement and ensure joints are clean and straight.
Tip: Follow manufacturer instructions for cement cure times. - 6
Test and monitor
Slowly restore water and watch all joints for leaks. Look for drips, damp patches, or discoloration over the next 24 hours. If anything shows signs of leaking, shut off water again and reassess.
Tip: Keep towels handy and inspect after a short test run.
Diagnosis: Multiple fixtures backing up, damp areas, and a strong sewer odor after heavy use or rainfall
Possible Causes
- highBroken drain pipe due to corrosion or physical damage
- mediumTree roots invading sewer/drain line
- lowSewer line blockage upstream
Fixes
- easyShut off water supply and avoid using the affected area to prevent further damage
- mediumLocate damaged section and prepare for replacement (cut back, dry, and clean)
- easyApply temporary epoxy sealant for a short-term patch when access is limited
- hardInstall new PVC/ABS segment with proper couplings and cement for a permanent repair
Got Questions?
What exactly is a broken drain pipe and how can I tell?
A broken drain pipe means a crack, split, or rupture in the drain line that allows water to escape. Look for backups, wet spots, and sewer odors as clear indicators. Sometimes the leak is hidden behind walls, requiring professional tools to confirm.
A broken drain pipe is a crack or rupture in the line that leaks water. Look for backups, damp spots, and odors; some leaks need professional tools to confirm.
Can I repair a broken drain pipe myself?
Minor cracks or leaks in accessible sections can sometimes be patched temporarily with epoxy putty or sealants. Most cases, especially in concealed or damaged sections, require a professional replacement using proper pipe materials and fittings.
Some small, accessible leaks can be patched temporarily, but most repairs require a professional replacement.
What immediate safety steps should I take?
Shut off the main water supply if you can do so safely, avoid using affected drains, and keep electronics away from damp areas. Wear protective gear and ventilate the space to reduce mold risk while you assess.
Shut off the water if safe, avoid using the area, wear protection, and ventilate to reduce mold risk.
How long does a repair typically take?
A basic temporary patch can take less than an hour, but full replacement and re-testing usually requires a few hours and sometimes a day depending on access and pipe location.
A quick patch can be done in under an hour, while full replacement may take several hours.
Will a broken drain pipe cause sewer gas exposure?
If the sewer line is compromised, sewer gases can enter living spaces. Evacuate if you smell strong gas-like odors and call a plumber promptly for a proper seal and repair.
Yes, compromised lines can allow sewer gases; evacuate and call a plumber.
Watch Video
The Essentials
- Act quickly to contain leaks and minimize damage
- Identify if roots or corrosion are the root cause
- Temporary patches are not a substitute for proper repair
- Professional inspection is recommended to prevent recurrence