How Can Drain Piping Damage Be Detected? A Practical Homeowner's Guide
Urgent, practical steps to detect drain piping damage in your home, with a diagnostic flow, non-invasive tests, and when to hire a pro. Learn signs, tools, and steps to protect your home in 2026.

Drain piping damage is most often spotted through a mix of visible signs, rising water bills, and unusual sounds. Start with easy checks: damp spots, slow drainage, gurgling, and increased water use. If leaks appear, shut off water to limit damage and contact a licensed plumber for a precise diagnosis. Keep notes of symptoms and affected areas to speed up assessment in 2026.
How can drain piping damage be detected
If you are wondering how can drain piping damage be detected, start with simple, non-invasive checks that you can perform without tearing out walls. Look for damp patches along walls or under sinks, listen for unusual noises like banging or gurgling, and monitor your water bill for unexplained spikes. Early signs often point to loose joints, corrosion, or small leaks that grow over time. Drain Guide recommends documenting every symptom and scheduling a professional assessment for hidden or complex damage in 2026.
Common observable signs of drain piping damage
Many homeowners notice slow drainage, frequent clogs, or water pooling around fixtures. Patches on ceilings or walls, a musty odor, or wet carpet can indicate leaks behind walls. Gurgling sounds when water flows, or a noticeable drop in water pressure, are red flags. If you observe these, prioritize non-invasive checks and avoid using aggressive chemical cleaners that can degrade pipes. Drain Guide suggests recording times, locations, and water usage to help diagnose the issue and plan next steps in 2026.
Safe, non-invasive detection methods you can start today
First, perform a dye test by adding food coloring to a toilet tank or sink trap and watching for color appearing in other fixtures. A pressure test using a capped drain and a gauge can reveal leaks in supply lines. A hand-held moisture meter can pinpoint damp spots. For sewer line concerns, a camera inspection by a professional provides definitive evidence without major disruption. Use these methods to narrow down the leak source before any invasive work.
Tools and steps you’ll need for basic inspection
Keep a flashlight, moisture meter, bucket, towels, and a notebook handy. Remove accessible access panels carefully to inspect joints, traps, and P-traps for leaks. Wipe surfaces dry to observe fresh moisture and avoid false positives caused by condensation. Take photos before and after testing to track changes over time, which helps a plumber or inspector interpret results quickly in 2026.
Diagnostic flow overview: symptom → diagnosis → solution
Start with the most obvious symptoms (leaks, damp patches, gurgling). Narrow down the location by checking nearby fixtures and the main clean-out. If evidence points to a specific area, perform targeted tests and consider camera inspection for hidden lines. Depending on findings, options range from sealing minor leaks to replacing damaged sections, or pursuing buried-line solutions with a professional.
Step-by-step: quick checks to plan the repair
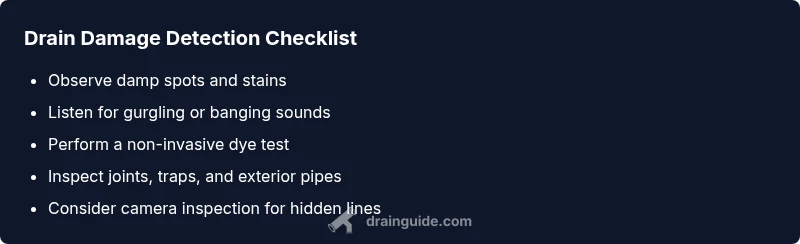
- Note the symptom and affected area. 2) Check all accessible joints and traps for moisture. 3) Conduct a dye test to trace leaks. 4) Inspect the exterior piping for corrosion or cracks. 5) Decide on DIY sealing versus professional replacement. 6) Schedule a follow-up to verify the repair solved the issue. This flow helps prioritize safety and clarity before any major work.
Prevention and maintenance to extend pipe life
Implement a seasonal inspection routine, replace aging joints, and insulate exposed pipes to prevent freezing. Avoid pouring grease or harsh chemicals down drains; use enzyme cleaners or mechanical snakes instead. Keep an up-to-date map of your plumbing and invest in a camera inspection every few years to catch issues early. If you suspect buried damage, call a pro promptly to avoid costly failures in 2026.
Steps
Estimated time: 2-3 hours
- 1
Identify symptoms and affected areas
Note where moisture appears and which fixtures show symptoms. Create a simple map of rooms and connections to guide testing and prevent blind spots. This step sets the scope for your diagnosis.
Tip: Document with timestamps and photos for each symptom. - 2
Check accessible joints and traps
Inspect all reachable joints, traps, and seals for moisture or corrosion. Tighten fittings if safe and accessible, and note any that require replacement.
Tip: Do not overtighten plastic fittings; use wrench gently. - 3
Conduct a dye test
Introduce a safe dye into a suspect fixture and observe whether color appears elsewhere. This helps localize leaks without digging.
Tip: Run tests one fixture at a time for clear results. - 4
Test piping with pressure or camera inspection
If dye tests are inconclusive, perform a pressure test on capped sections or schedule a camera inspection to view inside lines.
Tip: Pressure tests should be performed with the water off and according to local codes. - 5
Evaluate external pipes and main lines
Check visible exterior piping for cracks, corrosion, or frost damage. Exterior issues can indicate deeper problems even if interior pipes seem fine.
Tip: Look for wet spots after rain and in freezing conditions. - 6
Decide on DIY sealing vs professional repair
Small leaks may be DIY-able with sealant or clamps; more complex or buried leaks require a licensed plumber.
Tip: Avoid delaying large leaks; water damage escalates quickly. - 7
Plan follow-up and verification
After repair, re-test the area and monitor water usage to ensure the issue is resolved. Schedule periodic checks to prevent recurrence.
Tip: Keep a maintenance calendar and set reminders.
Diagnosis: Room or fixture shows damp spots, gurgling sounds, slow draining, or unexpected water usage.
Possible Causes
- highCorrosion or pinhole leaks in metal pipes
- highLoose joints or failed seals
- mediumTree roots invading sewer/main lines
- lowPipe freezing or frost damage
Fixes
- easyTighten or replace loose joints and seals
- easyApply epoxy or patch leaks on accessible sections
- mediumReplace damaged pipe sections or fittings
- hardCommission a camera inspection and repair plan for buried lines
Got Questions?
What are the most common signs of drain piping damage?
Look for slow drainage, gurgling, damp patches, musty odor, and unexpected spikes in water bills. These signs often indicate leaks or compromised joints.
Common signs include slow drainage, damp patches, and gurgling noises.
Can I detect pipe damage without invasive work?
Yes. Non-invasive checks like dye tests, pressure tests, and camera inspections by a professional can locate leaks without breaking walls.
Yes, start with dye tests and camera inspections to locate leaks without invasive work.
What tools do I need for DIY detection?
You’ll need a flashlight, moisture meter, dye, basic hand tools, and a notebook to record findings. A home camera can help document visible pipe damage.
Basic tools and a notebook help you document findings.
When should I call a professional?
Call a professional if leaks persist, you suspect buried or main lines, or you cannot locate the source safely. Professionals can perform camera inspections and provide repair plans.
Call a pro if the source is hidden or leaks persist.
Are chemical drain cleaners safe for detecting problems?
Chemical cleaners are not reliable for detection and can damage pipes. Use non-chemical tests first and consult a pro for any repair needs.
Chemicals aren’t reliable for detecting damage and can be harmful.
Watch Video
The Essentials
- Start with non-invasive checks first.
- Document every symptom and area affected.
- Use dye tests to trace leaks before opening walls.
- Call a professional for buried or complex damage.