Install Channel Drain: A Complete DIY Guide
Learn how to install channel drain with a clear, step-by-step approach. This guide covers planning, trenching, base preparation, sealing, testing, and maintenance for a reliable, leak-free installation.

Goal: You will be able to install channel drain in a residential setting, from layout through testing. This guide covers planning, trenching, base preparation, pipe connections, sealing, and final testing. You’ll know which tools and safety gear to use and how to verify a leak-free installation. According to Drain Guide, careful prep and correct sealing are key to long-lasting performance.
Overview: What is a channel drain and why install?
Channel drains are long, low-profile drainage channels designed to collect surface water and channel it away from areas like driveways, patios, and showers. A typical channel drain consists of a long trough with a grate on top and an outlet that ties into your home's stormwater or sewer line. They offer a high flow capacity, a clean aesthetic, and the ability to handle heavy downpours without creating puddles or slick surfaces. When you install channel drain, you gain greater control over runoff, protect foundations, and reduce safety hazards from standing water. According to Drain Guide, a well-planned installation not only diverts water efficiently but also minimizes maintenance needs over time by choosing the right materials and proper sealing. For homeowners, this means fewer emergencies after storms and a more resilient exterior.
Planning your installation: site assessment and code considerations
Before you touch a tool, map the area you intend to drain and verify local building codes. Consider whether the channel drain will serve a driveway, a walk path, a shower base, or a patio. Measure the length of the run and determine where the outlet will discharge, ensuring you won’t drain onto neighboring property or onto a public sidewalk. Check for underground utilities in the footprint using local call-before-you-dig services. Drain Guide analysis emphasizes following code requirements, maintaining a safe installation zone, and choosing a channel with a grate that matches traffic expectations. Understanding whether permits are required, and whether any homeowners association rules apply, will save time and avoid rework later. In addition, plan for freezing conditions in colder climates and choose materials rated for temperature fluctuations. A thoughtful layout will also minimize breakage risk when trenching and pouring a base.
Design options: types of channel drains and configurations
Channel drains come in various configurations, materials, and grate styles. Common materials include polymer, steel, and aluminum, each offering different strength, corrosion resistance, and cost profiles. The width and depth of the channel determine how much water can be conveyed and how high the load rating must be for your application. Grates vary from open-slot to slotted and decorative designs; some are ADA-compliant and easy to remove for cleaning. Consider whether you need end caps, outlet adapters, or a backwater valve to prevent reverse flow during heavy rain. If you install channel drain in a residential setting, select a system compatible with your existing drain line and surface finish. Drain Guide recommendations highlight matching the channel’s intake size with the downstream pipe, ensuring smooth transitions and minimal headloss. A well-chosen channel drain reduces maintenance and keeps surfaces safe for foot traffic and vehicles.
Sizing and choosing the right channel drain
Sizing a channel drain involves aligning the run length, cross-sectional area, and outlet capacity with expected rainfall and surface area. A larger system may be necessary for expansive driveways or pool decks, while smaller installations suit showers or planters. Look for channels with sturdy end caps and secure grates to prevent tripping hazards. Always verify compatibility with local codes and your home’s existing drainage infrastructure. Drain Guide analysis notes that selecting the correct size and slope helps minimize clogs and ensures efficient water conveyance. When in doubt, err on the side of a slightly larger system to avoid undersizing the drain, which can lead to frequent clogs and poor performance over time.
Preparing the site and trench layout
The installation area should be prepared with a stable bed and a slight slope to guide water toward the outlet. Clear debris, level the trench, and verify that the trench depth accommodates the base material plus the channel drain height. If you’re pouring a concrete bed, create a form to keep the pour even and consistent. A sand bed can also be used for bedding your channel drain, followed by compacted fill around the sides. Ensure the trench path is straight and that the outlet aligns with the existing drainage line. Drain Guide guidance highlights the importance of a solid base to prevent settlement and misalignment after installation.
Installation sequence: base preparation to grating
Begin by dry-fitting the channel drain in the trench to confirm fit. Install the base bed—sand or concrete—and lightly compact to create a stable platform. Connect the outlet to the existing drainage line with appropriate adapters, ensuring a watertight seal. Place the channel into the trench, check for level and alignment, and secure it in place with temporary supports if needed. Seal joints between sections with compatible sealant or hydraulic cement, depending on the system design. Install the grate and secure it with the provided hardware, ensuring it sits flush with the surface for safe foot traffic. Drain Guide recommends verifying alignment before final pours and ensuring all joints are sealed to prevent leaks.
Sealing, testing, and finishing touches
Seal all joints and transitions with the recommended sealant, then pour or backfill around the channel to restore surface height. Allow any concrete or bedding material to cure fully before applying traffic or fixtures. Conduct a test by slowly running water across the surface to observe flow through the channel and provider outlets. Look for leaks at joints, settling, or movement and address quickly. Finish the surface with pavement, tile, or decorative concrete to match the surrounding area. Regular checks after installation help detect early signs of wear or movement and allow timely maintenance.
Maintenance and common issues
Routine maintenance includes removing debris from the grate, rinsing the channel, and inspecting for cracks or settlement. Clogs typically form at the grate or inside the trench where leaves and sediment accumulate. If you notice slow drainage or standing water, you may need to clear the grate, clean the interior with a drain snake or flexible brush, and reseal joints if needed. Seasonal checks are important in areas with heavy leaf litter or seasonal storms. The Drain Guide team advises homeowners to document the installation and keep spare parts on hand for quick repairs. Staying proactive with maintenance will extend the life of the installation and reduce costly repairs later.
Authority sources and further reading
For code and safety references, consult authoritative sources that cover drainage system design, soil conditions, and building safety. Useful references include federal and educational sites that discuss general plumbing safety, rainwater management, and construction best practices. While local requirements vary, these sources provide foundational guidance for a sound installation and ongoing maintenance.
Authority Sources (sample references)
- https://www.epa.gov
- https://extension.illinois.edu
- https://www.osha.gov
Note: Always verify local code requirements and permit needs before starting construction and drainage projects.
Channel drain installation checklist
- Confirm layout and slope aligns with the intended discharge point.
- Gather all required tools and materials before starting.
- Dry-fit components to verify fit and alignment.
- Seal all joints and transitions according to manufacturer guidance.
- Test for leaks with a controlled water flow and monitor for movement or settlement.
Final thoughts
Installing a channel drain is a practical, achievable project for many homeowners when approached with careful planning, proper materials, and attention to safety. Use this guide as a roadmap, consult local codes, and rely on reliable sources for best practices. With the right preparation and execution, your surface drainage will perform reliably for years to come.
Tools & Materials
- Channel drain kit (body + grate)(Choose length to cover the run; ensure grate matches expected load)
- PVC pipes and fittings (outlet adapters, couplings)(Include elbows and adapters for transitions)
- Concrete mix or sand bed(Decide base method; ensure proper setting bed thickness)
- Gravel (drainage aggregate)(Provide a stable bedding and cover around pipe and channel)
- Level and tape measure(Accuracy matters for proper drainage and alignment)
- Masonry saw or reciprocating saw with masonry blade(Cut trench and channel sections as needed)
- Hammer drill with masonry bit(Drill anchor holes if securing with fasteners to concrete)
- Silicone sealant or hydraulic cement(Seal all joints and transitions to prevent leaks)
- Safety gear (gloves, safety glasses)(Protect hands, eyes; follow PPE best practices)
- Backfill material(Graded fill to restore surface; compact as needed)
- Pipe wrench and pliers(Tighten fittings securely; avoid overtightening)
- Broom or brush for debris removal(Helpful during prep and final cleaning)
Steps
Estimated time: 4-8 hours
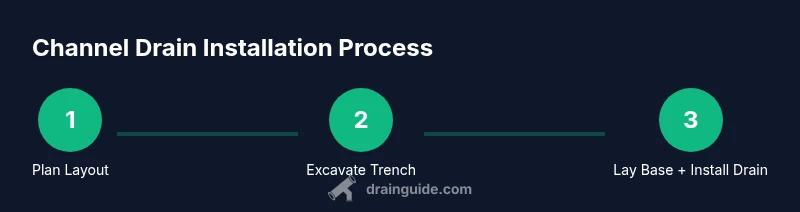
- 1
Plan layout and mark trench path
Map the run with chalk or string, ensuring a straight line and a gentle slope toward the outlet. Mark the trench width and depth, considering base bedding and channel height. Verify access to the outlet and confirm there are no underground utilities in the path.
Tip: Measure twice; cut once to avoid costly rework. - 2
Shut off water and prepare work area
If replacing an existing drain, isolate the area and protect nearby surfaces. Clear the workspace and lay down drop cloths or plywood to keep the surrounding area clean and safe.
Tip: Keep a trash bag handy for debris and a broom to clean dust quickly. - 3
Excavate trench to depth and width
Dig the trench to accommodate the base bed plus the channel thickness. Maintain a consistent slope away from structures and toward the discharge point. Use a level to confirm vertical alignment and straight sides.
Tip: Use a string line to keep the trench straight across long runs. - 4
Prepare base bed
Lay a compacted sand bed or a light concrete base in the trench according to your chosen method. Ensure the bed is flat and uniformly thick to avoid rocking the channel drain.
Tip: Do not overpack sand; leave enough give for the channel to seat evenly. - 5
Dry-fit channel drain
Place the channel in the trench without adhesive to verify fit, alignment, and outlet clearance. Check for smooth transitions with the existing piping.
Tip: Adjust the trench or channel as needed before final assembly. - 6
Connect outlet and secure joints
Attach outlet adapters to the existing drainage line, ensuring watertight seals with appropriate solvent cement or couplings. Align fittings to prevent kinks or stress on the pipework.
Tip: Apply primer and cement per manufacturer instructions and allow proper cure time. - 7
Set channel and seal joints
Place the channel into the trench, verify level, and secure it with anchors if required. Seal all joints with silicone or hydraulic cement as specified by the manufacturer.
Tip: Double-check that sealants handle exposure to weather and UV if outdoors. - 8
Install grate and finish connections
Attach the grate and fasteners, ensuring it sits flush with the surrounding surface. Complete any final connections to the downstream line and test for pull-out movement.
Tip: Run a quick test by placing weight on the grate to confirm stability. - 9
Test drainage and seal integrity
Flood the surface gradually to check water flow through the channel and outlet. Look for leaks at joints and around the channel base. If issues appear, re-seal or adjust fittings as needed.
Tip: Record test results and address any seepage before backfilling. - 10
Backfill and restore surface
Backfill around the channel with compacted material and restore the surface finish (concrete, pavers, or asphalt). Allow any concrete to cure fully before heavy traffic.
Tip: Finish with a clean, compact surface to prevent debris from entering the channel.
Got Questions?
What is a channel drain?
A channel drain is a long, low-profile drainage channel with a grate on top that collects surface water and directs it to an outlet. It’s ideal for large flat surfaces where water pooling is a concern.
A channel drain is a long, low-profile drain with a grate that collects water and directs it away from surfaces like driveways or patios.
Can I install a channel drain myself?
Yes, with basic plumbing and masonry skills, the right tools, and careful adherence to instructions. Be sure to follow local codes and safety practices.
Yes, many homeowners install channel drains themselves if they follow the instructions and stay safe.
Do channel drains require permits?
Permit requirements vary by location. Check local building departments to determine whether a permit is needed for trenching and drainage work.
It depends on your city or county rules; check with your local building department.
What slope should channel drains have?
Channel drains should slope away from structures to direct water toward the discharge point; this prevents pooling near foundations.
They should slope away from the building toward the drainage outlet.
How long does installation take?
Time varies with site complexity, but most projects take several hours to a full day, depending on trenching and surface finish.
Most installations take a few hours up to a day, depending on site conditions.
What maintenance is required?
Regularly remove debris from the grate, flush the channel, and check for leaks or cracks. Periodic resealing may be needed.
Keep the grate clear of debris and inspect for leaks; reseal when needed.
Watch Video
The Essentials
- Plan layout with local codes and slope in mind.
- Choose channel drain type and size that matches the surface and outlet.
- Seal joints properly and test for leaks before backfilling.
- Maintain the system by keeping the grate clean and inspecting for damage.