Can You Drain and Spin an Empty Washing Machine? A DIY Guide
Learn how to safely drain and spin an empty washing machine with Drain Guide's step-by-step instructions, safety tips, and troubleshooting to prevent leaks and damage.

Yes—you can drain and spin an empty washing machine to remove residual water, dry the drum, and verify the drain system, provided you follow safety steps and use the machine’s drain components correctly. This quick guide outlines when it’s appropriate, the exact actions to take, and how to avoid splashes or damage. By following these steps, you’ll reduce mold risk and confirm the unit’s drain path is clear.
Can you drain and spin an empty washing machine?
Readers often ask can you drain and spin an empty washing machine, and the answer depends on following safety steps and using the machine's drain components correctly. Draining an idle drum can help address standing water, test the drain path, or prepare the unit after a spill or malfunction. This kind of maintenance is safest when the washer is unplugged, water supplies are isolated, and the drum is actually empty of clothes. The Drain Guide team notes that handling water and electricity in close proximity requires deliberate care. By understanding the drain’s layout, you can avoid overflows, minimize mold growth, and ensure the spin cycle dries the drum effectively without putting strain on pumps or hoses.
Before you begin, define the scope and safety boundaries
Before attempting any drain and spin procedure, define what you’re trying to achieve. Are you removing standing water after a spill, testing the drain path, or clearing a partial clog? Each goal requires a slightly different approach, but all share core safety steps: unplug the unit, shut off water supply valves, and prepare the area with towels and a pan. This section will help you map out the task so you stay organized and reduce the chance of accidental splashes or electrical shocks. Drain Guide’s guidance emphasizes thinking through the risk of leaks, slippery floors, and potential damage to connectors. A calm, prepared start sets the stage for a smooth, safe operation.
Safety first: environmental and electrical precautions
Electrical safety is non negotiable when working on a washer. Always unplug the appliance before touching any internal components. Never work with wet hands or while standing in a pool of water. If your washer is in a basement or utility room, ensure adequate lighting and keep a dry path to the power outlet. Keep a drain pan or shallow tray ready to catch any unexpected leakage. Ventilate the space if there’s a musty odor from residual moisture. Drain Guide highlights that safety awareness reduces the risk of short circuits and accidental water contact with live circuits.
How the washer drain system works and what you’ll touch
Most front-loaders and some top-loaders route water through a drain hose or a pump filter. The critical areas you may encounter include the drain hose, the pump or sump, and any removable filter or trap panel. If your model has an accessible drain filter, you can open it to drain water directly into a bucket. If not, you’ll need to access the drain hose where it exits the cabinet and allow gravity to carry the water away. Understanding these components helps you decide where to start and what to expect when you remove residual water.
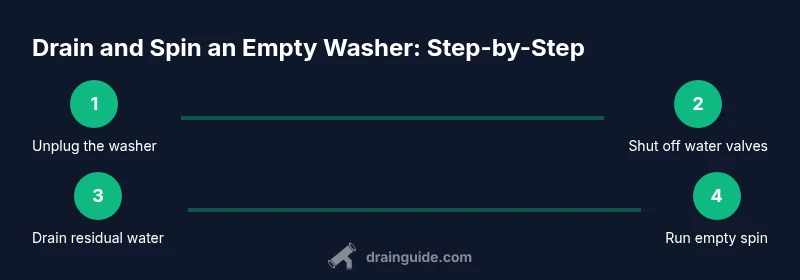
Step-by-step overview for a safe drain and spin
The approach combines two phases: (1) safely draining any standing water from the drum, and (2) running a brief spin cycle with no load to remove remaining moisture. You’ll need towels, a bucket, and proper hand protection. By sequencing tasks—from unplugging to running the spin—you reduce the risk of leaks and electrical hazards. Drain Guide emphasizes keeping your work area dry and organized so you can monitor for leaks and promptly address them if they occur.
Common mistakes and how to avoid them
Hasty disassembly or ignoring safety can lead to leaks or injuries. Avoid pulling hoses without securing the clamps, never unplug while water is flowing, and don’t attempt to drain if the unit is still plugged in. If you encounter resistance when removing a filter or hose, stop and re-check the model’s manual. Mold and mildew can thrive on damp surfaces, so dry the drum and surrounding area thoroughly after the procedure. By following these precautions, you’ll reduce the risk of accidental water exposure and electrical hazards.
Aftercare: drying, inspecting, and restoring
After draining and spinning, wipe down the drum and door seal to remove any residual moisture. Inspect hoses and clamps for signs of wear or leaks, and reattach any components securely. If you encountered a leak during the process, address it before running a full wash cycle again. Regularly inspecting the drain path as part of your routine maintenance helps prevent future clogs and keeps the drum dry. Drain Guide recommends a quick dry-out check after any drainage work to ensure no moisture remains in hard-to-reach areas.
Tools & Materials
- Rubber gloves(protect hands from dirty water)
- Bucket(to catch water, 2–3 liters capacity)
- Towels or absorbent rags(have several on hand to mop spills)
- Flashlight(inspect under machine or inside panel)
- Drain pan or shallow tray(to control overflow during hose work)
- Screwdriver (flathead or Philips)(only if you need to access a filter cover)
Steps
Estimated time: 30-45 minutes
- 1
Unplug the washer
Unplug the washing machine from the wall outlet before starting any work. This reduces the risk of electric shock in case you encounter water inside the cabinet. If the plug is behind furniture, move the unit carefully to access the outlet rather than pulling on the cord.
Tip: Always hold the plug, not the cord, when unplugging. - 2
Shut off the water valves
Close both hot and cold water valves that feed the washer. This prevents new water from entering the machine while you’re working and minimizes overflow from residual water in the drum.
Tip: If you only have a single valve, ensure both lines are fully closed. - 3
Move the washer for access and prep the area
Gently pull the unit away from the wall to expose the bottom panel and drain hose. Place towels around the area and set a bucket near the drain path to catch any drips.
Tip: Don’t tug on hoses while the unit is against the wall. - 4
Remove any removable drain filter
If your model has a removable drain filter or trap, locate it (usually behind a small access panel) and carefully remove the cap to let standing water drain into the bucket.
Tip: Have a towel ready in case water spills as you loosen the cap. - 5
Drain residual water via the drain hose
If there is no filter or the filter is cleared, gently loosen the drain hose clamp at the pump or base and guide the hose into the bucket. Allow gravity to drain the water slowly.
Tip: Keep the hose pointed toward the bucket to minimize splashing. - 6
Reassemble the drain components
Securely reinsert the drain filter (if used) and reattach any hoses or clamps you loosened. Double-check for a snug fit to prevent leaks during the spin cycle.
Tip: Wipe the area dry before closing any panels. - 7
Run an empty spin cycle
With no clothes in the drum, run a short spin cycle to remove remaining moisture. Monitor for leaks during the process and stop immediately if you notice water escaping.
Tip: Choose a gentle spin or low speed setting for best control.
Got Questions?
Is it safe to drain and spin an empty washer?
Yes, it is safe when you unplug the unit, shut off water, and follow basic precautions to avoid electric shock and leaks.
Yes, you can safely drain and spin an empty washer if you take proper safety steps.
What should I do first before starting?
Always unplug the machine and turn off both water valves before touching any internal components.
Always unplug and close the water valves before you start.
What if the drum won’t spin after draining?
Check the lid or door switch, ensure there are no clogs, and verify the belt or motor is functioning. If unsure, consult a professional.
If it won't spin, check the lid switch, belt, and motor. If you're unsure, seek a professional.
Can I use drain cleaners during this process?
Do not use chemical drain cleaners inside a washer. They can damage hoses and seals. Stick to mechanical draining steps instead.
Avoid chemical drain cleaners inside the washer; use mechanical draining steps only.
Is it okay to run a spin cycle with a light load?
Yes, running a spin cycle with a light, empty, or very small load is generally safe and helps dry the drum more evenly.
Yes, a short spin with a light load can help dry the drum faster.
What maintenance follows after draining an empty washer?
Wipe down the drum and door seal, inspect hoses for wear, and dry the area to prevent mold. Consider a routine drain path check every few months.
Wipe dry, check hoses, and keep the area dry to prevent mold.
Watch Video
The Essentials
- Unplug the washer before starting
- Identify the drain path or filter to drain water safely
- Drain residual water with gravity and secure all connections
- Run an empty spin cycle to dry the drum and verify no leaks