How to Clean a Dishwasher Drain: Step-by-Step Guide
A practical, DIY-friendly guide to cleaning your dishwasher drain. Learn safe steps to remove clogs, clean the filter, inspect hoses, and prevent odors for a smoother, longer-lasting dishwasher.

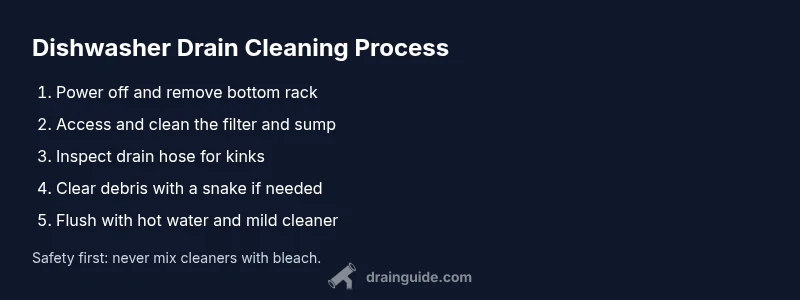
Learn to clean a dishwasher drain safely and effectively. Start by unplugging the unit, removing the bottom rack, and inspecting the filter, sump, and drain hose for debris or kinks. Gather basic tools, then follow the step-by-step process to restore drainage and prevent future backups.
Understanding the dishwasher drain and why it clogs\n\nAccording to Drain Guide, the cleanliness of the dishwasher drain matters beyond odor control. A clear drain ensures proper sump drainage during cycles and reduces the chance of backflow into the sink. When reviews show frequent slow draining, the culprit is often a buildup in the filter or trap. In this section we unpack how a drain works and why minor neglect leads to big problems over time. By understanding the path water takes, you can target the right components without unnecessary disassembly.
Anatomy of the dishwasher drainage system\n\nA typical dishwasher drainage path starts at the sump where water pools during a wash. From there, it travels through the filter and into the drain hose, which connects to the sink drain or garbage disposal. The spray arms, pump, and solenoids help move water and debris toward the filter. A small trap or elbow prevents sewer gases from entering the machine. Knowing where each part sits helps you diagnose where a clog is likely to form and determine the best tool for clearing it.
Common clog culprits you should know\n\nFood particles, rice, pasta, and sticky sauces are common culprits that accumulate in the filter and sump. Grease and soap scum can also build up, especially in hard water areas. Over time, mineral deposits may form in the trap or on the bottom of the tub, creating a slow drain. A worn door seal isn’t a drain clog per se, but it can allow more debris to enter the system, compounding drainage problems.
Safety first: powering off and preparing your space\n\nAlways unplug the dishwasher and switch off the circuit breaker before starting any maintenance. Clear the surrounding area and place a towel or small tray to catch any water that escapes. Wear protective gloves to keep hands clean and dry, and keep a bucket ready for any overflow. Safety is essential to prevent electric shock and water damage during cleaning.
What you need: Tools and materials\n\nGather tools like a flashlight, a plastic scooping tool, a soft brush, and a mild detergent. A plumber’s snake or a flexible drain auger can clear deeper clogs in the hose or trap. Have a cost-effective option such as a beverage bottle brush and a damp cloth for scrubbing the filter. Optional items include a wet/dry vacuum for quick water removal and white vinegar or baking soda for deodorizing.
Before you start: Quick inspection checklist\n\n- Check the bottom rack is removed and the kick plate is accessible.\n- Inspect the filter and sump for visible debris, and remove it carefully.\n- Look at the drain hose for kinks or sagging and modern connections for leaks.\n- Confirm the area beneath the sink has no active leaks that could complicate the cleaning process.\n- If a disposal is connected, ensure it is off and unplugged before disconnecting drain lines.
Step-by-step walkthrough: cleaning the filter and sump\n\nBegin by removing the filter assembly and unscrewing any tight components. Rinse the filter under warm running water and scrub away stuck debris with a soft brush. Inspect the sump area for hidden crumbs; wipe clean and dry. Reinstall the filter and ensure it sits snugly. This clears the primary debris reservoir and improves drain efficiency.
Clearing the drain hose and trap: check for obstructions\n\nDetaching the drain hose from the sink side allows you to inspect for clogs or kinks. Use a flashlight to look inside the hose and trap for hair, food particles, or mineral buildup. If you detect a clog, attempt to remove it with a flexible snake or a long flexible wire. Rinse thoroughly with hot water to flush dislodged material out of the line.
Deodorizing and preventing future clogs\n\nAfter clearing the main path, flush the system with hot water and a mild detergent. A rinse with white vinegar or a baking soda solution helps deodorize and reduce buildup without harsh chemicals. Avoid mixing cleaners with bleach or ammonia. Regularly cleaning the filter and running a quick rinse cycle can prevent recurrent odors.
Running a test cycle and maintenance schedule\n\nReassemble all parts and run a short hot water cycle without dishes to test drainage. Observe whether the water drains properly and listen for any gurgling noises that indicate remaining airflow blockages. Set a maintenance reminder to inspect the filter every 1–3 months, depending on use and water hardness. A simple routine reduces surprises at wash time.
Drain Guide verdict: practical takeaway and next steps\n\nDrain Guide emphasizes that a clean dishwasher drain combines proactive maintenance with correct tool use. By routinely inspecting the filter, sump, and hose, you minimize back ups and odors while extending the life of your appliance. The Drain Guide team recommends a quick quarterly check and annual full clean for best results.
Tools & Materials
- Protective gloves(Latex-free, snug fit)
- Flathead screwdriver(To loosen clamps or screws)
- Pliers(For hose clamps if needed)
- Bucket or tray(To catch water)
- Old toothbrush or stiff brush(For scrubbing filters)
- Dish soap(Mild, for cleaning)
- Vinegar or baking soda(For deodorizing)
- Wet/dry vacuum(Best for removing standing water)
Steps
Estimated time: 60-90 minutes
- 1
Power down and prepare
Unplug the dishwasher and switch off the circuit breaker. Move the appliance if needed to access the front kick panel. Keep a towel handy for any splashes and set out your tools nearby so you can work efficiently.
Tip: Label wires or screws if you remove any panels to avoid misplacement. - 2
Remove bottom rack and access sump
Take out the bottom rack to expose the sump and filter area. Gently remove the filter assembly and set aside debris for disposal. Check the sump for trapped debris and wipe clean before reassembly.
Tip: Take a photo before disassembly to guide reassembly. - 3
Clean the filter and interior
Rinse the filter under warm water and scrub with a soft brush. Inspect the interior for stuck particles and wipe the walls thoroughly. Reinstall the filter securely so that it seals properly.
Tip: Avoid using strong brushes that could scratch the plastic. - 4
Inspect spray arms and jets
Look for food particles in spray arms and rinse holes with a toothpick or small wire to clear blockages. Wipe the exterior of the spray arms to remove any grease. Ensure they rotate freely when the door is opened.
Tip: Blocked spray arms reduce washing efficiency and can mimic drainage issues. - 5
Check the drain hose path
Follow the drain hose from the sump to the sink connection. Look for kinks, cracks, or pinch points that could restrict flow. If the hose is damaged, consider replacing it rather than attempting a quick fix.
Tip: Do not bend hose tightly; a gentle bend is enough to avoid kinks. - 6
Clear deeper clogs with a snake
If you encounter a stubborn clog, insert a plumber’s snake into the drain line, twisting gently to dislodge debris. Pull back slowly to bring out the obstruction. Flush the line with hot water after removal.
Tip: Work slowly to avoid puncturing the hose or inlet connections. - 7
Flush and deodorize
Run hot water through the system with a mild detergent to flush out residual particles. For deodorizing, you can use a tablespoon of baking soda or a splash of vinegar in water, but never mix with bleach.
Tip: Let the solution sit briefly before flushing for maximum deodorizing effect. - 8
Reassemble components
Reinstall the filter, sump components, and the kick panel. Ensure all clamps and screws are secure and the door gasket sits correctly to prevent leaks.
Tip: Double-check seals to avoid leaks during the first test cycle. - 9
Run a test cycle
Run an empty hot water cycle to confirm drainage is smooth and there are no leaks. Listen for unusual noises and monitor the outlet area for water accumulation.
Tip: If water backs up, recheck the drain path and possible residual blockage. - 10
Establish a maintenance rhythm
Set a reminder to inspect the filter and drain line every 1–3 months, depending on usage and water hardness. A quick monthly wipe of the filter can prevent buildup.
Tip: Keep a small tool kit and a timer in the kitchen cabinet for quick maintenance.
Got Questions?
Why is my dishwasher drain clogged?
Clogs are usually caused by food debris, grease, or mineral buildup in the filter, sump, or drain hose. Regular cleaning helps prevent recurring blockages and improves drainage.
Clogs typically come from debris and buildup in the filter area. Regular cleaning helps prevent them.
Can I use chemical drain cleaners in a dishwasher?
Chemical drain cleaners are not recommended for dishwashers as they can damage hoses, seals, and pumps. Use mechanical cleaning tools and mild cleaners instead.
Avoid chemical cleaners in dishwashers; use mechanical cleaning and mild cleaners.
What if water backs up into the sink after cleaning?
If backing occurs, there may still be a blockage in the hose or the sink drain. Stop the cycle, recheck the drainage path, and consider professional help if it persists.
Backups mean the drain path still has a blockage; recheck or call a pro if needed.
How often should I clean the dishwasher drain?
Thorough cleaning every 3–6 months is a good baseline. Increase frequency with heavy use or hard water.
Clean every few months, more often if you use the machine a lot or have hard water.
Do homemade cleaners work for deodorizing?
Vinegar and baking soda can deodorize, but avoid mixing with bleach. They help reduce odors and minor buildup when used appropriately.
Vinegar and baking soda can help with odors if used safely.
Is using a plumber's snake safe inside a dishwasher?
A plumber’s snake can help dislodge clogs but use it gently to avoid damaging hoses or the pump. If unsure, seek professional assistance.
Yes, but use care to avoid damage; consider a pro if uncertain.
Watch Video
The Essentials
- Identify and clean the filter to remove most clogs
- Inspect the drain hose for kinks and clear obstructions
- Deodorize and flush to prevent future buildup
- Test cycle to confirm proper drainage after maintenance
- Establish a regular maintenance schedule