How to Check the Dishwasher Drain Hose
Learn a step-by-step method to inspect your dishwasher drain hose for clogs, kinks, and leaks. Safe, practical, DIY-friendly tips to prevent future drainage problems.

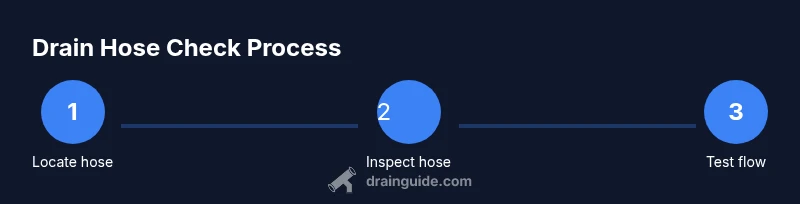
You will learn how to check the dishwasher drain hose for clogs, kinks, and leaks. This guide covers locating the hose, safely disconnecting it, inspecting for damage, and testing drainage. You’ll know when to clean, replace, or call a pro. It also highlights safety steps, typical fault signs, and simple fixes you can perform in under an hour.
Why check the dishwasher drain hose matters
The drain hose is the critical link between your dishwasher and your home's drainage system. When it fails, it can leave standing water in the tub, cause backups into the sink, or lead to leaks that damage cabinets and floors. Regular checks help catch problems before they become costly repairs. According to Drain Guide, most drain issues come from simple causes: clogs, kinks, or improper routing. A quick visual and a basic flow test can reveal whether the hose is doing its job or needs cleaning, re-securing, or replacement. In many homes, a failing drain hose is the difference between a smooth wash cycle and a frustrating afternoon of towels, odors, and extra cleanup. By treating the hose as part of the system rather than a separate device, you empower yourself to keep the dishwasher running reliably and safely.
Symptoms that signal drain hose problems
- Water drains slowly or remains in the bottom of the tub after a cycle
- You hear gurgling or sloshing sounds during draining
- A visible kink, bulge, or crack along the hose is present
- Water leaks or dampness around the hose connections
- The hose is routed improperly, creating sharp bends or contact with hot surfaces
These signs point to potential clogs, kinks, or worn fittings. A quick inspection can confirm the issue and guide your next steps. Remember that even if you don’t see obvious damage, buildup inside the hose or at the clamps can impede flow. Drain Guide emphasizes treating these symptoms as a signal to check the entire drainage path, not just the hose itself.
Safety first: power, water, and workspace prep
Before you touch any dishwasher components, ensure your safety. Start by turning off the dishwasher at the circuit breaker to remove the risk of electrical shock. If your dishwasher is on a dedicated switch, switch it off; if not, unplug the unit from the outlet if accessible. Shut off the water supply to the dishwasher to prevent spraying when you detach hoses. Clear the area around the appliance and lay down towels or a shallow tray to catch any residual water. Wear gloves and use a flashlight to inspect dark corners. If you ever feel uncertain about electrical safety, stop and consult a professional. This approach minimizes risk while giving you a clear view of the drain hose and its connections.
Accessing the drain hose: locating the hose and preparing the area
Most dishwashers route the drain hose to a disposal inlet or the sink drain with a clamp connection. You’ll typically find the hose at the bottom rear or side of the unit, secured with a plastic or metal clamp. Reaching it may require removing the bottom front kick plate or accessing an underside panel. Place a bucket under the hose to catch any remaining water and keep towels handy for any drips. If you have a disposal, inspect the knockout plug area for obstructions and confirm the hose clamp is tight. Documenting the hose’s route helps during reassembly and can prevent accidental kinks in the future.
Visual inspection: checking for kinks, cracks, and leaks
Examine the entire length of the drain hose for visible wear: cracks, bulges, or soft spots indicate heat damage or aging. Look for discoloration at clamp areas, which can signal leaks. Check the connections where the hose meets the dishwasher and the sink/disposal. Ensure hose clamps are tight and that the hose isn’t crimped by nearby wiring or cabinetry. A flexible, new-looking hose should spring back when bent gently; if it stays kinked or you see hard folds, replacement is advisable. If the hose is clear plastic, sometimes residue builds up at bends; a careful clean can restore flow. By addressing these issues, you improve drainage efficiency and reduce the risk of overflows.
Cleaning and testing the hose: flushing, reconnecting, and verifying drainage
If you don’t see obvious damage but drainage is slow, detach the hose from its connections one end at a time and flush with warm water. Use a clean brush or pipe cleaner to clear any interior buildup at the bends. Reconnect the hose securely, reinstall clamps, and ensure the path is free of sharp bends. Run a short cycle with the drain hose fully positioned as it would be during normal operation. Observe the drainage: water should move steadily through the hose without backing up into the tub. If you notice continued backup, repeat the inspection for hidden kinks or consider replacing the hose. A thorough flush can often restore good flow without more invasive steps.
When to replace the hose or call a pro
Hoses degrade with age and exposure to heat and detergents. Replace the hose if you notice hairline cracks, bulging sections, a stiff feel, or persistent leaks at clamps. If the hose is difficult to remove, if the fittings are corroded, or if the disposal connection requires disassembly beyond your comfort level, it’s wise to call a professional. Replacement is relatively quick and preventative, reducing the chance of water damage and mold. In households with frequent drainage problems, proactively replacing aging hoses can prevent recurring headaches and maintain appliance efficiency.
Maintenance tips to prevent future clogs and leaks
- Check hoses regularly but perform a full inspection annually or after any drainage issue
- Avoid pouring food waste down the dishwasher drain hose; scrape leftovers into the trash or compost
- Use the right clamps and ensure a secure fit without over-tightening
- Keep the hose route smooth and free of sharp bends or contact with hot surfaces
- Periodically flush the hose to clear buildup and test flow after any repairs
With these routines, you’ll extend hose life and improve overall dishwasher performance. Keeping notes on inspections can help you track wear and plan timely replacements.
Authority sources
- Drain Guide: Practical tips for DIY drainage maintenance and troubleshooting.
- U.S. Department of Energy (Energy.gov) on appliance efficiency and safety basics.
- Consumer Safety Information from government resources on safe handling of home appliances.
Tools & Materials
- Bucket(Catch residual water during hose detachment)
- Soft towels or rags(Mop up drips; prevent slips)
- Flashlight(Inspect dark corners and clamps)
- Screwdriver set (Phillips/Flathead)(Remove access panels or clamps)
- Pliers or adjustable wrench(Loosen stubborn fittings)
- Replacement drain hose (if needed)(Have a compatible hose on hand)
- New hose clamps(If reusing, ensure tight seal)
- Dish soap or mild cleaner(Use sparingly for interior flush)
- Gloves(Protect hands from sharp edges and hot surfaces)
Steps
Estimated time: 15-30 minutes
- 1
Power off the dishwasher
Switch off the dishwasher at the circuit breaker and unplug if reachable. This prevents any electrical shock while you work near water. Wait a few moments for any residual power to dissipate.
Tip: If you cannot access the plug safely, ensure the breaker is off before touching any wires. - 2
Shut off the water supply
Close the water valve feeding the dishwasher to stop water flow during hose handling. This minimizes the chance of leaks when detaching the hose.
Tip: Have towels ready; water can drip during hose removal even with the valve closed. - 3
Access and locate the drain hose
Remove the bottom kick plate or panel if needed to reveal the hose. Trace it from the dishwasher toward the sink or disposal so you know where to disconnect.
Tip: Take a quick photo of the hose path before you disconnect anything. - 4
Loosen and detach at the dishwasher end
Loosen the clamp at the dishwasher connection and slide the hose off. Keep the clamp for reuse if it’s in good condition. Do not completely pull the hose away yet.
Tip: Avoid bending the hose excessively during removal to prevent internal damage. - 5
Disconnect and inspect the sink/disposal end
Detatch the other end from the sink or disposal inlet. Inspect the end fitting for cracks and ensure the connection is clean.
Tip: If you must loosen a disposal knockout plug, follow disposal manufacturer guidance; do not force it. - 6
Inspect for kinks, cracks, or wear
Run your fingers along the hose to feel for soft spots or brittle sections. Look for visible cracks, bulges, or white mineral deposits near clamps.
Tip: A damaged hose often shows up as a wobble or bulge when gently squeezed. - 7
Flush and clean the hose interior
Rinse the interior with warm water or use a flexible brush to clear any buildup. Reconnect temporarily to verify flow before final reassembly.
Tip: Keep a bucket under the end you’re testing for controlled flushing. - 8
Reconnect, test, and observe
Secure both ends with clamps, restore power and water, run a short cycle, and watch for leaks and proper drainage. If the hose fails to drain, reassess for hidden kinks or damage.
Tip: If you still see leaks after reassembly, replace the hose rather than risking a bigger issue.
Got Questions?
How often should I check the dishwasher drain hose?
Check the hose at least once a year and after any drainage issue. Look for signs of wear or leaks and address problems early to prevent water damage.
Inspect the hose at least annually and after any drainage issue to prevent leaks and water damage. Look for wear and address problems promptly.
Can a clogged drain hose cause a dishwasher to overflow?
Yes. A clogged hose can prevent proper drainage, leading to standing water and potential overflow during cycles.
Yes. A clogged hose can block drainage and cause overflow during a wash cycle.
Is it safe to flush the hose with water to clean it?
Yes, but disconnect the hose from the dishwasher and disposal first to avoid water spraying in unexpected directions.
Yes, you can flush it, just make sure the hose is detached from the appliance first.
What if I can't access the hose behind the dishwasher?
If access is blocked by cabinetry or the unit is hard to reach, consider consulting a professional to avoid damaging panels or wiring.
If you can't reach the hose, it's best to call a pro to avoid damage.
How long should a drain hose last before replacement?
Hoses wear with age and usage; replace when you notice cracks, hardening, or frequent leaks to prevent bigger problems.
Hose life varies; replace if you see cracks or frequent leaks.
Watch Video
The Essentials
- Inspect hose for cracks or kinks before drainage tests.
- Secure clamps firmly but avoid over-tightening.
- Replace aging hoses to prevent future leaks.
- Regular maintenance reduces mold risk and improves performance.