Where is the Drain Hose on a Dishwasher? A DIY Guide
Learn how to locate the drain hose on your dishwasher, inspect for clogs, leaks, or improper routing, and verify proper connections with a practical, step-by-step guide from Drain Guide.

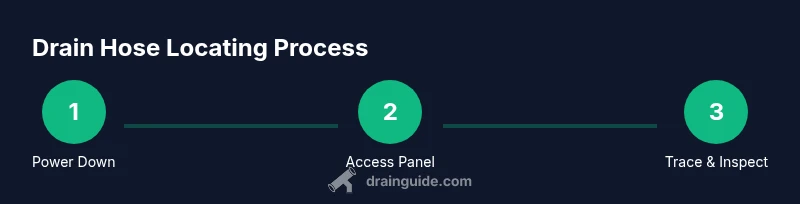
To locate the drain hose on a dishwasher, turn off power and water, remove the kick plate, and trace the hose from the dishwasher pump toward the sink drain or garbage disposal. Look for the hose clamp, any air gap, and routing that forms a high loop to prevent backflow. Drain Guide recommends starting at the kick plate for quickest access.
Where is the drain hose on a dishwasher? A practical starting point
The drain hose typically travels from the dishwasher's pump and out the back or under the toe-kick area, terminating at the sink drain, garbage disposal, or air-gap fixture. According to Drain Guide, understanding this route helps you diagnose leaks, clogs, and improper drainage quickly. The exact path can vary by model, but the general layout remains consistent: the hose emerges from the pump, travels along or behind cabinetry, and ends at a drain connection. By knowing this layout, you can plan your inspection, avoid damage to hoses or clamps, and reduce the risk of backflow or standing water in your cabinet.
Common routes: where to expect the drain hose in most models
Most dishwashers route the drain hose either directly to a disposal inlet or to a tailpiece connection at the sink. In homes with an air-gap, the hose typically runs upward to the air-gap device mounted on the sink or countertop, creating a high loop that prevents dirty water from siphoning back. When a unit is installed under a universal sink, the hose might take a longer, curved path beneath the countertop before joining the drain line. Recognizing these patterns helps you locate the hose even if you don’t see it immediately.
Safety first: power, water, and workspace
Before touching any components, unplug the dishwasher or switch off the circuit breaker. Turn off the water supply to reduce the risk of leaks while you work. Wear gloves to protect hands from sharp edges or grime, and place towels or a bucket nearby to catch any residual water. Drain Guide emphasizes that a clean, dry workspace reduces the chance of slips and helps you see hose connections clearly.
Access points: removing the toe-kick panel and opening the cabinet
To access the drain hose, start by removing the toe-kick panel with a screwdriver. A shallow, wide container beneath the unit helps catch any water that drains during inspection. Look for a primary hose connected to the pump, along with any secondary hoses that might be associated with an air-gap or high-loop assembly. Keep track of screws and clamps so you can reassemble the unit without forcing parts.
Tracing the path: from pump to drain
Follow the drain hose from the dishwasher pump toward its termination. Watch for clamps, zip-ties, or mounting brackets that secure the hose in place. If you encounter a sharp bend or pinch point behind the kick panel, note its location. A kink or pinch can restrict flow and cause backups, especially when the dishwasher is running.
How to identify the correct hose when multiple hoses are present
Many dishwashers use more than one hose for different purposes, including water supply and drainage. The drain hose is usually larger in diameter than supply hoses and is often located lowest in the cabinet to use gravity for drainage. If your unit has an anti-siphon device or an air-gap, the drain hose will connect through that component rather than directly into the sink tailpiece.
Visual cues: clamps, fittings, and potential trouble spots
Look for hose clamps on each connection, especially where the drain hose meets the pump outlet and the sink or disposal inlet. Check for cracks in the hose, loose clamps, or signs of water staining along the hose route. A healthy hose should be pliable, free of cracks, and securely fastened. If you notice any corrosion on metal fittings or a brittle hose, prepare to replace components rather than repair them.
Common issues you may find while locating the drain hose
Clogs often occur where the hose curves below the sink or near the disposal connection. Leaks can arise from loose clamps, torn hose ends, or degraded grommets. A folded or overextended hose can trap water and create backups. By carefully inspecting each segment, you can pinpoint the exact cause and plan a safe repair.
Model variations: built-in, compact, and portable dishwashers
Different models can place the drain hose in varying spots: behind the kick plate on built-ins, along the base of a compact unit, or entering a garbage disposal from the side. Portable dishwashers may route the drain hose to a sink adapter via a quick-connect fitting. In all cases, the drain hose should drain into a clean, unobstructed outlet with a secure seal.
How to test after locating the hose
With the hose identified, recheck every clamp and connection before running a test cycle. Add a small amount of water to the tub and start a short wash to observe the path of drainage. Look for leaks at joints and ensure water exits through the drain line without backing into the cabinet. If you see water collecting in the toe-kick area, stop the test and inspect for a kink, loose clamp, or blocked fitting.
Maintenance tips: keeping the drain hose healthy over time
Regular inspection of the drain hose, clamps, and fittings can prevent future problems. Clean any debris or buildup that could impede flow, and replace brittle hoses proactively. Drain Guide recommends a simple annual check to confirm that hoses remain in good condition and that any air-gap devices remain correctly mounted.
When to call a professional for drain hose issues
If you encounter persistent leaks, a persistent clog that won’t clear, or you’re unsure about the routing, it’s wise to consult a licensed plumber. A professional can assess whether the problem is localized to the hose, the pump, or the drain connection, and perform replacements or reconfigurations safely.
Tools & Materials
- Flat-head and Phillips screwdrivers(To remove toe-kick screws and access panels)
- Gloves(Protect hands from sharp edges and grime)
- Flashlight or headlamp(Illuminates dark cabinet areas)
- Bucket or tray(Catch residual water under the unit)
- Old towels or rags(Absorb spills during inspection)
- Replacement hose clamps and hoses (if needed)(Keep on hand for quick swap)
- Pliers or hose pliers(Grasp and reposition small hoses)
- Dishwasher-safe lubricant (optional)(Ease tight clamps during reassembly)
Steps
Estimated time: 60-90 minutes
- 1
Power down and prepare the workspace
Unplug the dishwasher or switch off the circuit. Shut off the water supply to prevent leaks. Clear the area, place towels, and have a bucket ready. This ensures you work safely and minimizes mess.
Tip: Verify power at the outlet with a tester before touching electronics. - 2
Remove the toe-kick panel for access
Use a screwdriver to remove the screws securing the toe-kick panel. Gently pull the panel away to reveal the bottom front interior of the cabinet where the drain hose and connections are located.
Tip: Keep screws organized in a labeled container to simplify reassembly. - 3
Locate the drain hose and follow its path
Trace the hose from the pump outlet toward the drain connection. Note any bends, kinks, or clamps along the route. Compare with typical layouts to confirm you’re following the drain hose and not a water supply line.
Tip: Use the flashlight to illuminate dark corners; mark any sections that look suspect. - 4
Inspect clamps, fittings, and joints
Check every connection for looseness or corrosion. Tighten clamps by hand then with a screwdriver. Look for hair or debris that could cause blockages near the hose ends.
Tip: Avoid overtightening clamps to prevent hose damage. - 5
Check for air gaps or high loops
Identify whether an air-gap device is in use and ensure the drain hose forms a high loop to prevent backflow. If the loop is weak or missing, adjust routing to restore proper function.
Tip: Keep a minimum height above the sink line to maintain gravity-assisted drainage. - 6
Differentiate drain hose from water supply hose
Confirm you’re tracing the drain hose (larger diameter) and not the water supply hose (smaller). Misidentifying can lead to accidental disconnection or water leakage.
Tip: If unsure, refer to model-specific diagrams in the user manual. - 7
Test the drainage path with water
With hoses secured, run a short wash cycle to observe drainage. Watch for leaks at joints and confirm water flows away from the cabinet.
Tip: Have towels ready to catch any unexpected drips during testing. - 8
Replace components and reassemble
Reinstall clamps, brackets, and toe-kick panel. Ensure the hose sits without sharp bends and recheck that the tub floor remains dry after testing.
Tip: Take a final walk-through to ensure nothing is left loose or dangling.
Got Questions?
What is the drain hose on a dishwasher?
The drain hose is a flexible tube that carries wastewater from the dishwasher to the home’s drain system, either directly or through an air-gap. Proper routing prevents backflow and leaks.
The drain hose carries wastewater from the dishwasher to the drain system; it should be routed with a proper loop or air-gap to prevent backflow.
How do I know if I’m looking at the drain hose or a water supply line?
The drain hose is usually larger in diameter and runs from the pump toward the sink drain or disposal. The water supply hose is smaller and connects to the water inlet valve. Trace from the pump to the drain to identify it.
Look for the larger hose that leads from the pump toward the sink drain; water supply hoses are smaller and connect to the inlet valve.
Can I fix a loose drain hose clamp myself?
Yes, you can tighten or replace a loose clamp. If the hose or clamp shows wear, replace the components to prevent leaks. Always recheck after reassembly with a test run.
You can tighten or replace a loose clamp, and test the system after reassembling.
What could cause a draining issue after finding the hose?
Common causes include kinks in the hose, a blocked air-gap, or a clogged pump. Inspect these areas and clear obstructions before re-testing drainage.
Kinks, blocked air gaps, or pump clogs are typical drainage culprits to check first.
When should I replace the drain hose instead of repairing it?
If the hose is cracked, stiff, or shows signs of wear, replacement is safer and more reliable than repair. Use a hose of the correct diameter and length for your model.
Replace a cracked or worn hose rather than attempting a risky repair.
Is an air-gap required for my dishwasher?
An air-gap is required in some jurisdictions or with certain installations to prevent backflow. If your home installation includes one, ensure the hose routes through it correctly.
If your setup includes an air-gap, route the hose through it as designed.
Watch Video
The Essentials
- Identify the drain hose path from pump to drain outlet.
- Inspect clamps, fittings, and potential kinks before reassembly.
- Create a clean work area and test drainage after routing adjustments.
- Different models may route hoses differently; adapt based on layout.
- Consult a pro if leaks persist after inspection.