How to Clean a Blocked Drain: A DIY Guide
Learn how to safely cleaning a blocked drain with a step-by-step approach. Drain Guide resource covers tools, techniques, safety, and prevention for DIY homeowners.

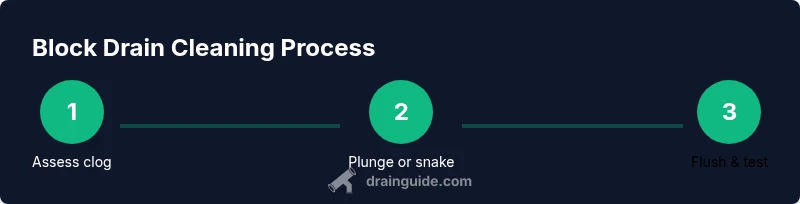
By following this guide, you will learn how to safely clean a blocked drain using practical, hands-on methods. You’ll identify when to start with mechanical methods (plunger or drain snake), how to properly prepare your workspace, and how to flush and test the drain for a lasting fix. This approach minimizes risk to pipes and plumbing while avoiding unnecessary chemical cleaners.
Why cleaning a blocked drain matters
A blocked drain disrupts daily routines, wastes water, and can lead to overflows and odors. Mastering the basics of cleaning a blocked drain helps restore flow, reduce buildup, and prolong pipe life. According to Drain Guide, tackling clogs promptly with safe, mechanical methods minimizes risk to your plumbing and home while avoiding unnecessary chemical exposure. Most blockages are caused by hair, grease, food particles, and soap scum collecting in traps and downstream pipes. By acting early, you protect fixtures, prevent backups, and keep sinks, tubs, and washing machines draining as intended. This section explains why home-based solutions work and when to pivot to professional help.
Signs of a blocked drain and what they indicate
Common signs include slow drainage, a gurgling sound in pipes, unpleasant odors coming from the drain, and water backing up into sinks or tubs. When multiple fixtures back up, or water drains reluctantly, a clog is likely present in the main line or a long run of pipes. Recognizing these indicators early helps you choose the right method and avoid taking unnecessary risks with chemical cleaners. Proper diagnosis can prevent water damage and reduce the need for invasive repairs later.
Safety considerations before you start cleaning
Before any intervention, take safety seriously. Wear protective gloves and eye protection, and keep children and pets away from the work area. Ventilate the space by opening a window or turning on a fan if you’re using cleaners or strong odors. If you’re dealing with sewage-backed drains or suspect a sewer issue, stop and call a professional.
Mechanical methods first: plunger, snake, and alternative approaches
Mechanical methods rely on physical force to dislodge clogs, reducing chemical exposure. Start with the plunger for sink or shower drains; a flange-style plunger often works best on flat surfaces. If plunging fails, move to a drain snake or auger, feeding it slowly and rotating to break up material. For very shallow or accessible blockages, a wet/dry vacuum can sometimes pull the clog out, but use caution to avoid damage.
Step-by-step overview of plunger technique and snake use
This section presents the core actions you’ll take when tackling a clog with mechanical tools. The plunger approach creates pressure to loosen the debris, while the drain snake physically threads through the obstruction. Follow these methods with care, monitor resistance, and avoid forcing tools beyond comfortable limits. For visuals, refer to your drain’s diagram.
When chemical cleaners are appropriate (and when to avoid them)
Chemical drain cleaners can offer a quick solution for light, non-porous clogs, but they carry risks. They may damage pipes, degrade seals, or corrode metal components if misused, and they can upset septic systems. If you choose to use them, read the label, use the minimum required amount, ensure good ventilation, wear eye protection, and never mix cleaners with other chemicals or cleaners. For most DIY scenarios, mechanical methods are safer and more reliable.
Aftercare: flushing, testing, and maintenance to prevent future clogs
Once the clog is cleared, flush the drain with hot water in stages to wash away debris. Run the faucet for a few minutes to confirm a steady flow and listen for any gurgling. Clean and sanitize tools, wipe up splashes, and check nearby traps for seals. Regular maintenance—such as using a small amount of baking soda and hot water periodically and avoiding pouring grease down the drain—helps prevent future blockages.
When to call a professional
If a clog recurs after you have tried the recommended methods, if you notice sewage backing up, or if multiple fixtures drain slowly, it’s time to call a licensed plumber. A professional can diagnose hidden issues, clear main lines, and check for pipe damage or venting problems that DIY methods cannot safely resolve.
Common mistakes to avoid
Avoid using excessive force with plungers or snakes, which can crack pipes or push the clog deeper. Never mix chemical cleaners with other cleaners or with bleach, and do not use a metal object to clear a drain. Don’t ignore slow drainage in the long term, as it often indicates a developing problem that will worsen.
Tools & Materials
- Rubber gloves(Latex-free; long cuff preferred)
- Safety goggles(Protects eyes from splashes)
- Plunger (cup or flange)(Choose based on drain type; flange for toilets)
- Drain snake / auger (manual)(Hand-crank preferred for control)
- Bucket(To catch wastewater and debris)
- Old towels or rags(Protect surfaces and soak spills)
- Enzymatic drain cleaner (optional)(For organic buildup after mechanical methods)
- Hair catcher or screen (optional)(Helps prevent future clogs)
Steps
Estimated time: 60-90 minutes
- 1
Prepare the workspace
Clear the area around the drain and lay down towels to catch spills. Move items that could be damaged and place a bucket nearby. This setup minimizes mess and ensures you have room to work safely.
Tip: Have a bucket and towels ready to catch wastewater. - 2
Put on PPE
Wear rubber gloves and eye protection before touching the drain. Ventilate the area by opening a window or turning on a fan if you’re using cleaners or strong odors. PPE protects you from splashes and fumes.
Tip: Avoid loose clothing; tie back long hair. - 3
Remove standing water and debris
Bail out visible water with a cup or container into the bucket. Remove any visible debris from the drain opening with a gloved hand, discarding in a trash bag. This clears the path for plunging or snaking.
Tip: Work over a bucket to minimize mess. - 4
Try the plunger technique
Seal the plunger around the drain and ensure water covers the cup. Use firm, up-and-down strokes without lifting abruptly, then repeat for 20–30 cycles. If the clog yields, you’ll see the water begin to drain.
Tip: Use a cup plunger for sinks; ensure airtight seal. - 5
Advance with a drain snake
Insert the snake into the drain and rotate slowly while feeding it in. When you feel resistance, push forward gently and pull back to break up the obstruction. Keep the motion steady to avoid kinking the cable.
Tip: Feed slowly; never twist or force through tight bends. - 6
Flush with hot water
Boil water and pour down the drain in stages to push loosened material through. If you notice improved flow, continue; if not, switch back to the snake or plunge again.
Tip: Be mindful of pipe material; avoid extreme heat on PVC in freezing climates. - 7
Optional: enzymatic or baking soda treatment
If the clog persists, you can try an enzymatic cleaner or a baking soda and hot water treatment. Do not mix these with existing cleaners and allow time for the enzymes to work if chosen.
Tip: Enzymes work best with organic buildup and should sit a bit before flushing. - 8
Final test and cleanup
Run the faucet for several minutes to confirm a steady flow. Clean tools, wipe surfaces, and rinse the area. If flow remains poor, consider professional help to avoid further damage.
Tip: Keep a log of methods used for future reference.
Got Questions?
What is the quickest method to unclog a sink drain?
The fastest approach is usually a plunger first; if that doesn’t work, a drain snake typically clears most sink clogs. Avoid forcing tools and check for overflow.
Try the plunger first, then a drain snake if needed.
Are chemical drain cleaners safe for use?
Chemical cleaners can work for minor clogs but pose risks to pipes and septic systems if misused. Always follow label directions, ventilate, and never mix cleaners.
They're effective for some clogs but use carefully and avoid mixing.
When should I call a plumber?
If the clog recurs after multiple attempts, or if water backs up in multiple fixtures, you should call a professional.
If the problem returns or affects multiple fixtures, contact a plumber.
Can baking soda and vinegar clear a blocked drain?
Baking soda and vinegar can help with minor buildup and odors but rarely clear stubborn clogs. Use as a supplementary step with hot water.
It may help odor and light buildup, but not a strong clog.
What safety gear do I need for DIY drain cleaning?
Wear rubber gloves, eye protection, and a mask if using strong cleaners. Ensure kids and pets are away during the process.
Wear gloves and eye protection; ventilate the area.
Is it safe to use a drain snake on metal pipes?
Yes, drain snakes can be used on typical metal and PVC pipes when used carefully. Rotate slowly and avoid forcing beyond resistance to prevent damage.
Yes, with careful, slow use.
The Essentials
- Identify clog signs early
- Prioritize mechanical methods over chemicals
- Protect floors and surfaces during work
- Test drain flow after clearing
- Adopt preventive habits to avoid future clogs