Clog Drain DIY: A Complete Step-by-Step Guide
Learn how to unclog drains yourself with safe, practical techniques. This Drain Guide guide covers tools, step-by-step methods, safety tips, and prevention strategies to keep your home plumbing flowing smoothly.

You can unclog a common household drain yourself with basic tools and safe techniques. Start by identifying the clog type, then assemble a plunger or a manual drain snake. Choose mechanical methods over chemicals when possible. The key requirements are a sturdy plunger, a drain snake, protective gloves, eye protection, and a bucket to catch water.
Understanding clog drain diy: what it means and why it happens
The phrase clog drain diy refers to resolving blockages in household drains using do-it-yourself methods rather than calling a plumber. For most homeowners, a slow sink, toilet, or shower drain is caused by hair, soap scum, food debris, or mineral buildup that collects over time. The goal of a DIY approach is to restore gravity-assisted flow without introducing hazardous chemicals or causing pipe damage. In this guide, we focus on safe, repeatable techniques you can perform with common tools. The Drain Guide team emphasizes that not every clog is equally solvable with DIY methods—severe blockages, multiple blockages, or clogs with sewage backflow require professional assessment. By starting with basic checks and mechanical methods, you can save time and money while learning about your plumbing system. This approach aligns with practical home maintenance, routine housekeeping, and ongoing prevention strategies that reduce future incidents.
The keyword appears here to align with the SEO goal of signaling to search engines and readers that clog drain diy is the central topic. The content also uses related terms like drain blockage, hair clogs, and mechanical unclogging to reinforce relevance and comprehension for homeowners engaging in DIY drainage tasks.
.
Tools & Materials
- Rubber gloves(Latex-free if possible; protects hands from dirty water and sharp edges)
- Drain plunger (cup or bell)(Choose a model appropriate for the drain type (cup for sinks, flange for toilets))
- Manual drain snake / hand auger(Keep lengths around 3-6 feet for sinks; longer for deeper pipes)
- Bucket(Catch water when you open the trap or remove the drain cover)
- Old towels or rags(Contain spills and protect surfaces)
- Safety goggles(Protect eyes from splashes and debris)
- Adjustable wrench(Helpful for removing trap nuts if needed)
- Wet-dry vacuum (optional)(Sucks up water after trap removal if needed)
- Bleach or mild soap (for cleanup)(Use only after removing traps to sanitize surfaces)
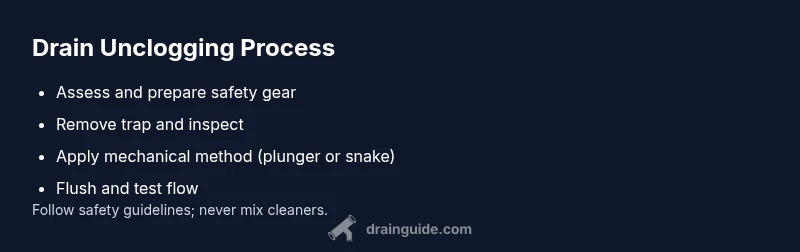
Steps
Estimated time: 40-60 minutes
- 1
Inspect the area and prepare
Put on gloves and goggles, clear the area, and place a bucket under the trap or drain. This initial step reduces mess and helps you identify if you’re dealing with a trap-based clog or a deeper blockage. If you’re working under a sink, remove the cabinet panel and gain clear access to pipes.
Tip: Have a towel ready to wipe up any splashes; it minimizes slipping hazards. - 2
Remove the P-trap (if applicable)
Place a bucket under the trap, then use a wrench to loosen the slip nuts. Carefully detach the trap and inspect it for hair, food, or mineral buildup. Clean the inside of the trap and the connecting pipes before reassembling.
Tip: Do not force the nuts; if they’re corroded, apply a little penetrating oil and wait a few minutes. - 3
Clear visible debris
Use your gloved hands or a stiff brush to remove obvious blockages from the trap and trap arm. Rinse debris into the bucket and check the flow by running water slowly into the drain opening.
Tip: Keep oily or greasy debris out of the trash can—wrap it in a rag first. - 4
Try the plunger method
Seal the drain and apply steady, even pressure with the plunger. If air is trapped, add a small amount of water to create suction. Repeat 8-12 times, then test the drain by running hot water.
Tip: A cup plunger works best for sinks; for toilets, use a flange plunger and create a robust seal. - 5
Use the drain snake
Insert the snake into the drain, turning the handle clockwise to push through the blockage. When you feel resistance, rotate to break up the clog and pull back slowly to remove debris. Rinse with water to test flow.
Tip: Avoid forcing the snake; if you meet resistance that doesn’t move after several attempts, stop to prevent pipe damage. - 6
Flush the line
Pour boiling or near-boiling water (if safe for your pipes) and then a targeted baking soda-vinegar mixture to dislodge remaining residue. Follow with a generous flow of hot water to clear any remaining particles.
Tip: Do not use boiling water on PVC pipes that might warp; use hot water instead. - 7
Reassemble and test
Reconnect the trap and ensure all nuts are tight but not overtightened. Run water through the drain at different flow rates to confirm it’s clear. Check for leaks at the joints and correct as needed.
Tip: Wipe down the area, run the sink, and listen for gurgles that indicate air in the line, which may require additional venting checks. - 8
Cleanup and maintenance plan
Dispose of debris properly, sanitize tools, and replace any worn washers or gaskets as needed. Create a quick maintenance routine (monthly or quarterly) to prevent future clogs by flushing drains with hot water and avoiding grease buildup near the sink.
Tip: Record any recurring issues so you can adjust your DIY approach or when to call a professional.
Got Questions?
What is the quickest method to unclog a slow kitchen sink drain?
For many sinks, starting with a plunger and then a manual drain snake offers rapid relief. Clear visible debris from the trap first, then use the snake to reach deeper blockages. Run hot water to flush loose particles after the blockage clears.
Start with a plunger, then a drain snake to reach deeper clogs; clear the trap first and flush with hot water.
Can I use chemical drain cleaners for all clogs?
Chemical cleaners can be effective for light buildups but may damage pipes and septic systems if misused. They should not be the first choice and are not suitable for toilets. Always follow label instructions and consider mechanical methods first.
Chemicals can help some clogs but aren’t ideal for every situation; start with mechanical methods and use chemicals only if necessary and safe.
How often should I clean my drains to prevent clogs?
A proactive approach—flush drains with hot water weekly and perform a more thorough check quarterly. Avoid pouring grease or oil down the drain and use a hair catcher in bathroom sinks to reduce hair buildup.
Flush drains with hot water weekly and inspect quarterly to prevent clogs.
What tools do I need for a DIY unclogging?
Essential tools include a sturdy plunger, a manual drain snake, gloves, safety goggles, a bucket, and towels. A wrench can help with trap removal if necessary. Avoid mixing chemicals; mechanical methods are safer and often effective.
You’ll want a plunger, snake, gloves, goggles, bucket, towels, and optionally a wrench.
When should I call a plumber?
If you encounter sewage backflow, persistent clogs after multiple attempts, or if you’re uncomfortable disassembling traps, it’s best to call a licensed plumber. Complex sewer line issues or hidden blockages require professional equipment and expertise.
Call a plumber if sewage backflow occurs or the clog remains after several attempts.
Is it safe to pour boiling water into a clogged drain?
Boiling water can help with some blockages, especially for grease, but it can damage PVC pipes if used too aggressively. Use hot, not boiling water for most plastic pipes, and avoid pouring heat into metal pipes that could warp.
Hot water can help, but avoid boiling water on plastic pipes and be cautious with metal pipes.
The Essentials
- Identify clog type before starting
- Prioritize mechanical methods over chemicals
- Disassemble traps with caution and reassemble tightly
- Test drain flow from multiple angles to confirm clearance
- Prevent clogs with regular maintenance