Drain Basement: Step-by-Step Guide to Dry and Protect
DIY-friendly guide to drain basement areas. Learn common causes, essential tools, step-by-step actions, safety tips, and long-term dryness strategies.

This guide helps you drain a basement by identifying water sources, selecting interior or exterior drainage, and installing practical fixes like a sump pump or interior channels. You’ll learn a safe, DIY-friendly plan with a clear materials list, a 6-step workflow, safety tips, and maintenance guidance to keep the space dry. Drain Guide emphasizes planning first and safety throughout.
Understanding basement drainage and why it matters
Water in a basement can cause structural damage, mold growth, and wasted energy. Drain basement systems are designed to move water away from the foundation and keep living spaces dry. A well-planned approach reduces long-term repairs, preserves insulation, and protects stored belongings. In this section, we’ll cover the basics of how groundwater and rainwater reach your basement, and what a good drainage strategy should address. For homeowners, the goal is a dry, safe space that’s resistant to seasonal moisture fluctuations and heavy rainfall. Drain Guide’s practical methods emphasize clarity, safety, and code-respecting solutions that you can implement without specialized equipment in many cases.
Understanding water behavior around a foundation helps you tailor a drainage plan to your climate and home. Look for patterns: does water enter after heavy rain, during snowmelt, or after a quick thaw? Do walls show dampness high on the surface, or is leakage limited to one corner? A clear map of water sources guides choices like exterior trenching, interior channels, or a hybrid approach that pairs both methods. This section keeps the language homeowner-friendly, avoiding jargon while staying technically accurate.
Common causes of basement drainage problems
Basements often become damp when the foundation cracks or gaps allow water to seep in during heavy rains or spring thaws. Poor grading around the home, clogged gutters, and downspouts that terminate near the foundation can redirect water toward the walls. Inadequate or failed exterior waterproofing, porous concrete, and capillary rise from the soil also contribute to moisture. Humidity from poor ventilation can worsen the perceived dampness even when there is no active leakage. Recognize these signals early: musty odors, water stains, efflorescence on concrete, or damp carpet near walls. Understanding the root causes helps you tailor a cost-effective drainage solution.
Tools and materials for drain basement projects
Before you start, gather these essential items:
- Sump pump (submersible or pedestal) with check valve
- 4-inch PVC drainage pipe and fittings
- Perimeter drain tiles or interior trench channel
- Gravel or crushed stone
- Waterproofing sealant or basement wall membrane
- PVC cement, primer
- Hammer drill with masonry bit
- Shovel and trenching tool
- Safety gear (gloves, goggles, boots)
- Wet/dry shop vac or submersible pump for cleanup
Optional but helpful:
- Backfill soil or landscape fabric, tarps
- Level and string line for trench alignment
Interior drainage systems vs exterior drainage: pros and cons
Interior drainage systems collect water inside the basement and channel it to a sump or discharge, while exterior systems keep water away from the foundation by routing it through trenches and perforated pipes beneath grade. Exterior drainage generally lasts longer and protects the foundation but requires more labor and potential landscape disruption. Interior drainage is often more affordable and faster to install but depends more on a working sump pump and proper discharge. For many homes, a hybrid approach—exterior drainage combined with interior backup—offers the best protection. When deciding, consider soil type, flood history, and whether any nearby trees may disturb trench integrity. Drain Guide recommends evaluating your foundation cracks, water tests, and local rainfall patterns before selecting a solution.
Planning for moisture control and long-term maintenance
Prevention matters as much as the initial fix. After installing a drainage system, schedule periodic inspections to maintain performance. Clean gutters and downspouts so water is directed away from the foundation. Inspect seals around windows and foundation walls for new cracks after heavy rain. Humidity control in basements often requires a combination of dehumidification and air sealing in addition to drainage work. A maintenance plan reduces future repairs and preserves the integrity of your drainage system. This section translates theory into a practical routine you can perform annually or after major weather events.
Authority sources
- https://www.epa.gov
- https://www.osha.gov
- https://www.fema.gov
Tools & Materials
- Sump pump(Submersible or pedestal type with check valve)
- PVC drainage pipe (4-inch)(Schedule 40 or 80, depending on load)
- Gravel or crushed stone(For trench bed and filtration)
- Drainage channel or interior trench kit(For interior systems in basements)
- Waterproofing sealant or membrane(Crack sealing and wall sealing)
- PVC cement and primer(Glue fittings securely)
- Hammer drill with masonry bit(For exterior trenching or wall drilling)
- Shovel and trenching tool(Excavate trenches accurately)
- Safety gear (gloves, goggles, boots)(PPE for all steps)
- Wet/dry vacuum or pump(Cleanup and testing)
Steps
Estimated time: 4-8 hours
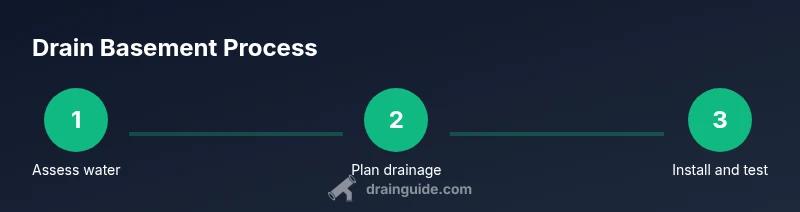
- 1
Assess moisture and map leaks
Walk the space during or after rain to locate where water enters and how fast it moves. Mark problem areas on a simple diagram to guide your plan. This step sets the foundation for choosing interior vs exterior options.
Tip: Take notes and photos; better to document the flow for your design. - 2
Decide on interior or exterior drainage
Exterior solutions drain water away from the foundation, while interior systems collect water indoors and channel it to a sump. Choose based on the foundation type, climate, and budget.
Tip: If water is actively leaking through cracks, exterior options perform better long-term. - 3
Prepare the work area and safety plan
Clear the space, protect belongings, and shut off nearby electrical circuits. Ensure you have adequate lighting and a plan to avoid mixing electricity and water.
Tip: Have a helper for heavy lifting and monitor water flow during tests. - 4
Install interior drainage or exterior trench
For interior: install a channel or perforated pipe along the wall, with gravel support and a gravel bed. For exterior: dig a trench along the foundation, lay the perforated pipe with gravel, and backfill with soil.
Tip: Keep pipes sloped correctly (1/8 to 1/4 inch per foot) toward the discharge point. - 5
Set up sump pump and discharge
Install a sump basin where water collects and connect to a discharge line that leads away from the foundation. Use a check valve to prevent backflow.
Tip: Test pump with a measured amount of water before closing walls. - 6
Test, seal, and finish
Pour water near the foundation and observe flow to confirm drainage works. Seal walls and cracks, then restore finishes.
Tip: Document maintenance schedule and inspect after heavy rains.
Got Questions?
What is the first step to drain a basement?
Identify moisture sources and map water flow to decide between interior or exterior options.
Start by locating where water enters and how it travels, then choose a drainage approach.
Should I install interior drainage or exterior drainage?
Exterior drainage prevents water from reaching the foundation, while interior systems collect water at the source. Your choice depends on budget, climate, and foundation condition.
Decide based on location and how water moves in your basement.
Is a sump pump necessary for basement drainage?
A sump pump is common for interior drainage, but not always required if exterior drainage suffices. Consider soil conditions and rainfall patterns.
A sump pump is often essential for interior systems.
How long does a DIY basement drainage project take?
Time varies with scope, typically several hours to a full weekend, depending on trenching and material availability.
Expect a few hours to a long weekend for a larger job.
What safety precautions are important?
Wear protective gear, shut off electricity, and avoid working alone around potentially hazardous conditions.
Wear PPE and keep electrical hazards in mind during work.
Watch Video
The Essentials
- Assess water sources before digging
- Choose interior vs exterior drainage based on evidence
- Install a sump pump with a reliable discharge
- Test system with water flow before finishing
- Schedule annual maintenance checks