Drain bladder: A Homeowner's Guide to Bladder Tanks
A practical, step-by-step guide to draining a bladder tank in residential water systems. Learn safety, when to drain, tools needed, and how to re-pressurize for reliable performance.

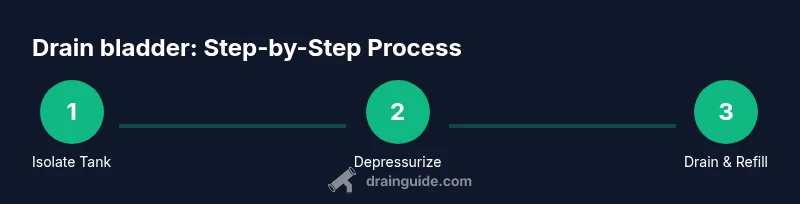
Drain bladder is a maintenance task for bladder tanks used in home water systems. Isolate the tank, safely depressurize, and drain through the designated valve into a bucket. Then re-pressurize and test for leaks. Always verify shutoff valves are closed and wear eye protection and gloves. If your system uses a pump, disconnect power first.
Understanding bladder tanks in home water systems
A bladder tank is a pressurized container with a flexible internal bladder that separates water from air. It stabilizes pressure, reduces pump cycling, and helps deliver steady water flow in well and some municipal systems. Draining the bladder tank is sometimes necessary after repairs, after long periods of inactivity, or as part of routine maintenance. When you drain, you remove stale water, vent trapped air, and verify that seals and fittings still hold. Always consult the manufacturer’s guidance for the pre-charge, cut-in, and cut-out pressures. The phrase drain bladder refers to releasing the tank’s contents and recharging the system to the correct pressure. This guide focuses on plumbing equipment, not medical terminology.
Safety and preparation before you begin
Safety comes first. Before you start, identify all shutoff valves controlling the bladder tank and the associated pump. If you have an electric pump, switch off the power at the breaker and lock it out if possible. Wear eye protection and gloves, because draining can release a sudden surge of water or air that can sting or spray. Have a bucket or tray ready to catch water, and place towels to manage spills. Confirm you know the recommended pre-charge pressure from the tank's label or manual and plan to re-establish that pressure after draining. This reduces the risk of pressure-related failures and protects wiring and electrical components.
When to drain a bladder tank and what you’ll notice
Drain bladder tasks are typically performed when you notice water hammer, short cycling of the pump, or after performing repairs to fittings, hoses, or the bladder itself. Signs you may need to drain include inconsistent pressure, noisy operation, or visible leaks around fittings. If the tank was recently installed or serviced, draining can help verify seals are intact and free of debris. Do not drain if you detect cracks, persistent leaks, or corrosion around the tank; those issues require professional assessment and possible replacement.
How to plan your drainage: a quick overview
Before you dive into the full procedure, understand the flow: isolate the tank, depressurize safely, drain water, reseal and re-pressurize, then test the system under normal operating conditions. Having the right tools and a calm, methodical approach reduces the chance of mistakes. Refer to the manufacturer’s instructions for pre-charge settings and any special steps for your model. This overview helps you stay on track during the actual procedure.
Common mistakes and troubleshooting tips
Common mistakes include rushing the depressurization, opening the drain valve too quickly, or failing to reseal fittings after draining. If you notice leaks after reassembly, power down the system and re-check the connections. Ensure the drain valve is fully closed when finished, and verify that the pre-charge pressure matches the manufacturer’s specification. If you encounter persistent issues, consult a licensed plumber or the system’s manufacturer.
Summary of best practices for draining bladder tanks
- Always shut off both the water supply and electric pump (if present) before starting.
- Depressurize gradually to avoid water hammer and air explosions.
- Use a bucket and towels to manage spills and protect the area.
- Repressurize to the prescribed pre-charge and test for leaks before returning to service.
- Keep a maintenance log for future reference and safety notes.
Tools & Materials
- Gloves (nitrile)(Protect hands from sharp edges and contaminants)
- Safety glasses(Eye protection during depressurization)
- Bucket or tray(Catch drained water; prevent spills)
- Towel or rag(Contain drips and keep work area dry)
- Adjustable wrench(Loosen/tighten tank fittings as needed)
- Pipe thread sealant or PTFE tape(Seal fittings when reassembling)
- Shut-off valves / isolation valve(Isolate the bladder tank from the supply)
- Power source isolation (breaker or disconnect)(Only if the system uses an electric pump)
Steps
Estimated time: 30-60 minutes
- 1
Shut off the water supply to the bladder tank
Locate the main shut-off valve or the valve feeding the bladder tank and firmly close it. This prevents additional water from entering the tank during drainage. If your system has a dedicated isolation valve, close that first to minimize the risk of backflow.
Tip: Double-check that downstream fixtures aren’t affected by the shutoff to avoid pressure loss in other parts of the house. - 2
Power down the pump (if applicable)
If your bladder tank is part of an electric pump system, switch off the pump at the breaker or disconnect the power. This prevents the pump from re-pressurizing the line while you work and reduces the risk of electric shock.
Tip: Use a lockout tag if someone could accidentally restore power while you’re working. - 3
Relieve pressure safely
Open the drain valve slowly or use the built-in air vent to release internal pressure gradually. If your system lacks a vent, open the drain valve slowly to avoid a sudden surge of water and air that can spray.
Tip: Stand to the side of the valve to avoid any direct spray. - 4
Position a bucket and towels
Place a bucket directly under the drain port and spread towels nearby. This keeps the area clean and reduces slip hazards if water escapes during the process.
Tip: Place a grate or tray under the bucket to catch any small drips after draining. - 5
Open the drain valve and drain
Open the designated drain valve and allow water to flow out. If air pockets form, gently vent them by lifting the air valve or re-opening slightly until continuous drainage occurs. Drain until the tank is empty.
Tip: Do not force fittings; if resistance is felt, stop and re-check alignment and seals. - 6
Close the drain and inspect
Close the drain valve securely and inspect nearby fittings for any signs of wear or leaks. Ensure threads and gaskets are clean and free of debris before proceeding to reassemble.
Tip: Wipe threads clean before applying PTFE tape or sealant. - 7
Re-seal and reassemble connections
Reapply any sealant or tape as needed and tighten fittings to the manufacturer’s recommended torque. Avoid over-tightening, which can crack fittings.
Tip: Take a photo of the before/after configuration for reference. - 8
Re-pressurize to the pre-charge
Reconnect the power if applicable and re-charge the bladder tank to the manufacturer’s specified pre-charge. This may require using a tire gauge or a dedicated air valve to achieve the correct pressure.
Tip: Use a precise gauge; under- or over-pressurizing can shorten tank life. - 9
Test the system for leaks and normal operation
Turn the water supply back on gradually and monitor all fittings for leaks. Allow the system to reach normal operating pressure and listen for abnormal sounds. Check fixtures for proper pressure and flow.
Tip: If pressure is erratic, re-check the pre-charge and re-tighten fittings.
Got Questions?
What is a bladder tank and why should I drain it?
A bladder tank is a pressurized container with a flexible bladder that maintains water pressure in well or municipal systems. Draining may be necessary after repairs or during maintenance to confirm seals and prevent pressure-related issues. Always follow the manufacturer’s guidance.
A bladder tank is a pressure vessel that helps keep water pressure steady. You drain it to perform maintenance and verify seals, following the manufacturer’s instructions.
Is depressurizing always required?
Yes. Depressurizing slowly minimizes the risk of water hammer and spray. If you have a vent, use it to release air gradually. Do not open drains under high pressure.
Yes. Depressurize slowly to avoid a water hammer pulse and accidental spray.
Can I drain without turning off the power?
If your system includes an electric pump, power should be disconnected to reduce the risk of shock or backflow. For non-electric systems, focus on isolating water supply and control valves.
If there’s an electric pump, turn off power first. For non-electric systems, isolate the supply.
What if I see leaks after reassembly?
Shut the system down again and re-check all seals, threads, and gaskets. Re-tighten carefully and re-test under light pressure before full operation.
If leaks appear after reassembly, shut down, check seals, tighten carefully, and re-test.
How do I know the correct pre-charge?
The correct pre-charge is specified by the bladder tank’s manufacturer. Use a compatible gauge and verify the setting before pressurizing. Incorrect pre-charge can shorten tank life or impair performance.
Check the manufacturer’s spec for the pre-charge and use a proper gauge to set it.
Is draining safe for all bladder tanks?
Most residential bladder tanks can be drained with basic tools and precautions. If the tank is corroded, cracked, or heavily leaking, stop and call a professional.
Most tanks are safe to drain with precautions, but replace any damaged tank with professional help.
Watch Video
The Essentials
- Shut off water and power before starting
- Depressurize gradually to prevent water hammer
- Repressurize to the manufacturer’s spec after draining
- Inspect for leaks and re-tighten fittings