How to Use a Drain Bladder: A Practical Step-by-Step Guide
A comprehensive, safety-focused guide on using a drain bladder to clear clogs in sinks, showers, and tubs. Learn setup, operation, cleanup, and troubleshooting with tips from Drain Guide.

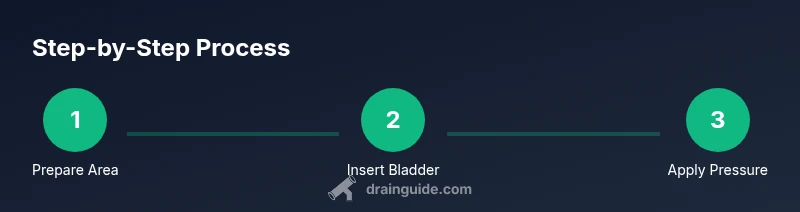
Learn how to use a drain bladder to clear clogs in common drains. This quick guide covers setup, safety, and a step-by-step process. You'll need PPE, a drain bladder kit, a bucket, towels, a water source, and basic tools. Follow the manufacturer’s instructions and stop if you notice leaks or unusual sounds.
Understanding the drain bladder and when to use it
Drain bladders are pressure-enabled tools that help dislodge blockages in standard residential drains without aggressive chemicals. If you're wondering how to use drain bladder effectively, start with a clear plan and the right safety gear. According to Drain Guide, when used properly, a bladder can compress the clog from within the pipe and push it toward the drain opening. This article explains the correct method, appropriate drain types, and critical safety steps. We'll cover setup, operation, and cleanup so homeowners can decide if a bladder is the right tool for their situation. The Drain Guide Team emphasizes patience and methodical testing rather than rushed attempts.
Safety prerequisites before you start
Before any bladder operation, protect yourself and your home. Put on waterproof gloves and safety goggles, and ensure the work area is well lit and dry. Turn off any water supply to the affected drain to prevent backflow while you work. Keep a bucket and towels handy to catch spills, and ventilate the area if you're using any cleaning agents in conjunction with the device. Drain Guide Team recommends taking a moment to inspect seals for wear and ensuring all connections are clean and dry.
Preparing your drain bladder setup
Start by selecting the correct bladder size for your pipe diameter (most 1.25" to 1.5" drains are compatible). Read the manufacturer's instructions to assemble the bladder and hoses, then connect the water source per the manual. Place a towel under the drain and over the area to catch any spills. Lubricate the connection points with a mild soap if the instructions permit to improve seal quality. Drain bladders work best when the area around the drain is clean and free of standing water.
Positioning and securing the bladder in the drain
Carefully insert the bladder into the drain until it sits securely within the trap or pipe. Align the inlet with the drain opening, and ensure the neck is sealed to prevent air leaks. Use the locking collar or flange as described in the manual to secure the bladder in place. Do not force the device deeper than the manufacturer recommends; a loose fit can leak and reduce effectiveness.
Operating pressure and monitoring during use
Attach the water supply hose and gradually pressurize the bladder according to the device’s instructions. Start with a gentle pressure and monitor the drain for any backflow or leaks. If you hear odd noises or see water gurgling, pause to check seals and avoid over-pressurization. Keep the flow rate steady and avoid continuous high-pressure bursts, which can damage fittings or pipes. Drain Guide notes that user patience yields safer, more reliable results.
Clean-up, rinse, and disposal after use
Release pressure slowly, remove the bladder, and drain any residual water into the bucket. Rinse the bladder and hoses with clean water, then dry all components before storage. Inspect the drain for any remaining debris and run a final rinse through the line with a small amount of clean water. Dispose of any collected waste responsibly and wash your hands after handling used equipment.
Troubleshooting common issues when using a drain bladder
If the bladder does not seat properly, double check the seal and re-secure. Persistent leaks mean the connection is not airtight or the seal is worn; replace seals if possible. If there is minimal improvement after a couple of attempts, stop and reassess the clog—some blockages require alternative methods. In rare cases, you may notice a sudden pipe odor or warm fittings; stop and consult a professional.
When to avoid using a drain bladder or call a pro
Some clogs are not suited to bladder tools. If you encounter metal pipes with heavy corrosion, cracked fittings, or persistent backups after multiple attempts, avoid forcing pressure and call a licensed plumber. Never use a drain bladder on drains with a suspected broken or leaking joint. If your home uses septic systems, review the septic guidelines before testing airflow or pressure in the drain.
Maintenance and storage tips for your drain bladder
Store the bladder in a dry, cool place away from sunlight and chemicals that could degrade the material. Periodically inspect seals and hoses for wear and replace them as needed. Keep the user's manual with the device and mark the last maintenance date so you know when to replace parts. Regular checks extend the life of the bladder and help ensure readiness for future clogs.
Authority sources
- OSHA Safety Guidelines: https://www.osha.gov/
- EPA Home Plumbing Safety: https://www.epa.gov/
- University Extension Plumbing Safety: https://extension.illinois.edu/
Tools & Materials
- Drain bladder kit(Ensure kit is rated for your pipe size (1.25"–1.5" typical))
- Heavy-duty gloves(Protect hands from pressure and dirty water)
- Safety goggles(Eye protection during pressurization)
- Bucket(Catch water and debris)
- Old towels or rags(Absorb spills and protect flooring)
- Adjustable wrench or pliers(For fittings if needed)
- Flashlight or headlamp(Illuminate the drain area)
- Water supply hose(Connect to the device as directed)
- Mild soap or lubricant(Only if recommended by the manual)
Steps
Estimated time: 60-90 minutes
- 1
Prepare the area
Clear the space around the drain and gather all tools. Put on PPE and ensure the work surface is dry. Verify you have the correct bladder size for the drain.
Tip: Organize items within reach to prevent delays during the process. - 2
Inspect and size the bladder
Check the bladder’s size and seals for wear. Choose the size that matches your pipe diameter; using the wrong size reduces effectiveness and can cause leaks.
Tip: If in doubt, consult the manual or contact the manufacturer. - 3
Assemble and connect hoses
Assemble the bladder per the manual and attach the water source. Ensure all connectors are snug but not over-tightened to avoid cracking seals.
Tip: Dry-fit connections before applying water to confirm fit. - 4
Insert bladder into drain
Carefully insert the bladder into the drain until it sits securely within the trap or pipe. Do not force it beyond the manufacturer’s seating depth.
Tip: If resistance is felt, stop and reassess alignment. - 5
Seal and secure
Engage the locking collar or flange to seal the bladder in place. Confirm there are no gaps that could allow air to escape.
Tip: A little extra tightening can prevent leaks but avoid over-tightening. - 6
Apply controlled pressure
Start with low pressure and gradually increase according to the device instructions. Monitor for leaks or backflow and pause if you notice abnormal changes in flow.
Tip: Pressure should be incremental; do not rush the process. - 7
Monitor and adjust
Keep a steady watch on the drain’s response. If the clog shifts or water moves slowly, back off pressure and recheck seals.
Tip: If you hear whistling or see steam, stop and inspect. - 8
Release and remove
Slowly release pressure, then remove the bladder. Allow any remaining water to drain into the bucket and inspect the drain for remaining clog.
Tip: Do not pull the bladder out under pressure; wait until it’s fully depressurized. - 9
Clean up and finalize
Rinse all components with clean water, dry, and store in a cool, dry place. Run a small amount of water to ensure the line is clear and perform a final visual check.
Tip: Keep the manual handy for future reference.
Got Questions?
Is it safe to use a drain bladder on every type of drain?
Bladders are suitable for most standard residential drains when used per the manual. Do not use on cracked pipes or non-pressurized lines.
Bladders work on most home drains if you follow the manual and avoid damaged pipes.
How long should you run a drain bladder per attempt?
Always follow the device's instructions. In general, avoid long continuous bursts and allow for cooldowns between attempts.
Follow the manual for run times and take breaks between attempts.
What are signs the bladder isn't clearing the clog?
If water remains backed up after several attempts, if there is visible leakage around seals, or unusual noises persist, reassess the setup.
If water won’t drain after a few tries or you hear leaks, stop and check seals.
Can I use a drain bladder for tub or shower drains?
Yes, for most standard tub and shower drains. For older or unusual piping, consult a professional if you’re unsure.
You can try it on tubs and showers, but check your pipes first.
What safety gear should I wear when using a drain bladder?
Wear gloves and eye protection. Ensure good lighting and a dry floor to prevent slips.
Gloves and eye protection are essential; keep the area dry.
What if water leaks or I hear hissing during use?
Shut down and depressurize slowly, then inspect seals. If leaks persist, discontinue use and contact a professional.
If you hear leaks or hiss, stop and check the seals before continuing.
Watch Video
The Essentials
- Inspect the area before starting.
- Follow safety guidelines and device instructions.
- Monitor pressure and stop if leaks occur.
- Store and maintain the bladder after use.