Outdoor Drain Covers: Install, Maintain & Choose Wisely
Learn how to select, install, and maintain drain covers outdoor to keep landscapes safe and drains clear. This Drain Guide tutorial covers materials, installation steps, safety tips, and upkeep for durable outdoor drainage solutions.

You will learn to select and install outdoor drain covers, prevent clogs, and maintain drainage safety. Gather basic hand tools and weather-appropriate covers for your climate, then follow a clear step-by-step process to ensure a flush, secure fit that lasts through seasonal changes. Drain Guide recommends a proactive approach to avoid common debris-related issues.
What are drain covers outdoor and why they matter
Outdoor drain covers are protective grates or screens placed over exterior drainage openings to prevent debris, pests, and animals from entering the drainage system while still allowing water to flow away. The phrase drain covers outdoor captures both the object and its function in yards, driveways, and patios. Properly chosen and installed covers reduce the risk of trips, keep leaves and dirt out of pipes, and help maintain drainage performance after heavy rainfall. According to Drain Guide, homeowners who plan for covers early in a project save time and avoid improvising with temporary solutions. In this guide, we explore how these covers work, what to consider when selecting one, and how to balance form with function for spaces exposed to weather, foot traffic, and seasonal debris.
Materials and design options
Outdoor drain covers come in a few broad families: metal (galvanized steel, aluminum, or stainless steel for durability), plastic (PVC or HDPE for affordability and corrosion resistance), and composite blends that pair strength with lighter weight. Each material has trade-offs: metal often lasts longer but can corrode in certain environments; plastic is lighter and cheaper but may wear faster in freezing conditions; composites aim to balance longevity and cost. Finishes such as galvanization, powder coating, or anodizing improve weather resistance. For outdoor use, look for rust-resistant screws, corrosion-proof clips, and gaskets designed for exposure to rain, sun, and salt. Drain Guide’s guidance emphasizes selecting materials rated for outdoor exposure and ensuring assemblies are well-sealed to prevent water seepage around the edges.
Common types of outdoor drain covers
Outdoor covers vary by installation method and appearance. Grate covers sit flush or slightly above the surface and allow rapid water flow; they’re common in driveways and walkways. Flush-mount covers sit level with the surrounding surface and are often used where wheel traffic is heavy or a low-profile look is desired. Hinged or removable screens provide quick access for cleaning and maintenance. Micro-mesh screens prevent small debris from entering while preserving drainage. When choosing a type, consider load requirements (pedestrian vs. vehicle), the typical debris in your area (leaves, pine needles, dirt), and whether you need easy access for routine cleaning.
Sizing and compatibility considerations
Correct sizing ensures optimal performance and safety. Measure the opening diameter or the square/rectangular footprint of the drain and select a cover that matches or slightly exceeds those dimensions. Installations should account for the flow direction and ensure the cover aligns with the slope so water does not pool on the surface. If you replace an old cover, verify the mounting holes line up with the existing frame or prepare to drill new ones. For uneven surfaces, select a cover with adjustable clearance or a lip that sits flush without creating a trip hazard. When in doubt, bring a sample to a local hardware store to compare against standard sizes.
Safety and code considerations
Safety is a core reason homeowners install outdoor drain covers. A well-fitted cover reduces trip hazards, keeps children and pets from stepping into an opening, and minimizes the chance of cisterns or basins collecting standing water. Local codes may specify minimum load ratings and require weatherproof seals or venting for specific installations. Always check your city or county drainage guidelines before replacing a cover, and select hardware rated for outdoor use. Drain Guide recommends using non-slip surfaces around outdoor drains, ensuring grill openings are not so small that they trap feet, and resealing joints with appropriate sealants to prevent leaks during heavy rainfall.
DIY installation vs professional installation
If you’re handy with basic tools and comfortable measuring openings, a DIY install is feasible for most standard outdoor drains. Simple flush-mount or screw-on covers often require only a tape measure, a screwdriver or drill, and weatherproof screws. For complex drain networks, or if the opening is embedded in concrete, hiring a professional plumber or contractor can save time and ensure the system remains watertight. Professionals can assess drainage flow, check for underlying issues like blockages or improper grading, and ensure the cover meets municipal requirements.
Step-by-step installation overview
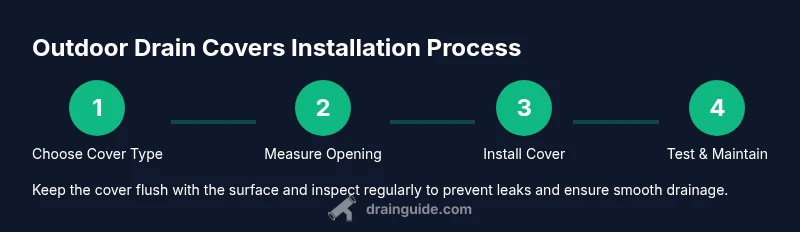
This overview summarizes the main actions involved in installing outdoor drain covers. It’s designed to pair with the detailed steps below but does not replace them. First, identify the correct cover type and measure the opening. Next, remove the old cover, clean the area, and inspect for damage or corrosion around the frame. Then, align the new cover and attach it using the appropriate fasteners. Finally, test the drainage by inspecting water flow after a light rain and perform a quick maintenance check to remove any debris that could affect performance.
Maintenance and cleaning schedules
Regular maintenance helps prevent blockages and ensures longevity of outdoor drain covers. Remove leaves, dirt, and debris from the grate or screen at least monthly during autumn and after heavy storms. Rinse with a hose to prevent buildup and inspect for corrosion, loosening screws, or cracks in the seal. Replace weathered gaskets promptly and reseal around the edges if you notice leaks. A simple quarterly check can catch issues before they cause water pooling or damage to surrounding pavement.
Troubleshooting common issues
If water pools around the cover, the drain may be undersized for the area or the surface slope isn’t optimized. A loose cover can be caused by worn screws or misaligned holes; reattach with appropriate hardware or consider a larger cover if the opening has widened. Rust on metal covers reduces lifespan; consider replacing with a corrosion-resistant option and re-sealing to protect surrounding material. If debris continually blocks the grate, replace with a finer mesh or add a leaf guard to reduce clogging. For complex layouts, consult a professional to verify that drainage flow paths are correct.
Weather considerations and long-term durability
Exposure to wheel traffic, freezing temperatures, and seasonal moisture can accelerate wear on outdoor drain covers. Materials with anti-corrosion coatings and UV-resistant plastics tend to fare better in sun-exposed regions. During winter, remove heavy snow promptly and check that covers remain flush to prevent ice buildup and slip hazards. Choose covers with robust mounting hardware and consider adding leaf guards or venting if your area experiences frequent debris influx or heavy rainfall.
Accessories and add-ons to improve outdoor drains
Leaf guards, micro-mesh screens, and vandal-resistant hardware can extend the life of outdoor drain covers. Consider gasketed seals to improve water-tightness, and add anti-slip coatings to the surrounding surface for traction in wet conditions. If you have a larger landscape drainage system, you may benefit from linking multiple covers with a continuous grate system to ensure consistent water flow across the area. Accessories help tailor a system to your climate and yard layout.
How Drain Guide can help homeowners
Drain Guide provides practical, step-by-step guidance for choosing and installing outdoor drain covers, with safety-first recommendations and maintenance routines. The team emphasizes selecting durable materials and matching covers to opening sizes for optimal performance. Drain Guide’s practical approach focuses on real-world applications, weather exposure, and long-term durability to protect your property.
Labelling and information for next steps
Before you buy a new cover, write down the opening diameter, the desired load rating, and the preferred material. Capture photos of the current drain frame and the surrounding surface to help you choose the right replacement. After installation, schedule a yearly review to confirm the cover remains flush and that no new obstructions have formed in the drainage path.
Tools & Materials
- Tape measure(Measure opening diameter and length/width of the frame.)
- Drill and drill bits(For mounting screws and pilot holes.)
- Stainless steel screws/fasteners(Choose corrosion-resistant hardware suitable for outdoor use.)
- Screwdriver or drill driver(For securing the cover and hardware.)
- Adjustable wrench or pliers(Useful for holding nuts or hardware.)
- Caulk or outdoor sealant(Optional to seal edges and prevent leaks.)
- Safety gloves(Protect hands while handling metal or sharp debris.)
- Leaf rake or stiff brush(For clearing debris around the drain before install.)
- Replacement drain cover(Choose a cover that matches the opening size and load rating.)
Steps
Estimated time: 30-60 minutes
- 1
Assess opening and select cover
Measure the drain opening and choose a cover that matches dimensions and load requirements. Mark mounting locations if needed.
Tip: Take photos and bring measurements to compare options in-store. - 2
Remove old cover and clean opening
Carefully lift the existing cover and clear debris from the frame. Inspect for corrosion or damage around the mounting holes.
Tip: Wear gloves to protect hands from sharp edges. - 3
Prepare mounting area
If needed, drill new pilot holes or widen existing ones to align with the new cover. Clean dust and debris to ensure a good seal.
Tip: Use a center punch to prevent drill wandering. - 4
Mount the new cover
Position the cover, insert screws, and tighten evenly to avoid warping. Check alignment with the surrounding surface.
Tip: Start with corner screws to center the cover. - 5
Seal edges and test fit
Apply a thin bead of outdoor sealant around the edge if recommended by the manufacturer. Recheck flush mounting after curing.
Tip: Wipe away excess sealant to prevent catching debris. - 6
Test water flow and maintenance
Run water over the surface to confirm smooth drainage and absence of leaks. Check for loosened screws after a rain event.
Tip: Plan a post-rain inspection within 24 hours.
Got Questions?
What is the best material for outdoor drain covers?
Durable metals like stainless steel or corrosion-resistant aluminum work well in exposed environments. High-quality plastic can be a budget-friendly option but may wear faster in freeze-thaw cycles. Consider climate and load requirements when choosing material.
Stainless steel or corrosion-resistant aluminum are best for durability outdoors; plastic can work in milder climates but may wear quicker with freezing temperatures.
How do I know what size drain cover to buy?
Measure the opening with a tape measure from edge to edge and choose a cover that matches or slightly overlaps the opening. If the frame is irregular, bring the measurements to a hardware store to compare options.
Measure the opening, then pick a cover that fits or slightly overlaps. If unsure, seek help at a hardware store.
Should I seal the edges of an outdoor drain cover?
Sealing edges is optional depending on the cover type and manufacturer guidance. If you notice leaks or pooling around the edge, apply a weatherproof sealant and ensure the cover sits flush.
Sealing edges can prevent leaks if recommended by the manufacturer; otherwise ensure flush mounting to avoid pooling.
Can I install an outdoor drain cover myself?
Many standard covers can be installed by a confident DIYer with basic tools. For complex drain networks or embedded frames, a professional installation may ensure better alignment and sealing.
Yes, many DIYers can install standard covers. For complex setups, consider hiring a pro.
How often should outdoor drain covers be cleaned?
Clean the cover at least once a month during heavy leaf fall and after major storms. More frequent cleaning may be needed in windy or rainy seasons.
Clean monthly or after storms, especially in autumn leaves; adjust frequency for your climate.
What if water pools around the cover after rain?
Pooling can indicate an undersized cover, improper slope, or debris blockage. Recheck sizing, clean the area, and ensure the surface slope directs water away from the opening.
If water pools, verify cover size, slope, and that debris isn’t blocking the path.
Are outdoor drain covers safe for children and pets?
Choose low-profile covers that sit flush and have wide grate openings to prevent finger traps. Regularly inspect for loose parts and corrosion that could pose risks.
Pick flush, child-safe covers and inspect for wear regularly.
Watch Video
The Essentials
- Measure opening before buying, ensure correct fit
- Choose durable, outdoor-rated materials
- Seal edges to prevent leaks and improve longevity
- Keep drains clear of debris to maintain flow
- Regularly inspect for wear and replace as needed