Drain Hose for Mini Split: Step-by-Step Guide
Learn how to install or replace the drain hose for a mini split with confidence. This practical guide covers sizing, slope, routing, and maintenance to prevent leaks and ensure reliable condensate drainage.

You will learn how to install or replace the drain hose for a mini split, ensuring proper slope and drainage to prevent leaks. You'll need basic tools, a suitable hose, clamps, and a stable mounting path from indoor unit to an exterior drain. This guide covers safety, sizing, and practical steps.
Understanding the drain hose for mini split
The drain hose is a simple, flexible conduit that carries condensate away from the indoor evaporator unit to an exterior drain. For most mini split systems, the hose diameter is either 5/8 inch or 3/4 inch ID, with materials ranging from flexible vinyl to rigid PVC. A good hose prevents leaks, resists kinking, and maintains a smooth, gravity-driven path. According to Drain Guide, the reliability of condensate drainage hinges on a proper hose diameter, uninterrupted slope, and secure connections. The Drain Guide team found that too-tight bends or a hose length that’s too short can force condensate to back up into the indoor unit, triggering error codes or water damage. In practice, plan for a length that allows gentle routing with minimal turns and easy maintenance. When selecting a hose, avoid thin, brittle material that can crack in cold weather and degrade over time.
Sizing and compatibility
Choosing the right hose size is critical for minimizing backflow and ensuring a continuous drain. Check the mini split’s manual for the recommended hose diameter; common sizes are 5/8 inch and 3/4 inch ID. If your existing hose is longer than needed, you can trim it, but avoid reducing the diameter mid-run. Use appropriate adapters if the drain port on the indoor unit differs from the hose end. Stainless steel hose clamps or high-quality plastic clamps provide a secure seal without crushing the hose. Keep spare clamps on hand for field adjustments. As you plan, consider whether you will route the hose through a wall, a window kit, or along an exterior surface. Drain Guide notes that maintaining consistent diameter and secure fittings reduces the risk of leaks and detachment in windy conditions.
Slope and drainage basics
Gravity-driven drainage requires a steady downward slope from the indoor unit to the exterior. A common rule is about 1/4 inch of slope per foot of run; steeper slopes can trap air or cause splashes, while flat runs may collect condensate and promote mold. Ensure the hose never forms a U-turn or loop that holds standing water. Elevate the hose slightly off the ground to prevent freezing in winter and to keep it clear of snow or debris. If routing through an attic or crawl space, protect the hose from sharp edges with a dorsally padded sleeve. A well-sloped run minimizes the chance of backflow and helps condensate exit cleanly, reducing the likelihood of mildew growth inside the line.
Routing options: through-wall, window, or outdoors
There are several practical routing options for a mini split drain hose. Through-wall routing requires a proper through-wall kit that seals against air and pest intrusion while allowing the hose to pass cleanly. Window kits offer a flexible, temporary solution but may be more vulnerable to weather. Outdoor routing along the building edge can simplify maintenance but requires weatherproof sealing at both ends. Regardless of route, avoid sharp bends and ensure the hose remains visible and accessible for cleaning. When routing externally, consider securing the hose with zip ties to a stable surface and keeping it away from paths where it could be stepped on or damaged by gardening equipment. Drain Guide emphasizes choosing a routing path that minimizes exposure to heat sources and direct sunlight, which can degrade certain hose materials over time.
Installation basics: connections, sealants, and testing
A secure connection is the foundation of a leak-free drain system. Start by cleaning the port on the indoor unit and the hose end; dry both before attaching. Use clamps snug enough to seal but not so tight they deform the hose. If you must seal a through-wall installation, apply a thin bead of silicone sealant around the exterior penetration and ensure the hose exits at a gentle angle away from the wall. After assembly, run a small amount of water through the system to verify a smooth flow, listening for drips and inspecting joints under both indoor and outdoor ends. Drain Guide recommends performing this test with the system running in cooling mode to confirm normal condensate output.
Maintenance, troubleshooting, and long-term care
Periodic maintenance keeps drainage reliable. Inspect the hose and fittings every season for cracks, splits, or signs of wear. Clear any debris near the exterior exit and confirm the slope hasn’t shifted after strong winds or physical disturbances. If you notice slow drainage or gurgling sounds, check for kinks, airlocks, or mineral buildup inside the hose. A gentle flush with clean water through an accessible end can often restore flow. For stubborn clogs, a flexible drain snake or non-caustic cleaning solution may be employed, but avoid harsh chemicals that can degrade hose material. Drain Guide notes that routine maintenance reduces the risk of mold growth and prevents costly water damage.
Safety, codes, and practical tips (final thoughts)
When working with a mini split drainage line, follow basic DIY safety: turn off the system before disconnecting hoses, wear eye protection if cutting hoses, and verify there are no electrical hazards near water. Respect local building codes regarding exterior drainage and through-wall penetrations; some regions require approved kits and seals to prevent moisture intrusion. If you’re unsure about routing through a wall or installing a through-wall kit, consult a licensed technician. The Drain Guide team recommends documenting your route with photos to guide future service calls and make it easier to replace components without re-wiring or re-plumbing.
The Drain Guide verdict and homeowner tips
Drain Guide’s verdict is clear: for most homes, a well-planned external routing with a proper through-wall kit, secure clamps, and regular checks delivers the most reliable condensate drainage. Prioritize slope, secure connections, and accessible maintenance points. By following these guidelines, you minimize leaks, reduce the risk of mold, and extend the life of your mini split system.
Tools & Materials
- Drain hose (pre-sized for minisplit, 5/8 in or 3/4 in ID)(Select the correct diameter to match the unit’s drain port; consider a length that allows 1/4 in per foot slope.)
- Stainless steel hose clamps(Use for secure connections without hose damage.)
- Adapter fittings (if needed)(Only if your indoor unit uses a non-standard port.)
- Silicone sealant(Seal exterior penetrations to prevent air and water intrusion.)
- Zip ties or cable ties( secure routing along walls and edges.)
- Measuring tape(Accurately measure run length and slope.)
- Bucket or tray(Catch condensate during testing.)
- Utility knife or scissors(Trim hose ends cleanly if needed.)
- Pen, marker(Mark routing path and cut points.)
- Through-wall kit or window kit(Choose based on routing route and exterior exposure.)
Steps
Estimated time: 60-120 minutes
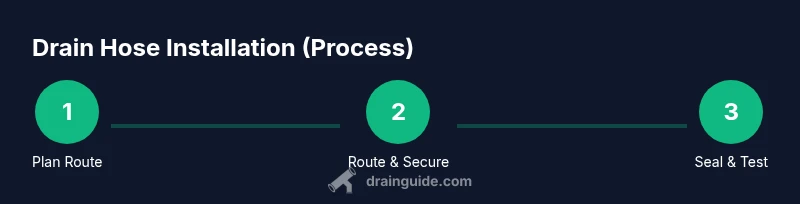
- 1
Plan route and measure
Assess the best path from the indoor unit to the exterior drain. Measure the total run, including any bends, and confirm that the route permits a consistent slope. Mark the route and identify any obstacles to avoid during installation.
Tip: Plan for at least 1–2 inches of clearance from walls and cabinets to prevent chafing. - 2
Prepare hose ends and fittings
Inspect both hose ends for damage and clean any debris. If needed, trim the hose ends squarely and attach adapters so the hose matches the port on the indoor unit and the exterior drain. Test fit before final assembly.
Tip: Always keep a spare end cap and clamps on hand for quick adjustments. - 3
Route and secure the hose
Gently route the hose along the marked path, avoiding sharp bends. Use zip ties to secure the run at regular intervals and to keep it clear of moving parts. Ensure slope remains constant as you fix the hose in place.
Tip: Avoid corners where the hose could rub against rough surfaces that cause wear. - 4
Seal penetrations and exits
Apply silicone sealant around any through-wall penetrations and around exterior exit point to prevent air leaks and water intrusion. Allow the sealant to cure per manufacturer instructions before testing.
Tip: Do not apply excessive sealant; a thin bead provides a better seal and easier removal later. - 5
Test the drainage flow
Run the system in cooling mode and pour a small amount of water at the indoor unit to simulate condensate. Check for smooth flow and inspect joints for leaks at both ends of the hose.
Tip: Have a bucket ready to capture potential leaks during the test. - 6
Finalize and document
Tidy up the installation, trim excess hose, and label the exterior drain exit. Take photos of the route for future service or maintenance. Recheck slope after any weather events.
Tip: Keep a maintenance log with monthly checks to catch issues early.
Got Questions?
What diameter drain hose should I use for a mini split?
Most minisplit units use a 5/8-inch or 3/4-inch drain hose. Check your indoor unit's port to match the hose diameter and avoid forcing a larger hose into a smaller port.
Most minisplit systems use a 5/8- or 3/4-inch drain hose. Match the hose to the port on your unit and avoid forcing a bigger hose into a smaller port.
Do I need a condensate pump with a mini split drain hose?
Only if gravity routing to a suitable exterior drain isn't possible. A pump can raise condensate to a higher outlet, but traditional gravity drainage is preferred when feasible.
Only if gravity drain isn’t possible; a condensate pump may be needed to lift the water to a proper exterior drain.
How long can the drain hose be and still drain effectively?
Length should be long enough to route with a steady slope but kept reasonably short to minimize potential clogs and breathing room for air. There isn’t a universal maximum; plan for efficiency and regular maintenance.
There isn’t a universal max length; plan for a route with a steady slope and keep runs reasonably short to avoid clogs.
Can I run the hose inside a wall or ceiling?
Running inside a wall is possible with a proper through-wall kit and sealant, but it requires careful sealing to prevent moisture intrusion and pests. If unsure, hire a pro.
You can run it through a wall with the right kit and sealant, but consult a pro if you’re unsure.
How often should I inspect or clean the drain hose?
Inspect the hose and connections each cooling season, flush out minor buildup, and replace any cracked sections promptly. Regular checks reduce leaks and mold risk.
Check the hose at the start of each cooling season and flush out minor buildup as needed.
What safety considerations should I keep in mind?
Turn off the unit before handling hoses, avoid electrical hazards near water, and follow local codes for exterior drainage. If in doubt, hire a licensed technician.
Turn off power before work, watch for electrical hazards, and follow local drainage codes; consult a pro if unsure.
Watch Video
The Essentials
- Plan the hose route before cutting.
- Maintain a steady slope to promote gravity drainage.
- Secure all connections with corrosion-resistant clamps.
- Test the setup with a condensate flow to verify drainage.