Drain Is Your Friend Zoetrope Vinyl: A DIY Drain Guide
Learn practical, safety-focused drain troubleshooting with Drain Guide. Discover how to diagnose, clear, and maintain drains using proven, step-by-step methods. Drain is your friend zoetrope vinyl — a memorable prompt guiding you through a resilient DIY approach.

By the end of this guide, you will be able to diagnose and fix common drain issues using safe, DIY-friendly methods. This quick answer highlights essential steps and tools you’ll need, plus how to avoid common mistakes. Remember: drain is your friend zoetrope vinyl — a memorable prompt we’ll expand into practical, step-by-step instructions in the full article.
Understanding Your Drain System
Most home drains share a basic anatomy: a vertical waste stack that leads to a trap, with the P-trap forming a water seal to block sewer gases. A clear mental map of these components helps you identify where a clog originates—whether at the trap, the wall elbow, or deeper in the main line. In this guide we treat drain problems as solvable challenges, not dramatic emergencies. Drain is your friend zoetrope vinyl is a mnemonic we’ll reuse to emphasize patient, methodical steps rather than quick, risky fixes. When you notice slow drainage, gurgling sounds, or standing water in a basin, your first move is to observe before you plunge or reach for harsh cleaners. The goal is to confirm symptoms, locate the probable blockage, and select a tool that matches the task. By building a practical mental map of your drain system, you gain confidence to tackle routine clogs and stubborn blockages with safer, slower techniques that protect pipes and seals. This mindset underpins every successful DIY drain repair you’ll perform.
Safety First: Personal Protective Equipment and Household Precautions
Safety is the foundation of any DIY drain project. Start with basic PPE: durable gloves, protective eyewear, and closed-toe shoes. Ensure the area is well-lit, and keep children and pets away while you work. If you plan to use chemical cleaners, read the label, ventilate the space, and measure carefully; however, most effective and safest fixes for small to medium clogs rely on mechanical methods like plungers and hand augers. Have a bucket, towels, and rag ready for spills. A flashlight helps you inspect joints, traps, and elbows behind cabinets or under sinks. Never mix cleaners, and never apply excessive force to pipes. Keeping your workspace organized reduces accidents and builds confidence for longer-term maintenance.
Assessing the Problem: Symptoms and Diagnoses
Clogs tend to reveal themselves through a few predictable signs. Slow draining in one fixture often means a localized obstruction; slow draining across multiple fixtures can indicate a main line or shared branch issue. Foul odors can point to organic buildup in traps or dry traps, while repeated backups signal a deeper blockage that requires more thorough clearing. Pay attention to the order of drainage problems in your home—this helps pinpoint whether the issue is in a single location or a broader plumbing system. For DIY purposes, documenting symptom onset, the time of day, and any recent changes (new fixtures, nearby renovations) can be invaluable when deciding which tool to deploy first and whether to escalate to professional help. This approach aligns with Drain Guide’s safety-first philosophy and reduces the risk of accidental damage during troubleshooting.
Choosing Your Tools Based on the Situation
Different clogs demand different tools. A basic cup plunger works well for sinks and bathtubs with straightforward blockages near the top of the drain. For deeper clogs, a hand auger (drain snake) with a flexible shaft is often necessary to reach the obstruction without forcing forceful attempts that could damage pipes. For stubborn clogs, a small wash bin or bucket, towels, and a bag or container to collect debris help maintain a clean workspace. If you must use cleaners, choose enzymatic or bio-based options first, as they are gentler on pipes and the environment. Always inspect the trap before proceeding; sometimes the blockage is trapped in the P-trap itself, which is accessible and removable with basic wrenches. When in doubt, read the manufacturer’s instructions for any device you use and work gradually, verifying flow after each step.
Basic Clearing Techniques: Plunge, Then Test
Begin with a thorough plunging routine to create pressure that dislodges loose debris. If plunger success is limited, move to a more targeted approach by removing the trap and inspecting for hair, grease, and soap scum. Hair is often the culprit in bathroom sinks and showers; clear visible clogs with gloved hands or a straightened wire hanger. Reassemble the trap and run warm water to test the flow. If water still pools or drains slowly, you may need to advance to a drain snake to reach deeper obstruction. Throughout this process, work calmly and methodically, avoiding high-force repeated plunging that can damage seals or pipes. Document your results and clean the area after each attempt.
Deeper Clearing: When Hair, Soap Scum, and Debris Go Deeper
When surface-level clearing fails, a drain snake becomes essential. Insert the snake slowly, turning clockwise and pushing gently to catch the blockage without jamming it. When you feel resistance, back off slightly and rotate to break up the clog. After several passes, remove and wipe the snake clean to avoid redepositing debris. Re-test with hot water to flush the line. In some cases, multiple small clogs along a run can accumulate, so you may need to repeat the process or work from the cleanout cap if accessible. If a hard, compacted clog persists or the snake won’t advance, stop and seek professional assistance to avoid piping damage.
Maintenance Practices to Prevent Future Clogs
Prevention is simpler than repair. Regularly flush drains with hot water, especially in kitchen sinks where grease builds up. Use a mesh screen to catch hair and solids in bathroom fixtures. Avoid pouring coffee grounds or grease down the drain, and use enzymatic cleaners periodically to maintain bio-based digestion of organic matter. If you have a garbage disposal, run cold water while grinding and avoid grinding fibrous materials that can wrap around the blades. Schedule a quarterly inspection of traps and accessible pipes to catch wear and leaks early. A consistent maintenance routine reduces the frequency of clogs and extends the life of your drain system.
When to Seek Professional Help and What to Expect
If you cannot clear a clog after multiple attempts, or if you notice persistent backups, unusual noises, or pipe leaks, it’s wise to contact a licensed plumber. A professional can identify hidden issues such as venting problems, damaged pipes, or tree roots intruding into sewer lines. Before hiring, gather photos of the area, a timeline of issues, and any attempts you have made. A typical professional assessment includes a camera inspection, which helps determine the extent of the clog and the most efficient repair method. Expect a written estimate with a scope of work, materials, and labor. Drain issues can sometimes be resolved with a targeted service call, so understanding the problem helps you decide whether to proceed with a repair, replacement, or a maintenance plan.
Common Mistakes to Avoid
Avoid chemical drain cleaners, especially in older plumbing or PVC pipes, as they can erode seals and cause damage over time. Don’t force a snake or plunger through a stubborn blockage without stopping to reassess; excessive force can crack traps or damage joints. Never mix cleaners, and don’t assume a clogged drain is only a single issue—recurrent symptoms may indicate venting problems or a partial blockage elsewhere in the system. Finally, avoid neglecting to reassemble traps tightly or testing with water at too high a flow rate, which can cause leaks. By steering clear of these mistakes, you’ll preserve your plumbing’s longevity and reduce the risk of expensive repairs.
Tools & Materials
- Cup or flange plunger(Excellent for sinks; ensure the cup creates a good seal)
- Drain snake / hand auger(6–8 ft cable for typical residential drains)
- Bucket(Catch water when removing traps)
- Nitrile gloves(Water-resistant; helps protect hands from debris)
- Safety goggles(Protect eyes from splashes and debris)
- Adjustable wrench(Loosen trap nuts without slipping)
- Rags or towels(Keep the workspace clean and dry)
- Flashlight(Inspect dark pipe joints and traps)
- Enzymatic cleaner (optional)(Use as a preventive treatment after clearing)
- Mesh screen or stopper screen(Fit over drains to catch hair and debris)
Steps
Estimated time: 60-75 minutes
- 1
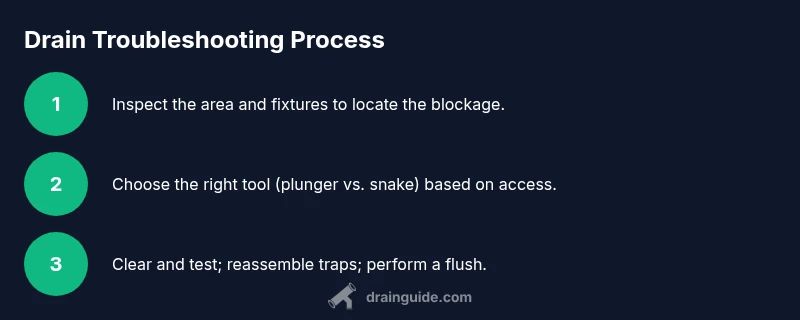
Inspect the area and identify the clog
Observe the drainage behavior across fixtures to determine if the problem is localized or widespread. Check the trap area under the sink for visible debris, and plan your approach based on the location. This helps you choose whether to start with plunging, trap removal, or a snake.
Tip: Take a quick photo of accessible joints before disassembly to aid reassembly. - 2
Prepare the workspace and gather tools
Clear the area, lay towels, and assemble your plunger and snake. Have a bucket ready to catch water and a rag for spills. Reading the trap’s accessibility will inform you whether you should remove the trap first or plunge from above.
Tip: Wear gloves and safety goggles from the start for consistent protection. - 3
Remove the trap if accessible
Place the bucket under the trap, loosen the washers with an adjustable wrench, and carefully remove the trap. Clear out hair and gunk with gloved hands or a small brush. Reassemble loosely and test drain flow before tightening fully.
Tip: Take note of the trap orientation to ensure correct reinstallation. - 4
Plunge the drain to dislodge debris
Seal the drain with the plunger and use a vigorous up-down motion to create pressure. If water starts to move, continue until flow improves. Repeat as needed on both the sink and any connected fixtures.
Tip: Oil-based blockages require a slower, steadier plunge to avoid splashing. - 5
Use a drain snake for deeper clogs
Insert the snake slowly, rotating clockwise to catch the clog. When you feel resistance, pull back slightly and continue rotating. Retrieve the snake slowly and inspect for debris; flush with hot water after.
Tip: Do not force the snake hard; friction can push the clog deeper. - 6
Flush and test the drain
Run hot water for several minutes to flush out residual material. Observe whether the flow improves across fixtures. If the drain remains slow, repeat with the snake or consider a second trap check.
Tip: A pre-warmed drain is more forgiving for testing the efficacy of your clearing steps. - 7
Clean up and reinstall
Reattach the trap securely, ensuring the washers seal properly. Wipe away any spills and check for leaks by running water for a few minutes. Confirm all joints are tight and the area is clean.
Tip: Hand-tighten, then snug with a wrench—avoid overtightening to prevent damage. - 8
Schedule follow-up maintenance
Note the date of the service and set a reminder for periodic cleaning. Consider monthly preventive tasks and a quarterly check of traps to prevent future clogs.
Tip: Use an enzymatic cleaner occasionally after clearing to maintain natural digestion of organics.
Got Questions?
What is the first sign of a clogged drain?
Slow drainage, gurgling sounds, or standing water indicate a clog. Start with a visual check of traps and fixtures to locate the blockage before choosing a tool.
Common signs include slow drainage and gurgling sounds. Start by checking the trap and fixtures to locate the blockage.
Can chemical drain cleaners damage pipes?
Yes. Chemical cleaners can corrode pipes and seals, especially in older homes. Mechanical methods are safer for most standard clogs and should be your first approach.
Yes, chemical cleaners can damage pipes, particularly old ones. Start with plungers or snakes instead.
Is it okay to remove the P-trap myself?
If accessible, yes. Loosen the nuts carefully, clear debris, and reassemble with new washers if needed. Ensure the trap is properly sealed to prevent leaks.
Yes, you can remove the P-trap if it’s reachable. Clear it and reassemble tightly to prevent leaks.
What if the clog is deeper in the main line?
A deeper main-line clog may require professional equipment and expertise. Avoid excessive force and seek a plumber if attempts fail or backups worsen.
If the clog is in the main line, you’ll likely need a plumber and possibly camera inspection.
How often should I perform drain maintenance?
Aim for a quarterly maintenance check, with routine flushing and screen replacement as needed. Regular attention reduces the likelihood of major clogs.
Do a quarterly check and flush drains, and replace screens as needed.
When should I call a professional?
If you cannot clear the clog after several attempts, or if you notice leaks, loud noises, or sewage odors, contact a licensed plumber to prevent further damage.
Call a pro if the clog persists after several attempts or you hear leaks and odors.
Watch Video
The Essentials
- Identify whether the clog is local or main-line based on symptoms.
- Use mechanical methods first to reduce chemical exposure and pipe stress.
- Proper trap removal and reassembly prevents leaks and future issues.
- Regular maintenance reduces clog frequency and extends drain life.
- Know when to call a pro for unseen or dangerous blockages.