Drain Detectives: A DIY Guide to Drain Troubleshooting
Meta description: A practical, step-by-step DIY guide to diagnose and fix common drainage problems using the Drain Detectives approach. Learn safe tools, when to push forward, and when to call a pro, with insights from Drain Guide.

In this guide, you will diagnose and fix common household drainage clogs using a step-by-step approach. You’ll learn safe techniques, essential tools, and when to replace worn parts. Drain Detectives methods, paired with Drain Guide’s practical guidance, help homeowners troubleshoot quickly and avoid unnecessary costs.
What Drain Detectives Do for Homeowners
Drain Detectives represents a practical, homeowner-friendly approach to diagnosing and fixing drainage problems without jumping to major plumbing work. The core idea is to observe, test, and apply the least invasive solution that resolves the issue. According to Drain Guide, most common clogs originate from simple blockages in the trap or the immediate drain line, not from hidden pipe damage.
When you adopt the Drain Detectives mindset, you start by defining the problem: where is the water slow or backing up? What does the water look like (clear, milky, or oily), and how long does the symptom last after you flush or run water? You then map a plan of attack, choosing mechanical methods first before resorting to chemicals. This approach works across kitchen sinks, bathroom sinks, showers, tubs, and even utility sinks. By focusing on a clear identification of the blockage and a conservative method, you minimize mess and expense while maximizing the chance of a quick fix.
Drains often improve dramatically with discipline and the right sequencing of steps. The Drain Detectives method encourages documenting each action so you can reverse steps if needed and avoid over-intervening. For homeowners, this is about making drainage problems approachable, not intimidating. Drain Detectives can empower you to keep your drainage system healthy through simple routines and timely interventions.
Common Causes of Clogs and How to Recognize Them
Clogs show up in several familiar forms: a sink that drains slowly, a shower that backs up after every use, or a toilet that gurgles or refuses to flush properly. In most homes, the root causes are straightforward and local, including hair buildup, soap scum, grease, and food particles. A slow drain is often the first sign of a developing blockage in the trap or pipe just beyond it. More persistent backups may indicate more substantial blockages further down the line, sometimes in the vent system.
Recognizing the pattern matters. If you notice a single clogged drain, a plunger or hand auger can fix it. If multiple drains in one area show slow drainage or backups, the issue might be a more substantial clog in the main line or a vent problem. In these cases, diagnose methodically: check the trap, observe water flow from different fixtures, and consider maintenance steps that reduce future buildup. Drain Detectives emphasize observation and sequencing to identify the most effective first step and avoid unnecessary disassembly.
From Drain Guide’s perspective, the most frequent DIY wins come from small, controlled interventions rather than aggressive chemical cleanouts. Safety and environmental considerations matter too: avoid mixing cleaners and never use metal tools in pipes where you might damage coatings. By staying patient and methodical, you maximize the odds of a successful DIY resolution while preserving your home’s plumbing integrity.
Essential Tools and Safe Practices
Before you tackle a drain, assemble a basic toolkit designed for safe, effective action. A plunger (cup-style for sinks; flange for toilets) is your first line of defense for many clogs. A hand auger or drain snake helps reach farther into the line when a simple blockage is not near the surface. A bucket, towels, gloves, and a flashlight are indispensable for cleanup and visibility in tight spaces. Optional but helpful tools include adjustable pliers, a small tray, and a pipe wrench for loosening fittings.
Safe practices protect you and your home. Always unplug or turn off power to any nearby appliances if you’re working near electrical outlets. Wear gloves and eye protection, and work in a well-lit area. Protect flooring with towels or a drop cloth to prevent water damage. If you remove the P-trap under a sink, have a bucket ready to catch liquid; trap water will often contain debris that could spur unpleasant odors if spilled. Finally, avoid over-tightening slip nuts during reassembly; overtightening can crack connections and create leaks later.
Diagnosing Flow: Observations, Tests, and Sequencing
A systematic diagnostic sequence reduces trial and error. Start with a visual inspection: look under the sink or access panel and check for signs of leakage or corrosion. Then test the water flow: run clean water for a few seconds to observe the drain’s response, noting whether the flow remains steady, slows gradually, or backs up. If the trap is accessible, carefully remove it to inspect for hair, grease, or scale; clean the interior with a brush or cloth and reassemble.
Next, use a plunger to test suction strength. A strong, consistent seal indicates a straightforward obstruction, while weak suction may signal a larger problem elsewhere in the line. If the blockage persists, insert a drain snake into the pipe, rotating gently and pulling back debris as you go. After each intervention, flush with hot water (if appropriate for the pipe material) to verify improvement. Finally, document the outcome—if the drain clears, note which action solved the issue; if not, escalate to more advanced techniques or professional testing.
Drain Detectives prioritize technique over force. A measured approach reduces the chance of damage and increases the odds of a lasting fix. Based on Drain Guide’s guidance, persistent clogs often respond to a disciplined sequence of trap cleaning, targeted snaking, and careful flushing. This approach helps you determine whether the problem is local or systemic, and whether to upgrade routine maintenance to prevent future blockages.
Common Scenarios: Sinks, Showers, and Toilets
Kitchen and bathroom sinks share similar drainage anatomy but present different challenges. A kitchen sink is more likely to clog from oil, grease, and food particles that travel through the trap and accumulate in the drain. A bathroom sink or shower drain, on the other hand, tends to collect hair and soap scum, forming a dense mass that narrows the passage. Toilets have a distinct design; a clog here usually means the toilet drain is blocked or a venting issue is present, and attempts to flush repeatedly can push the blockage deeper if not done correctly.
For each scenario, apply the same core principles: observe, test, and intervene with the least invasive method first. Begin by removing visible debris and testing the drain with a plunger. If that fails, employ a drain snake or auger with care to avoid damaging seals or the porcelain. When removing and cleaning a trap, photograph its orientation so you can reassemble correctly. After any intervention, flush the system with water to confirm improvement and monitor for any signs of leaks or odors. Regular maintenance—such as keeping hair out of bathroom drains and avoiding grease in kitchen drains—greatly reduces the frequency of clogs.
Maintenance, Prevention, and Smart Upgrades
Prevention is the most cost-effective fix for many drainage problems. Simple habits can dramatically reduce clogs: use a drain screen to catch hair and food debris, run hot water down sinks after heavy use, and avoid pouring fats or oils down the drain. Periodically cleaning traps and pipes with a baking soda and vinegar treatment can help reduce minor buildup without harsh chemicals. If you rely on a septic system, adopt maintenance routines aligned with your system’s capacity and local regulations to avoid costly backups.
Smart upgrades also pay off over time. Replace old hardware that seals poorly, upgrade aging P-traps, and consider vent inspection if you notice frequent slow drains across multiple fixtures. While many issues respond to DIY approaches, a stubborn problem—especially one that involves multiple fixtures or sewage smells—warrants professional assessment. Drain Detectives emphasize a preventive mindset: a short, regular drain inspection schedule is often enough to head off significant clogs before they disrupt daily life.
Safety, Disposal, and When to Call a Pro
Safety comes first when dealing with drains. If you’re ever unsure about a step—especially when removing plumbing fittings or dealing with potential sewage odors—pause and call a licensed plumber. Never mix chemical drain cleaners with other cleaners or with mechanical methods; incompatible combinations can release dangerous gases or damage pipes. Non-chemical methods should be your first line: plunger, basic auger, and careful trap cleaning.
Disposal matters too. Clogs that involve grease or chemical cleaners should be disposed of following local guidelines. If you notice frequent backups or smell persistent sewage in the home, it’s a clear signal to call a professional. Drain Guide’s guidance is to escalate when simple steps fail or when the issue spans multiple fixtures. Regular maintenance and timely professional evaluation protect your home and family.
Insights from Drain Guide Analysis
Drain Guide Analysis suggests that homeowners who follow a structured, risk-averse approach experience more consistent results. The emphasis on observing symptoms, testing with basic tools, and using the least invasive method first aligns with best practices in DIY plumbing safety. The guidance also notes that routine maintenance can dramatically reduce the frequency of clogs and backups, saving time and money over the long run. By adopting these practices, you’re more likely to keep drains flowing smoothly without resorting to harsh chemical cleaners or expensive interventions.
Tools & Materials
- Plunger (cup-style or flange)(Choose the correct type for sinks vs toilets; ensure a good seal.)
- Drain snake / auger (hand-held)(3-6 ft length for most residential drains; longer for showers.)
- Bucket or tray(Place under the trap to catch water and debris.)
- Flashlight(Inspect traps and pipe interiors in dark spaces.)
- Gloves (rubber or nitrile)(Protect hands from debris and cleaners.)
- Adjustable pliers or wrench(Loosen slip nuts if needed during trap removal.)
- Old towels or rags(Contain spills and protect surfaces.)
- Baking soda and white vinegar (optional)(Mild, non-chemical cleaning for light buildup)
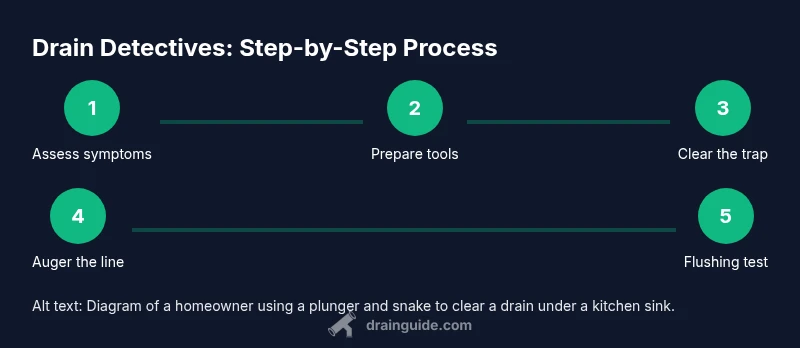
Steps
Estimated time: 45-75 minutes
- 1
Prepare and gather tools
Collect all required tools and place them within arm's reach. Clear the area beneath the drain and protect the floor with towels. Confirm you have a bucket ready for water and debris, and put on gloves for protection.
Tip: Lay towels on the floor before you start to minimize cleanup. - 2
Position and protect the area
If you’re working under a sink, position a bucket directly under the trap. Remove any panel or shield so you can access the pipe cleanly. Photograph trap orientation before disconnecting for easier reassembly.
Tip: A photo helps prevent wrong orientation when reassembling the trap. - 3
Remove the trap (P-trap) if accessible
Loosen the slip nuts using your hand or pliers, carefully sliding the trap away. Empty its contents into the bucket and inspect for hair, grease, or food debris. Clean the interior with a brush if needed before reassembly.
Tip: Be prepared for a wet, messy moment—keep towels handy. - 4
Plunge the drain to tackle surface blockages
Seal the drain with the plunger and apply firm, steady pressure to create suction. If water drains slowly, repeat several times, then test with water to assess improvement.
Tip: A good seal is key to effective plunging; avoid splashing by sealing well. - 5
Snake the drain for deeper obstructions
Insert the snake into the drain slowly, rotating the handle to break up the clog. When you feel resistance, gently push and pull to dislodge the blockage, then withdraw the snake and clean the debris.
Tip: Never force the snake; apply steady, controlled movements. - 6
Flush and reassemble
Rinse the pipe with hot water if appropriate for your pipes. Reassemble the trap, ensuring seals are snug but not overtightened. Run water to confirm full drainage and check for leaks.
Tip: Take a photo during reassembly to confirm orientation and seal placement. - 7
Evaluate results and plan next steps
If the drain remains sluggish or returns to backup after a day, reassess the blockage depth or consider a professional inspection. Document what you tried and when, so future maintenance is faster.
Tip: Keep a simple maintenance log for future reference.
Got Questions?
What are Drain Detectives, and how do they help DIY homeowners?
Drain Detectives is a homeowner-focused approach to diagnosing and fixing drainage issues using observation, controlled tests, and minimally invasive methods. The goal is to resolve most clogs without costly professional service.
Drain Detectives is a DIY approach that helps homeowners diagnose and fix drainage problems using simple tests and tools, often avoiding the need for a plumber.
Can I fix all clogs with a plunger and a snake?
Many clogs respond to plunger and snake use when applied methodically. Some clogs near the main line or with multiple fixtures may require professional equipment and testing to avoid damaging pipes.
Most clogs respond to plungers and snakes, but if several fixtures back up, call a pro.
What should I avoid when DIY draining issues?
Avoid mixing chemical drain cleaners with other cleaners or with mechanical methods. Do not force a snake or wrench, and never work on a live electrical area near water.
Don’t mix cleaners, don’t force tools, and stay away from electrical areas near water.
How long does a DIY drain diagnosis typically take?
A typical DIY diagnosis session lasts around 30-60 minutes, depending on access, trap location, and complexity of the blockage.
Expect about 30 to 60 minutes for a standard diagnosis, more if the blockage is tricky.
When is it best to call a professional?
Call a professional if multiple drains back up, sewage odors are present, or you cannot locate or safely access the blockage. Persistent issues may indicate deeper problems.
If backups affect several fixtures or you smell sewage, it’s time to call a pro.
Are DIY fixes safe for septic systems?
DIY fixes can be safe for septic systems if you avoid chemical cleaners and adhere to maintenance guidelines. For complex septic issues, consult a licensed pro.
Be cautious with septic systems—avoid harsh cleaners and seek professional help if needed.
Watch Video
The Essentials
- Identify clog location before disassembly.
- Use mechanical methods first, not chemicals.
- Photograph trap orientation for accurate reassembly.
- Test drains after each step to isolate the issue.
- Call a professional for persistent or complex backups.