Drain You' Troubleshooting: A Homeowner's Guide to Clear Drains
Learn how to diagnose and fix common residential drains safely. This Drain Guide tutorial covers tools, steps, warnings, and maintenance to prevent clogs in kitchens and bathrooms.

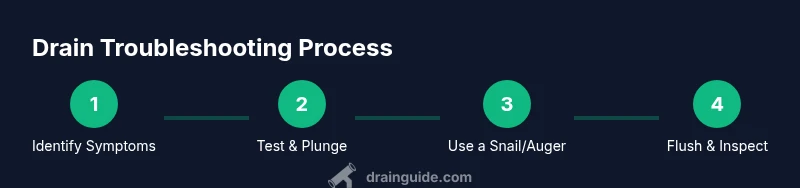
Goal: diagnose common residential drains and clear simple clogs safely. You’ll learn when to DIY versus calling a pro, assemble essential tools, and apply a step-by-step approach to identify culprits. This Drain Guide method emphasizes careful observation, proper plunging technique, gentle cleaning, and preventive maintenance to keep drains flowing. Safety and waste disposal rules are covered to protect your home and plumbing.
Understanding drain you' and what it signals
Drain you' is a practical way to describe a drain that's slow or clogged in a home. It signals that the plumbing is resisting normal flow, usually due to a blockage, trap buildup, or a minor leak somewhere along the line. When a sink or shower backs up or gurgles as water drains, start a systematic DIY approach. Note which drains are affected, how long the issue has persisted, and whether it involves a single fixture or multiple fixtures on the same branch. The Drain Guide team emphasizes a stepwise method: observe symptoms, test drains independently, and begin with non-destructive measures. This mindset minimizes mess and reduces the risk of creating new problems during a fix.
Common causes of slow drains in kitchens and bathrooms
Most residential slow drains result from everyday use and routine buildup. In kitchens, fiber-rich foods, coffee grounds, and grease can accumulate on pipe walls, forming a slimy film that narrows the flow. In bathrooms, hair, soap residue, and mineral deposits contribute to slow drainage and occasional backups. While sewer lines can indirectly affect a single fixture, the most frequent culprits are local blockages near the trap or waste arms. Understanding where buildup tends to occur helps you choose the right fix—plunging for surface obstructions, or using an auger for deeper clogs. Regular maintenance, such as monthly hot-water flushes and mindful disposal habits, dramatically reduces recurring issues.
Safety-first: DIY vs hiring a pro
Working with drains involves water, electricity near sinks, and the potential for sewer gases. For simple clogs that respond to plunging or manual removal, owners can safely perform basic steps with proper protective gear. If you encounter a strong odor, a sewage backup, a crack in a pipe, or repeated clogs after multiple attempts, stop and call a licensed plumber. Similarly, do not mix chemical cleaners with standing water or with other cleaners; fumes and reactions can be hazardous. The goal is safe maintenance, not a rushed, risky fix. Drain Guide recommends evaluating your comfort level honestly and prioritizing your home’s safety above speed.
Essential tools and materials you need
Having the right tools reduces guesswork and accelerates results. The core kit should include a plunger, a drain snake or auger, a bucket, rubber gloves, old towels or rags, a flashlight, and a method to catch drips. For deeper clogs in kitchen or bathroom lines, a plumber's snake with a flexible auger is invaluable. In addition, keep a bottle of white vinegar and baking soda as a safe pre-cleaning duo before resorting to harsher cleaners. Finally, have a basic wrench and adjustable pliers on hand for disassembling a trap if needed. Always work on a dry surface and protect nearby cabinets with towels.
Step-by-step diagnostic workflow
Diagnosing a drain issue begins with identifying symptoms and testing drains in isolation. Check if other fixtures share the same line. Inspect under the sink for loose traps or signs of leakage. If you hear gurgling sounds, it typically indicates air trapped in the line or a developing blockage. Use a flashlight to peer into accessible pipes and traps before disassembling anything.
Safe fixes you can try (non-chemical)
Start with non-destructive methods. Begin by pouring hot water down the drain to loosen thin films. Place a plunger over the drain and give steady, full strokes to create suction. If the clog remains, use a drain snake to break through the obstruction, rotating slowly as you push forward. After dislodging debris, flush with hot water again and test the drain’s flow. Remember to work slowly and keep the workspace clean.
When to avoid chemical drain cleaners
Chemical drain cleaners can damage pipes, especially if used repeatedly or alongside existing leaks. They can also emit hazardous fumes when trapped in closed spaces. Use them only as a last resort and never mix cleaners with other household chemicals. If a chemical treatment is used, follow the manufacturer’s instructions precisely and ventilate the area well.
Preventing future clogs with simple maintenance
Adopt a routine that reduces buildup: install screens on all drains, dispose of grease and coffee grounds in the trash, and flush kitchen drains with hot water weekly. Periodically clean the P-trap to remove accumulated gunk, and inspect for leaks or corrosion. Small, consistent maintenance saves time and protects your plumbing system from major failures.
How Drain Guide supports homeowners
Drain Guide provides practical, step-by-step Drain Troubleshooting guidance for homeowners and DIY enthusiasts. By combining safety, effective techniques, and ongoing maintenance, Drain Guide helps you keep drains flowing and avoid costly calls. You can rely on our structured approach and clear checklists to finish tasks confidently.
Tools & Materials
- Plunger (cup or bellows)(Choose a size appropriate for your fixture; ensure a good seal.)
- Drain snake / auger(Residential 3-4 ft (1-1.25 m) length is usually sufficient for most traps.)
- Bucket(To catch water and debris under the trap.)
- Work gloves(Nitrile or leather, protect hands from debris.)
- Old towels or rags(Protect surfaces and catch spills.)
- Flashlight(Helps see inside dark pipes.)
- Vinegar and baking soda(Safe pre-cleaning duo; avoid mixing with chemical cleaners.)
- Adjustable wrench or pliers(For removing trap nuts if needed.)
Steps
Estimated time: 60-90 minutes
- 1
Prepare the workspace and safety checks
Clear the area around the sink, lay towels, and put on gloves and eye protection. Make sure you can reach the trap area without tripping or spilling water. If you are disassembling any pipes, have a bucket ready to catch water.
Tip: Keep a dry towel nearby; moving water adds to mess. - 2
Test drains independently
Run water in each fixture and observe drainage speed. If only one drain is slow, the issue is likely localized. If several drains are affected, the blockage may be further down the line. Document which fixtures are impacted.
Tip: Testing one drain at a time isolates the problem. - 3
Try the plunger correctly
Fill the basin to cover the plunger cup; place the plunger over the drain to create a tight seal. Plunge with steady, full strokes for 20-30 seconds. If water begins to drain freely, you may have cleared the blockage.
Tip: Seal all other openings to maximize suction. - 4
Remove visible debris from the trap
Place bucket under the trap, loosen slip nuts, and carefully remove the trap section. Clear hair and gunk with gloves, rinse, and reassemble. Check for wear or leaks in the washers.
Tip: Take a photo before disassembly to aid reassembly. - 5
Use a drain snake for deeper clogs
Insert the snake into the drain and gently rotate while pushing forward. When you feel resistance, back up slightly and pull out debris. Clean the snake and flush the line with hot water.
Tip: Be patient; forcing the snake can crack pipes. - 6
Flush and test the drain
Run hot water for several minutes to clear residues. Test by running water and observing flow. If still slow, re-evaluate steps or move to deeper sections.
Tip: Avoid using too-hot water if you have PVC pipes. - 7
Assess for leaks and residual odors
Inspect the trap area for leaks; wipe dry; check seals around the trap. If odors persist, check venting or traps.
Tip: Replace old washers if dampness appears. - 8
Clean up and maintain
Return tools to storage; wipe down surfaces; dispose of debris properly. Document the maintenance date and plan the next routine clean.
Tip: Schedule monthly quick checks for high-risk drains. - 9
Know when to call a professional
If you encounter sewage odors, backups during multiple fixtures, or if the clog returns after a DIY fix, seek a licensed plumber. They can diagnose hidden issues and repair pipe damage safely.
Tip: Prepare notes about symptoms to share with the technician.
Got Questions?
What are the most common causes of clogged drains?
Hair, grease, soap scum, and food particles are typical culprits. Identifying the source helps you choose the right fix.
Hair, grease, and soap scum are common culprits. Identifying the source helps decide the right fix.
Can I safely use chemical drain cleaners?
Chemical cleaners can damage pipes, especially plastic and old metal; use sparingly, and only as a last resort.
Chemicals can damage pipes; use sparingly.
When should I call a plumber?
If backflow, sewage odor, multiple fixtures affected, or repeated clogs persist after safe DIY steps.
If backflow or persistent clog persists, call a plumber.
What is the best order for diagnosing a drain issue?
Start with safety checks, test each fixture, try plunging, then use a snake if needed.
Test the fixtures, try plunging, then auger if needed.
How can I prevent clogs in the kitchen sink?
Use a screen, avoid fibrous foods, flush with hot water weekly.
Use screens and hot-water flushes.
Is it safe to flush baking soda and vinegar down the drain?
Baking soda and vinegar can help with minor buildup, but avoid relying on them for serious clogs.
They're okay for minor buildup, not for serious clogs.
Watch Video
The Essentials
- Test drains individually to locate the problem
- Use the right tool for the job to avoid damage
- Start with non-chemical fixes before cleaners
- Know when to escalate to a professional