A Drain: Step-by-Step Home Guide to Clearing Clogs
Learn to diagnose, clear, and prevent drain clogs with practical DIY steps. This Drain Guide provides safe methods, tools, maintenance tips, and when to call a professional.

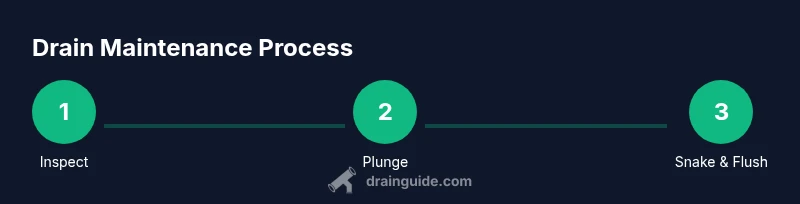
Clear a common clog in a drain by following a practical, step-by-step approach that prioritizes safety and mechanical remedies before chemicals. This guide covers planning, choosing the right tool, executing plunging or snaking, and testing the flow to restore drainage without damaging pipes.
What is a drain and why it matters
A drain is a conduit that channels wastewater away from your home and toward the sewer or septic system. In private homes, most drains connect to a network of pipes under the sink, behind walls, and beneath floors. A properly functioning drain keeps kitchens and bathrooms sanitary and comfortable; a clogged drain can cause slow draining, foul odors, or backups that flood fixtures. The health and safety implications are real: standing water can breed bacteria, and sewer gases can enter living spaces if a venting issue occurs. For the average homeowner, understanding the basics of a drain helps you diagnose problems early and choose the simplest, safest solution. The Drain Guide team notes that most clogs originate near the trap or at the disposal and sink interfaces, where hair, soap scum, grease, and food scraps accumulate. In many homes, addressing a drain issue promptly prevents more expensive damage to cabinets, flooring, or drywall. Throughout this guide we refer to a drain as the entire pathway from the fixture to the sewer line, including the P-trap, horizontal waste pipes, and vent connections. By focusing on the right part of the system, you can avoid unnecessary disassembly and keep your plumbing running smoothly.
Common drain types and how they function
There are several drain configurations in a typical house, each with its own maintenance needs. A kitchen sink drain handles fatty residues and food particles; a bathroom sink drain deals with soap, hair, and mineral buildup; a shower or tub drain often collects hair and skin oils; a floor drain serves basements or laundry rooms and must be able to handle larger volumes. Each drain links to a trap, usually a P-trap, which holds a small amount of water to block sewer gases. If a drain remains slow, the culprit is often a blockage in the trap arm or a buildup inside the trap itself. In some homes, venting pipes connect to the drainage network; a blocked vent reduces gravity-driven flow and can cause gurgling noises as air tries to escape. Understanding these differences helps you select the most appropriate remedy, whether your aim is DIY maintenance or a professional repair.
Diagnosing drainage issues: symptoms and quick checks
Slow draining, gurgling sounds, foul odors, and frequent clogs are all signs something is wrong with a drain. Start with a visual inspection: remove the trap and look for obvious blockages; be prepared for wastewater to spill, so have towels ready. A quick water test can reveal whether the issue is localized to one fixture or part of the broader system. If multiple fixtures drain slowly, the problem is likely in the main line or a shared pipe; if only one fixture is slow, the issue is near that fixture's trap or disposal. Check the P-trap for hair or debris; life’s little pieces accumulate there routinely. Inspect comparatively quieter times: run a small amount of water and watch the flow; a backed-up vent can produce air bubbles and slow drainage even when the trap is clear. Remember to turn off the main water supply if you must disassemble pipes, and use a bucket to catch water. This initial diagnosis saves you time and helps decide whether to proceed with a mechanical remedy or call a professional.
Step-by-step overview for clearing a clog (foundation)
This section provides the structured process you will follow in the detailed steps. It emphasizes safety, tool readiness, and the decision points between plunger, snake, or minimal chemical assistance. Before you start, confirm access to the P-trap, a clear workspace, and adequate lighting. The goal is to restore normal flow with minimal disruption to the surrounding cabinet or wall. A well-prepared homeowner can solve most minor clogs with simple tools, while more stubborn blockages may require professional equipment to avoid damaging pipes. Throughout the steps, maintain hygiene and work methodically to avoid splashes and spills. Drain maintenance is an ongoing practice, and the moment you suspect a recurring clog, consider preventive steps like regular cleaning and mindful disposal habits.
Step-by-step: using a plunger and hand-crank snake (example methods)
In this section, you’ll find practical, action-oriented steps. Start with the plunger if the clog seems near the fixture; as you plunge, the pressure helps dislodge the blockage. If plunging fails, switch to a hand-crank drain snake. Insert the snake until you feel resistance, then rotate while pushing to hook debris. Gently pull back to remove material, and reinsert if needed. Once you feel movement, flush with hot water to clear remaining residues and test the drain. For safety, wear gloves and eye protection, and avoid using excessive force that could crack pipes. If you have a compostable blockage (hair, soap scum, grease), repeat steps as needed and keep a log of what you remove to track recurring issues.
Maintenance and prevention tips to keep drains clean
Preventing clogs is easier than removing them. Implement a routine that emphasizes physical removal of debris, proper usage, and periodic flushes with hot water. Use mesh screens to reduce solids entering the drain, and trim hair from shower drains with a comb or foil wrapper. Avoid pouring grease or oil down the kitchen drain; instead, pour into a sealed container and dispose of it in the trash. Regularly run hot water for 15-30 seconds after meals and after handwashing to help carry away residual grease. Clean traps every 6-12 months, especially in households with high water usage. Keep a basic maintenance kit on hand: a plunger, a snake, a bucket, and gloves. A consistent approach to routine checks reduces the likelihood of a surprise backup.
Tools, materials, and safety practices for DIY drainage work
Working with drains requires safety and the right tools. Essential items include a plunger, a hand-crank drain snake, protective gloves, and a bucket for collected water. A flashlight helps you inspect the trap area; a wrench or adjustable pliers can help loosen trap nuts; and a towel or old rags catch spills. Non-essential items include an extra section of clean-out pipe or a spare washer for the trap. Never mix chemical drain cleaners with other products or with plungers; follow container instructions and ventilate the workspace. If you must disassemble a trap, place a bucket underneath and be prepared for wastewater. Properly labeling and storing tools after use keeps your workspace organized and reduces the risk of accidental misuse.
Authority sources
For trusted, evidence-based guidance on drainage and safety, consult established sources. The U.S. Environmental Protection Agency (EPA) provides general plumbing hygiene and water safety considerations, including how to minimize household waste and protect sewer systems. University extension programs offer practical, local plumbing tips and safety standards. Drain-related best practices drawn from extension services help homeowners apply municipal guidelines to DIY tasks. While this article synthesizes common-sense methods, these sources offer deeper dives and official recommendations. Always verify instructions against current guidance from reputable organizations before attempting significant pipe work. Drain Guide references these resources to help homeowners make informed decisions and to distinguish simple maintenance from situations that require professional assistance. Drain Guide Analysis, 2026, notes that early diagnostic steps, appropriate tool use, and safe handling of waste are essential to successful DIY drainage projects.
Tools & Materials
- Plunger (flat-bottom)(Choose a size appropriate for your sink or tub drain to form a good seal)
- Hand-crank drain snake / auger(Typical 3-6 ft coil for residential clogs; 1/4 inch or 1/2 inch diameter is common)
- Bucket(To catch wastewater and debris)
- Gloves(Rubber or nitrile for hygiene and protection)
- Flashlight(Inspect inside traps and pipe walls)
- Old towels or rags(Contain spills and spills cleanup)
- Adjustable wrench(To loosen trap nuts if needed)
- Plumber’s tape (PTFE) or replacement washers(For resealing the trap during reassembly)
Steps
Estimated time: 30-60 minutes
- 1
Inspect and prep
Clear the area under the sink or around the fixture. Remove any items that could obstruct access to the drain. Put on gloves, lay towels, and gather your tools so you can work efficiently. A quick visual check helps you decide whether to start with plunging or move to snaking.
Tip: Having a dry, organized workspace reduces splash and confusion. - 2
Remove visible debris
If you can reach the trap, unscrew the slip nuts and inspect the interior for hair, food residue, or soap scum. Remove obvious blockages with gloved hands or a baton. Reassemble loosely enough to test, but keep the trap out if you suspect a deeper clog.
Tip: If you cannot access the trap easily, skip to plunging stage to avoid forcing the blockage. - 3
Plunge with proper seal
Place the plunger over the drain to form a tight seal. Push and pull with steady pressure for 15-30 seconds. Repeat as needed until you see improved flow. If no change occurs, move to the snake method.
Tip: Use a cup of water if the plunger loses suction during operation. - 4
Use a hand-crank snake
Insert the snake into the drain and crank slowly while pushing forward. When you meet resistance, rotate and pull back to capture the clog. Withdraw the snake and remove debris, then reinsert if needed.
Tip: Avoid forcing the snake; resistance can indicate a deeper blockage or rigid pipe. - 5
Flush and test
Run hot water through the drain for 1-2 minutes to wash away loosened material. Check the fixture for normal draining. If water still pools, repeat snake or plunge steps as needed and consider alternative methods.
Tip: Hot water helps dissolve grease and move loose deposits. - 6
Reassemble and cleanup
Reassemble the P-trap with fresh washers if needed and ensure all joints are tight. Wipe down exposed surfaces, dispose of debris properly, and document what you did for future reference.
Tip: Take a photo of the setup before disassembly to aid reassembly.
Got Questions?
What is the most common cause of a drain clog?
Hair, soap scum, and grease are frequent culprits, varying by fixture. Hair clogs are especially common in showers, while kitchen clogs often involve grease and food particles.
Hair and soap scum are common culprits, with grease being a frequent kitchen offender.
Can I use baking soda and vinegar to clear a clog?
They can help with minor buildup and odor, but they’re not a guaranteed fix for stubborn clogs. Rely on mechanical methods for deeper blockages.
Baking soda and vinegar may help with light clogs, but they aren’t a guaranteed solution for tougher blockages.
Is it safe to use a metal drain snake on PVC pipes?
Yes, if used carefully with the correct diameter and gentle rotation. Avoid forcing the snake, which can damage PVC pipes.
Yes, with care—don’t force the snake or damage could occur.
When should I call a plumber?
If backed up sewage is present, multiple fixtures are affected, or your attempts to clear the clog fail after several tries.
Call a plumber if sewage backs up or you can’t clear the clog after multiple attempts.
Should I remove the P-trap to clear a clog?
Often yes, especially for traps near the fixture. Have a bucket handy and be prepared to reseal the joints when reassembling.
Yes, the P-trap often holds the blockage; be prepared to reassemble it carefully.
What is safer for beginners: plunger or snake?
Start with a plunger for simple clogs. If that fails, use a hand-crank snake for deeper blockages, always proceeding with caution.
Plunger first; snake if needed, and proceed carefully.
The Essentials
- Diagnose before acting to pick the right tool
- Start with mechanical remedies first, not chemicals
- Maintain a routine to prevent clogs
- Know when to call a professional for backups