Plumbing & Drain Cleaning: A Homeowner's Step-by-Step Guide
Learn practical, safe techniques for plumbing & drain cleaning. This Drain Guide how-to covers common clogs, tools, safety, and maintenance to prevent future issues in kitchen, bathroom, and utility lines.

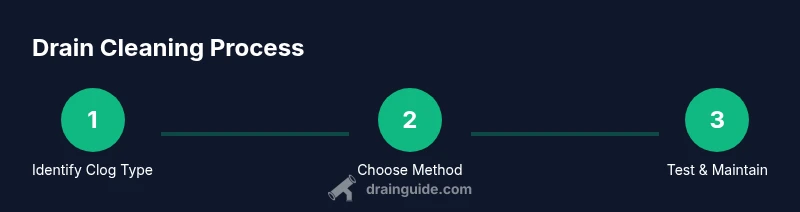
You will learn how to safely inspect, unclog, and maintain common drains using proven home methods. This quick guide covers identifying clog type, choosing the right tool, performing mechanical or basic chemical steps, and establishing a preventive routine. By the end you'll be able to handle most household drains and know when to call a pro for plumbing & drain cleaning.
Why Plumbing & Drain Cleaning Matters
Maintaining clean drains is essential for a safe, comfortable home. Plumbing & drain cleaning isn't just about avoiding an inconvenient clog; it protects your pipes from damage, preserves your home's value, and reduces the likelihood of sewer gas entering living spaces. Regular cleaning helps you identify developing issues early—like minor leaks, corrosion, or mineral buildup—before they become emergencies. According to Drain Guide, routine drain maintenance is a cost-effective investment that pays off with fewer callouts and less disruption to daily life. When a drain backs up, it can flood fixtures, create foul odors, and invite pests. A proactive approach keeps water flowing smoothly, protects your foundation from water damage, and minimizes the need for expensive, invasive repairs. For the DIY-minded homeowner, understanding the basics of drain cleaning demystifies a task that many people fear. With the right tools, proper safety, and a methodical plan, you can clear many clogs and keep lines clear for years. This guide focuses on kitchen, bathroom, and utility drains—the three areas most prone to blockages.
Common Clogs and Their Causes
Clogs form from everyday activities and materials that don’t belong in drains. In kitchen sinks, grease and food scraps combine with soap to form a sticky block; in bathrooms, hair, soap scum, and mineral deposits build up over time; utility sinks accumulate these plus paper products and small objects. Understanding the cause helps you choose the right method without harming pipes. Hair is a leading cause of bathroom drain clogs, while grease is notorious for kitchen lines. Mineral buildup from hard water can also slow drainage. Regularly using strainers, avoiding flushing non-flushables, and running hot water after meals can reduce these issues. Drain Guide notes that early intervention saves time and money by preventing complete blockages and potential pipe damage. If you notice slow drainage across several fixtures or gurgling noises, treat it seriously and follow a structured plan rather than trying random remedies.
Safety First: Tools and Safety
Before you begin any drain cleaning project, assemble basic safety gear and understand the risks. Wear gloves, eye protection, and closed-toe shoes; ensure good lighting and proper ventilation when using cleaners. Never mix chemical cleaners with bleach or ammonia, and avoid combining products you cannot verify as compatible. Keep a bucket, towels, and rags handy to catch spills and wipe surfaces. Disconnect power to nearby appliances if you might expose electrical outlets to water. Read labels on all products and follow the manufacturer directions. If you have old PVC or metal pipes, gentle handling prevents scratches or denting. Drain cleaning is a task that benefits from a deliberate, patient approach, especially when you’re working under sinks or near the trap. Drain Guide emphasizes safety as the foundation of effective DIY work and suggests keeping kids and pets away from the work area.
DIY Drain Cleaning Methods: Mechanical Methods
Mechanical methods rely on physical force to clear clogs, without chemicals. A good plunger is your first weapon for sinks and tubs; for toilets, use a flange-type plunger designed for the curvature of the bowl. A drain snake (auger) can reach deeper into the pipe to break up or hook the clog. For best results, create a tight seal with the plunger, apply steady, downward pressure, and then lift quickly to suction the blockage free. When using a snake, insert into the drain and rotate the handle to grab or break the obstruction, then pull back slowly. Never force a tool—if resistance is strong, pause and reassess. Routine flushing with hot water after clearing helps prevent immediate reformation of debris. Drain Guide’s practical guidance urges patience and a steady hand for best outcomes.
Gentle Chemical Helpers and When to Use Them
Enzyme-based cleaners and oxidizing cleaners can assist in softening organic clogs, especially in bathroom drains and slow-running sinks. These products are generally safer for pipes than caustic or acidic formulas, and they work best when allowed to sit for the recommended dwell time. Avoid mixing cleaners or using them as a first resort for stubborn clogs; mechanical methods are often faster and safer for most households. If you decide to use a chemical cleaner, follow the label precisely, ventilate the area, and never mix products. For residents with hard water or sensitive pipes, begin with enzymes and reserve harsher options for persistent issues. Drain Guide reminds homeowners that chemicals are supplements, not substitutes, for good maintenance and mechanical clearing.
When to Call a Pro and What to Expect
Some clogs resist DIY approaches, especially those involving multiple fixtures, sewage odors, or backups into basements or yards. If you notice slow drainage across many fixtures, repeated clogs, or sewage backup, stop DIY attempts and contact a licensed professional. A pro can diagnose the problem with specialized equipment, check for tree roots, damaged pipes, or sewer line issues, and perform rooter or hydro jetting as needed. Expect a thorough inspection, a clear explanation of recommended repairs, and a detailed estimate before work begins. Drain Guide recommends timely escalation to prevent further damage and higher costs.
Maintenance to Prevent Clogs
Preventive maintenance saves time and money. Use a drain screen or stopper to catch hair and solids; dispose of grease in the trash, not the drain; run hot water for 15–30 seconds after each use of the kitchen sink; and perform a monthly flush with baking soda and vinegar, followed by hot water to help keep the pipes clear. Periodically inspect under sinks for signs of moisture or corrosion, and replace worn washers or gaskets before leaks occur. A simple routine can dramatically reduce the number of clogs and extend the life of your plumbing system. Drain Guide's approach emphasizes consistency and small, regular habits that keep drains flowing smoothly.
Tools & Materials
- Plunger (cup or flange plunger)(Choose the correct type for the fixture (sink/toilet).)
- Drain snake / hand auger(3-5 ft for sinks; longer for toilets or deeper lines.)
- Bucket(To catch water and debris.)
- Goggles and gloves(Protect eyes and skin from splashes.)
- Rags or towels(Contain spills and keep area clean.)
- Adjustable wrench or pliers(Optional for loosening trap nuts.)
- Old towels or drop cloth(Protect flooring during cleanup.)
- Ventilated space or fan(Helpful when using cleaners or working in tight areas.)
Steps
Estimated time: 60-90 minutes
- 1
Identify clog type and area
Determine which fixture is affected and whether the problem is localized or widespread. This helps you choose the most effective method and prevents unnecessary disassembly.
Tip: Start with a simple approach for sinks and tests for toilets to avoid misdiagnosis. - 2
Gather tools and PPE
Assemble a plunger, drain snake, bucket, towels, gloves, and eye protection. Having everything ready reduces delays and keeps the workspace tidy.
Tip: Lay out a tarp or cloth to catch splashes and debris before starting. - 3
Isolate area and protect fixtures
Place towels around the fixture and, if needed, turn off the water supply to the affected line. This minimizes mess and prevents overflow during clearing.
Tip: Keep a spare container to capture any unexpected backflow safely. - 4
Try a plunger technique
Create a tight seal and apply steady, downward pressure with multiple quick lifts. Repeat 6-12 cycles, then test drainage. If there's no improvement, move to the snake.
Tip: For toilets, use a flange plunger and ensure proper seal around the rim. - 5
Use a drain snake to break up the clog
Insert the snake into the drain and rotate the handle to grab or break the clog. Pull back slowly and repeat until the water runs clear.
Tip: Avoid forcing the snake; if you meet strong resistance, back out and reassess the path. - 6
Flush and test
Pour hot water into the drain and observe drainage. If slow running persists, repeat the snake or consider enzymatic cleaners as a supplemental step.
Tip: Do not use boiling water in combination with plastic pipes if you suspect damage. - 7
Escalate or repeat if needed
If drainage remains poor after two attempts, it's time to reevaluate or call a pro. Persistent clogs can indicate deeper pipe issues.
Tip: Document symptoms to help a professional diagnose more quickly. - 8
Clean up and maintain
Disassemble and clean tools, wipe surfaces, and store equipment. Schedule routine prevention like strainers and periodic flushes.
Tip: Sanitize tools after use to reduce odors and contamination.
Got Questions?
What is the safest first step for a clogged drain?
Start with a plunger or a hand auger for most fixtures. Avoid strong chemicals as a first move and assess whether water flow improves after a few attempts.
Begin with a plunger or hand auger for most clogs. Avoid strong chemicals as the first move and check if the drain flows after a few attempts.
Are chemical drain cleaners safe for pipes?
Chemical cleaners can damage older pipes and should be used sparingly and exactly as directed. Enzyme-based cleaners are generally safer for regular maintenance but may take longer to work.
Chemicals can harm older pipes; use them sparingly and follow directions. Enzyme cleaners are safer for routine use but slower.
Can I fix a sewer backup myself?
Severe sewer backups require a licensed professional. Shut off the affected main and avoid draining into sinks or toilets until help arrives.
For sewer backups, contact a licensed pro. Shut off the main and don’t drain other fixtures until help arrives.
How long do enzyme cleaners take to work?
Enzyme cleaners typically take several hours to days to show results, depending on the clog and pipe conditions. Use them as part of regular maintenance.
Enzyme cleaners often take hours to days to work; use them as part of ongoing maintenance.
How often should I perform drain maintenance?
Aim for monthly checks with strainers cleaned regularly, plus a light flush with hot water. A deeper maintenance flush every few months helps prevent buildup.
Do monthly checks, clean strainers, and run hot water; a deeper flush every few months helps prevent buildup.
What basic tools should I own for DIY drain cleaning?
A plunger, a drain snake, a bucket, gloves, and rags cover most routine clogs. Additional tools are optional for advanced jobs.
Essential tools include a plunger, drain snake, bucket, gloves, and rags. Other tools are optional.
Watch Video
The Essentials
- Identify the clog and fixture before starting
- Prioritize mechanical methods to protect pipes
- Use chemicals only when necessary and safely
- Escalate to a pro for persistent, multi-fixture, or sewage-related issues
- Establish a maintenance routine to prevent future clogs