Pipe and Drain Cleaning: A Homeowner's Step-by-Step Guide
Learn safe, effective pipe and drain cleaning techniques for DIY homeowners. Clear clogs, prevent backups, and protect plumbing with a practical, step-by-step guide.

With this guide, you will master pipe and drain cleaning to clear stubborn clogs, restore flow, and prevent future backups. You’ll learn when to DIY, what tools to use, and how to choose safe methods that protect pipes. Drain Guide’s approach emphasizes safety, proper disposal, and clear step-by-step instructions for kitchen, bathroom, and laundry drains.
What is pipe and drain cleaning and why it matters
Pipe and drain cleaning is the process of removing blockages, buildup, and debris from household drains to restore flow. Regular maintenance helps prevent backups, reduces odors, and extends the life of your plumbing. According to Drain Guide, routine pipe and drain cleaning can lower the risk of costly repairs and keep kitchen, bathroom, and laundry drains functioning smoothly. This article outlines core concepts and practical, safe approaches homeowners can use to keep drains performing well and minimize calls to pricey plumbers. By understanding how clogs form and how to approach cleaning, you gain confidence to handle many common situations without compromising pipe integrity.
Signs you need cleaning now
Slow draining, gurgling noises, and lingering odors are common indicators of a developing clog. If water backs up from other fixtures, such as a sink and tub sharing a line, it may signal a more serious blockage. Drain Guide recommends acting early to minimize the risk of a complete drain failure and potential overflows. Recognizing patterns—repeated clogs in the same drain or backups after disposal of grease—helps you act before a small issue becomes a costly repair.
Mechanical, chemical, and enzymatic approaches
There are three broad families of techniques for pipe and drain cleaning. Mechanical methods include plungers and hand augers to physically break up or pull out the clog. Chemical cleaners dissolve organic material, but they can damage pipes if misused. Enzymatic cleaners use bacteria to digest organic buildup and are gentler on plumbing when used as a preventive treatment. Waste and vent concerns should guide method selection. Drain Guide emphasizes combining methods safely and avoiding aggressive, high-pressure approaches in fragile pipe networks.
Safety and choosing cleaners
Always prioritize PPE and ventilation when handling cleaners. Read labels, never mix cleaners, and avoid caustic products on older pipe materials. Enzymatic cleaners are safer for frequent use, while mechanical methods avoid chemical exposure altogether. Drain Guide cautions homeowners to dispose of residue responsibly and avoid dumping concentrated products into septic systems without guidance. If unsure, test a small area first and work in a well-ventilated space.
Kitchen drain considerations
Kitchen drains accumulate grease, food particles, and soap scum. Hot running water followed by a mechanical clear can help flush solids. For stubborn grease clogs, a combination of a plunger and a snake can be effective, but avoid pouring boiling water into PVC pipes as it may warp fittings. Always use a sink trap brush to remove hair and debris from the trap. Proper sequence and regular maintenance reduce recurring grease clogs.
Common pitfalls and how to avoid them
Do not mix different cleaners; this can release dangerous gases. Do not use metal tools in a porcelain sink; they can scratch finishes. Avoid using excessive force with a snake, which can push the clog deeper or damage pipes. Test a small area first when attempting any new cleaner or technique. Regular maintenance prevents large clogs and reduces the risk of pipe damage.
When to call a professional
Persistent clogs after a DIY session, sewer odor, sewage backups, or multiple slow drains may indicate a more complex issue, such as a sewer line problem. If you find standing water, unusual noises, or suspect hidden damage, contact a licensed plumber. Drain Guide recommends escalation to a pro when safety or code concerns arise. A professional assessment can prevent further damage and ensure proper venting and drainage.
Getting organized before you start
Before you begin, assemble tools, set towels to catch spills, and clear the area. Disconnect powered appliances if you are near electrical outlets, and keep kids and pets away. Create a plan: identify the drain, choose the method, gather materials, and set a timer to track progress. A calm approach reduces frustration and improves results. Having a setup checklist saves time and reduces mistakes during the process.
Authority sources
- OSHA safety guidelines for handling cleaners and personal protective equipment: https://www.osha.gov/
- Extension services on home plumbing maintenance: https://extension.illinois.edu/
- General household hazardous waste and safe disposal guidance: https://www.epa.gov/
Tools & Materials
- protective gloves(nitrile or latex; protects hands from chemicals and debris)
- plunger(cup plunger for sinks; flange plunger for toilets)
- drain snake / auger(manual or drill-powered; choose 3/8 inch cable for typical drains)
- bucket(to catch water and debris)
- rags or towels(for spills and wipe-down)
- flashlight or headlamp(to inspect dark drains and traps)
- adjustable wrench(useful for removing P-trap if needed)
- old towels or plastic sheeting(protect nearby surfaces)
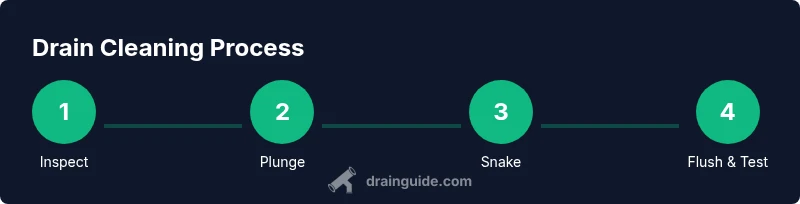
Steps
Estimated time: 60-90 minutes
- 1
Gather tools and prep space
Arrange gloves, plunger, snake, bucket, rags, and a flashlight. Clear the work area, remove items that could fall into the drain, and place towels to catch spills. This reduces chaos and keeps the process efficient.
Tip: Lay out a dedicated cleanup zone and test all tools before starting. - 2
Identify the drain and remove standing water
Locate the blockage and remove standing water with a cup or siphon if needed. Visible water helps you assess the clog type and plan the next step.
Tip: If water is deep, scoop gradually to avoid creating splashes. - 3
Plunge with proper technique
Seal the drain and plunge with firm, vertical motions. Create a good seal and avoid excessive force to prevent pipe damage. Repeat several times to loosen material.
Tip: Use a sink plunger with a tight fit and keep it upright to maximize suction. - 4
Use a drain snake to break up the clog
Insert the snake slowly, rotate as you push forward, and retract to pull out debris. If you feel resistance, work gently and advance a bit further before pulling back.
Tip: Don’t force the snake through sharp bends; adjust angle and reinsert. - 5
Flush and inspect the trap
Run hot water to flush loosened material toward the sewer, then inspect/clean the P-trap if accessible. Reassemble carefully and ensure joints are tight.
Tip: Keep the bucket ready for any residual water when removing the trap. - 6
Test drains and clean up
Open the valve, run water through the system, and check for leaks or slow drainage. Clean up the workspace, dispose of debris properly, and store tools.
Tip: Document any recurring issues for future reference.
Got Questions?
What is pipe and drain cleaning?
Pipe and drain cleaning is the process of removing blockages and buildup from household drains to restore flow. It can involve mechanical methods, chemical cleaners, or enzymatic options depending on the situation.
Pipe and drain cleaning means clearing clogs with mechanical, chemical, or enzymatic methods to restore flow.
When should I use a plunger versus a drain snake?
Start with a plunger for simple, surface-level clogs. If the plunger doesn’t clear the drain, use a drain snake to reach further into the pipe and break up or pull out the clog.
Begin with a plunger, then move to a drain snake if needed.
Are chemical cleaners safe for pipes?
Enzymatic cleaners are generally safer for frequent use. Be cautious with caustic cleaners, especially on older pipes or near septic systems, and never mix cleaners.
Enzymatic cleaners are safer; avoid caustic products and never mix cleaners.
How long does a DIY drain cleaning take?
A typical DIY drain cleaning session ranges from 30 to 90 minutes, depending on clog severity and the number of drains involved.
Most DIY drain cleanings take under two hours depending on the clog.
When should I call a professional?
Call a professional if clogs persist after a DIY attempt, you smell sewage, or you notice multiple slow drains suggesting a bigger sewer issue.
Call a pro if the clog persists or you suspect a sewer problem.
Watch Video
The Essentials
- Start with mechanical methods first.
- Choose the method based on clog type and pipe material.
- Prioritize safety and PPE at all times.
- Escalate to a professional when issues persist.