Drain Troubleshooting Guide: Clear and Protect Your Drains
A comprehensive, step-by-step approach to diagnosing and clearing common household drain clogs using safe, mechanical methods, with maintenance tips to prevent future issues.

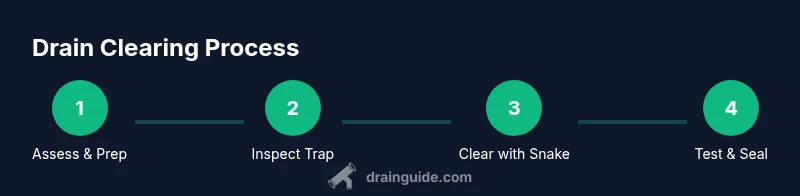
This guide shows you how to diagnose and clear common household drain clogs using safe, mechanical methods before resorting to chemicals. You'll learn to inspect the trap, use a plunger and a drain snake, and verify flow. Gather gloves, a bucket, plunger, drain snake, flashlight, and a few towels, then follow the steps in order.
What is a drain and why it clogs
A drain is a channel that carries wastewater away from fixtures like sinks, showers, and tubs. When a drain becomes slow or stops draining, the issue usually stems from buildup, hair, soap scum, grease, or mineral deposits that trap other debris. Understanding how a drain works helps you choose the right method. According to Drain Guide, even simple clogs can often be resolved with patient, mechanical methods before resorting to harsher options. Start by identifying which fixture is affected and whether the flow is equally slow across all nearby fixtures, which can indicate a broader venting or sewer issue rather than a local blockage.
Common causes of drainage blockages
Most residential clogs arise from everyday use. Hair, soap residue, and grease are notorious culprits in bathroom drains, while food particles and fats commonly slow kitchen drains. In showers and tubs, soap scum combines with hair to form a dense mat that traps debris. Bathroom vanity traps and laundry drains can also accumulate lint and fabric fibers. In some homes, mineral build-up from hard water can create a crust that narrows the pipe over time. While chemical cleaners may offer a quick fix, they can damage pipes and septic systems if misused. Drain Guide analysis shows that persistent clogs often start with hair and soap buildup in the trap and U-bend, then migrate into the main line.
Mechanical vs chemical approaches: making the right choice
Mechanical methods—plungers, drain snakes, and manual extraction—are usually safer for most households and pipelines. They target the blockage directly and minimize chemical exposure to family members and the environment. Chemical drain cleaners should be used with caution and never as a first option, especially on old pipes or septic systems. The Drain Guide team recommends starting with mechanical options, then trying enzymatic cleaners or routine flushing after the blockage is removed to maintain flow. If you suspect a venting problem, a chemical solution will not fix that issue and could worsen the situation.
DIY readiness: safety and setup
Before you dive in, plan your approach and gather PPE: gloves, safety glasses, and a small flashlight. Turn off the water supply to fixtures you’ll service, especially when working under sinks or behind walls. Place a bucket or towel under the trap to catch any residual water. If you have a septic system, avoid chemical cleaners that could disrupt beneficial bacteria. If the clog sits behind a rigid wall or deep in the drain line, you may be entering a space where a professional’s tools are necessary. The goal is to minimize mess and protect you and your family while preserving pipe integrity.
Inspecting the trap: where blockages often hide
The P-trap is a prime suspect for clogs because it collects hair, soap scum, and debris. Start by placing a bucket beneath the trap, then unscrew the trap’s slip nuts with an adjustable wrench. Clean out any gunk, and inspect the interior with a flashlight for shiny hair loops, fibers, or mineral buildup. Rinse thoroughly and reassemble, ensuring a tight seal to prevent leaks. If the trap is clear and water still backs up, the clog likely lies beyond the trap in the drain line, requiring a snake or professional intervention.
Clearing methods: plunger, auger, and cautious improvisation
For most sinks and bathtubs, a cup plunger or a flange plunger can dislodge shallow clogs near the fixture. Ensure a tight seal, then plunge with steady up-and-down pressure. If plunging fails, use a hand auger (drain snake) to break up the obstruction. Feed the snake into the drain slowly, rotating the handle to keep the cable engaged with the blockage. When you feel resistance, gently rotate and push forward, then retract to pull debris out. In some cases, a straightened wire coat hanger with a small hook can retrieve hair near the trap, but avoid damaging plastic pipes.
Running tests and verifying flow after clearing
After removing the blockage, flush the line with hot water to clear residual debris and test the drain by running water for several minutes. Check all joints for leaks and ensure there is no gurgling or slow draining. If the water still backs up, you may need to repeat the approach or attempt a deeper snaking from the cleanout access, if available. Documentation of what you did helps if you contact a professional later. Remember: the goal is a steady, whisper-quiet drain with no odors or backups.
Preventing future clogs: a maintenance routine
Regular maintenance keeps drains flowing smoothly. Use a simple weekly practice: flush with hot water, space hair-catching mesh screens over bathroom drains, and avoid pouring fats or oils down kitchen sinks. A monthly or quarterly routine with a gentle enzymatic cleaner can help break down organic buildup without harming pipes or septic systems. If you notice recurring clogs in the same drain, it may indicate a bigger problem in the main line or venting that requires a professional investigation. Drain Guide recommends documenting your maintenance schedule for peace of mind.
When to call a plumber: signs you’ve reached the limit
If multiple fixtures are slow, if you hear persistent gurgling, or if you don’t feel confident handling the blockage, it’s time to call a plumber. Blockages beyond the main trap, roots invading older pipes, or sewer line issues require professional equipment and expertise. Quick professional assessment can prevent pipe damage and contamination of the home. The Drain Guide team suggests contacting a licensed plumber if you have persistent backups after trying DIY methods twice, or if you notice unusual wet spots or soil changes around exterior drains.
Tools & Materials
- Cup plunger(Also called a sink plunger; ensure a good seal for best suction.)
- Flange plunger(Better for toilets and deeper clogs (optional for sinks).)
- Drain snake/auger(Handheld version for home use; minimum 3 ft length.)
- Adjustable wrench(Used to loosen trap nuts if needed.)
- Bucket or tray(To catch water and debris when removing traps.)
- Safety glasses(Protect eyes from splashing water or debris.)
- Work gloves(Grip slippery parts and prevent cuts.)
- Flashlight(Inspect traps and interior pipes.)
- Towels or rags(Contain mess and protect surrounding surfaces.)
Steps
Estimated time: 60-90 minutes
- 1
Assess the situation
Survey which fixtures are affected and note whether the problem is isolated to one drain or affects multiple fixtures. This helps you decide whether to start at the trap or move to the main line.
Tip: Document the symptoms (slow drain, gurgling, backups) to guide your next actions. - 2
Turn off water and prepare the area
Shut off the water supply to the affected fixture if possible. Place a bucket under the trap and lay towels to catch spills. This minimizes mess and protects the floor.
Tip: Have rags ready to wipe spills and protect cabinet surfaces. - 3
Remove and clean the P-trap
Place the bucket under the trap, loosen the slip nuts, and remove the trap. Clear out the debris with gloved hands or a brush, then rinse the trap before reinstalling.
Tip: Inspect for cracks; replace the trap if damaged. - 4
Try plunging first
Seal the drain with a plunger and plunge with steady pressure. If you hear a clear water surge, run water to see if the flow improves.
Tip: Use a cup plunger for flat drains; ensure no air leaks around the seal. - 5
Snaking the drain
Extend the drain snake into the pipe until you meet resistance. Rotate the handle to grip and break up the clog, then pull back debris.
Tip: Do not force the snake; back off if you feel resistance that could damage pipes. - 6
Flush and test
Run hot water for several minutes to clear residual material. Check both the main drain and connected fixtures for proper drainage.
Tip: If water still backs up, repeat snaking or move to a deeper portion of the line. - 7
Address tricky sections
If the clog persists beyond the trap and accessible sections, consider using enzymatic cleaners or more advanced tools. Avoid caustic chemicals on aging pipes.
Tip: Enzymatic cleaners are gentler on pipes and septic systems. - 8
Reassemble and verify
Tighten the trap nuts, ensure no leaks, and run water to confirm smooth drainage. Clean up the work area.
Tip: Take photos of the setup for future reference.
Got Questions?
What is the first step to diagnose a clogged drain?
Identify whether the problem is isolated to one fixture or affects multiple fixtures. This helps determine whether to start at the trap or move to the main line. A visual check and listening for gurgling can guide your approach.
Start by checking if one drain is blocked or if several are slow, then listen for gurgling sounds to guide your next move.
Can I use a chemical drain cleaner for a kitchen sink?
Chemical cleaners can damage pipes, especially older or PVC pipes, and may harm septic systems. Use them only as a last resort and follow the product instructions precisely.
Avoid chemical cleaners when possible, especially in older plumbing or septic systems; follow the product instructions if you must use them.
Is it safe to use a wire coat hanger to clear a drain?
A straightened coat hanger can remove hair at the trap or clean the immediate blockage, but it risks scratching or puncturing pipes if used aggressively. Use gentle, controlled motions and avoid forcing debris.
A coat hanger can help, but use it carefully to avoid damage; better to use a proper snake for deeper clogs.
When should I call a plumber?
If clogs persist after two DIY attempts, involve multiple fixtures, or you notice drainage backups with sewage odors, it’s time to call a licensed plumber for a thorough inspection.
If DIY attempts don’t clear the clog after a couple of tries or you smell sewage, get a professional.
How can I prevent clogs from returning?
Use strainers, avoid pouring grease or fats down the drain, run hot water weekly, and consider enzymatic cleaners to maintain flow without harming pipes.
Install strainers, limit grease down the drain, and perform regular flushes to prevent buildup.
Watch Video
The Essentials
- Take a mechanical-first approach to clear most clogs
- Inspect traps before deeper diagnostics
- Vent and main-line issues require professional help
- Regular maintenance prevents recurring clogs