Drain LG Washer: Step-by-Step Drainage Troubleshooting
Master LG washer drainage with this Drain Guide tutorial. Learn quick fixes, safe tools, and step-by-step troubleshooting to keep your drain flowing smoothly and odor-free.

By following this guide, you will diagnose and fix LG washer drainage issues safely and effectively. You’ll examine common causes like clogged filters, kinked hoses, and standing water, then perform targeted steps to restore proper draining. Gather basic tools and reset the drain path to prevent future backups. This quick answer highlights the key actions and safety reminders.
Why Drain LG Washer Drainage Issues Happen
Water backups around an LG washer usually signal a partial blockage or an improperly configured drainage path. According to Drain Guide, many laundry drainage problems originate from debris in the pump filter, a kinked drain hose, or a standpipe that is too high or too low. Hard water scale can also accumulate on metal components, reducing flow. In front-load models, soap and lint can cling to the door boot or filter housing and form stubborn clogs. In top-load machines, a clogged pump or bend in the drain hose is a common culprit. Understanding the typical failure modes helps you target the right area first, which saves time and reduces the risk of accidental damage. Common symptoms include slow draining, gurgling sounds, or water pooling in the drum after a cycle. While some issues require professional service, many drainage problems are solvable with a systematic approach and the right tools.
Safety First: Prepare and Protect Your Home
Safety should come before every repair. Unplug the washer from the power outlet and shut off the water supply to minimize the risk of electric shock or water damage. Wear protective gloves and use a flashlight to inspect dark cotton lint areas like the pump housing. Place towels and a shallow pan nearby to catch any residual water during work. Keep children and pets away from the work area. If your model has a removable back panel, consult the owner's manual before prying; many panels require a specific tool or screws that can be damaged easily. By planning safety steps, you reduce the chance of flooding and protect household surfaces while you diagnose the drainage issue.
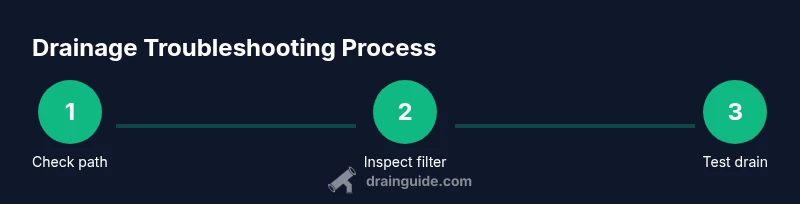
Basic Diagnostic Checklist for LG Washer Drainage
Use a simple checklist to narrow down the problem. Start by running a short cycle with no laundry and observe whether water drains within a reasonable time. Check for visible kinks or crimps in the drain hose; ensure it loops upward only as designed to prevent backflow. Inspect the pump filter or access panel for debris like lint, coins, or hair. Listen for the pump motor when the washer should be draining—if you hear a buzzing or no sound, the pump may be stuck or faulty. Confirm the drain hose is correctly installed to the standpipe or laundry sink and that the standpipe is the correct height. A systematic diagnostic reduces unnecessary disassembly and points you toward the correct component to service.
Step-by-Step: Access and Clean the Pump Filter (LG Front-Load and Many Top-Load Models)
The pump filter is a common choke point for drainage. Start by turning off power and water, then locate the filter door usually near the bottom front panel. Place a towel under the access area and slowly open the filter cover to avoid a splash. Remove the filter and rinse under running water, removing lint and coins. Reinsert the filter securely and wipe away any residue before closing the panel. This simple maintenance can restore proper drainage in many cases. For visual guidance, refer to your model’s manual and consider inspecting the impeller once the filter is removed to ensure it spins freely.
Step-by-Step: Inspect and Clear the Drain Hose and Path
A clogged drain hose or a crushed hose can block drainage. Disconnect the hose from the standpipe or sink and inspect inside for lint buildup. Use a long brush or flexible snake to dislodge any obstruction, then flush the hose with warm water. Reconnect securely, ensuring a snug fit at both ends to prevent leaks. If the hose is damaged or overly stiff, replace it rather than attempting a risky bend. After reassembly, run a short test cycle to confirm flow is restored.
Step-by-Step: Verify Standpipe, Trap, and Venting
The standpipe should be tall enough to prevent backflow but not so high that water cannot drain. Check the trap for clogs or standing water and clean as needed. Ensure venting is adequate for your plumbing configuration; poor venting can cause siphoning and slow drainage. A properly configured standpipe and trap reduce backpressure and improve drain speed. If the standpipe is too low or the trap is clogged, correct these elements before testing again.
Maintenance Tips to Prevent Future Clogs in LG Washers
Regular maintenance is the best defense against drain problems. Clean the pump filter every 3–6 months or as recommended by your LG model’s manual. Use a lint screen and avoid overloading the drum, which increases lint and fiber load in the drain. Run an occasional hot-water cycle with a cup of baking soda and a splash of vinegar to loosen mineral buildup—do not overdo this practice, and ensure the drum is empty. Consider installing a standpipe guard or drain cover to minimize lint entering the lines. Document maintenance dates to keep your routine consistent and effective.
Troubleshooting Scenarios: Front-Load vs Top-Load LG Washers
Front-load LG washers often accumulate lint and detergent residue in the door boot and filter housing, which can contribute to slow drainage if not cleared. Top-load models tend to trap debris in the pump or hose elbows, making routine pump cleaning critical. Regardless of layout, verify the drain path’s integrity (hose, filter, standpipe) and perform a full diagnostic sequence if you notice persistent drainage issues. This approach helps you adapt the troubleshooting steps to your specific model and home plumbing configuration.
When to Call a Pro and What to Expect
If you exhaust the above steps without resolving the drainage issue, it may be time to call a plumber or certified appliance repair technician. A professional can inspect the internal pump impeller, verify electrical components, and check the home’s plumbing for hidden blockages. Ask for a written estimate and confirm warranty coverage if applicable. For many homeowners, a well-documented diagnostic and a clear plan from a technician reduces the risk of repeated problems and ensures safe, compliant repairs.
Tools & Materials
- Gloves(Protect hands from sharp edges and dirty water)
- Flashlight(Inspect dark compartments around pump and hoses)
- Towels or absorbent rags(Catch spills and keep work area clean)
- Bucket(Hold used water and debris during filter cleanout)
- Screwdriver set (Phillips and flat-head)(Open access panels and filter covers as needed)
- Pliers(Loosen hose clamps if needed)
- Cloth or brush for hose(Clean residual lint from hose interior)
- Water-safe snake or bottle brush(Clear minor clogs inside hoses)
- Replacement drain hose or filter (optional)(Use if hoses are cracked or filter is damaged)
- Owner’s manual or model-specific guide(Model-specific access locations and steps)
Steps
Estimated time: 60-90 minutes
- 1
Unplug and prep
Disconnect power from the washer and shut off the water supply. Move the appliance to a clear working area and place towels to catch any remaining water. This is the essential safety step before any internal inspection.
Tip: Always prioritize safety—electric and water together can be dangerous. - 2
Locate the drain path access
Find the pump access panel or filter door at the bottom front of the machine. Use a flashlight to inspect the area and prepare to remove the cover if needed. Check the model-specific guidance to ensure you’re accessing the correct component.
Tip: Some LG models hide the filter behind a decorative panel—check your manual first. - 3
Remove and inspect the pump filter
Carefully open the filter cover and remove the filter. Rinse it under warm running water, removing lint, coins, and fibers. Reinstall securely and wipe away any residue before closing.
Tip: Have a bucket handy to collect dirty water during this step. - 4
Inspect the pump area for debris
With the filter removed, check the pump inlet and impeller area for clogs. Use a flashlight and remove any trapped lint or small objects that could impede pumping.
Tip: Do not force the impeller; if it’s stiff, stop and reassess—some models require professional service for impeller issues. - 5
Check the drain hose for kinks
Trace the drain hose from the machine to the standpipe or sink. Look for sharp bends, crimps, or crushed sections that block flow. If needed, detach and straighten the hose.
Tip: Keep the hose elevated from the floor to prevent backflow. - 6
Flush and re-seat the hose
Reconnect the hose and flush it with warm water to clear any remaining blockage. Ensure clamps are tight and there are no leaks. If the hose appears damaged, replace it rather than reuse a compromised part.
Tip: Use a spare towel to catch any leftover water during reattachment. - 7
Verify standpipe and venting
Ensure the standpipe height accommodates your washer’s drain and that the venting system (if present) is not blocked. A proper standpipe height (typical range is 18–30 inches) helps prevent backflow and siphoning.
Tip: If backflow persists, consider consulting a professional about venting options. - 8
Run a test cycle and observe
After reassembly, run a short cycle with no laundry to observe drainage. Listen for the pump and watch the water level. If drainage is still slow or absent, proceed to additional checks or seek professional assistance.
Tip: Document any unusual sounds or errors to share with a technician.
Got Questions?
What are the most common LG washer drainage issues?
Most drainage problems come from clogs in the pump filter or hose, kinks in the drain line, or an improperly configured standpipe. Regular filter cleaning and proper hose routing prevent many issues. If problems persist, consult the manual or a technician.
Common issues are clogged filters, hose kinks, and standpipe misconfiguration. Clean the filter regularly and check the hose routing to prevent backups.
Can I use vinegar to clear a clogged drain hose?
Vinegar and baking soda can help with mineral buildup but are not a cure-all for severe clogs. If you use them, flush with plenty of water afterward and avoid mixing with commercial cleaners. For stubborn blockages, a flexible snake is a better option.
Vinegar can help mild buildup, but for stubborn clogs, use a snake and flush with water after.
Do I need a professional if the pump is making noise?
A noisy pump can indicate a worn impeller or blocked housing. If cleaning the filter and hose does not fix the noise, or if you notice electrical clues like burning smells, call a professional. Do not run the machine with a damaged pump.
If the pump remains noisy after cleaning, seek a professional to avoid further damage.
How often should I clean the LG washer pump filter?
Most LG washers benefit from filter cleaning every 3–6 months, or more often if you notice slow drainage or a lot of lint. Check your model’s manual for model-specific intervals.
Clean the filter every 3–6 months or when you notice slow drainage.
What’s the right standpipe height for LG washers?
A typical standpipe height is between 18 and 30 inches. If your setup causes frequent backflow or siphoning, adjust the height or consult a plumber.
Standpipe height is usually 18–30 inches; adjust if drainage is inconsistent.
When should I replace the drain hose?
Replace a cracked, kinked, or stiff hose rather than attempting a repair. A damaged hose can leak or collapse, causing future drainage problems.
Replace a damaged hose to prevent leaks and backflow.
Watch Video
The Essentials
- Identify the root cause before disassembly
- Clean the pump filter to restore drainage
- Inspect and straighten the drain hose for proper flow
- Verify standpipe height and venting to prevent backflow
- Create a simple maintenance routine to prevent future clogs