Drain Plug Bathroom: Step-by-Step Guide to Fix Common Drainage Issues
A comprehensive DIY guide for fixing bathroom drains with a plug, covering types, common clogs, safe tools, step-by-step removal, cleaning, and maintenance to prevent future blockages. Learn practical tips from Drain Guide.

This drain plug bathroom guide shows you how to inspect, remove, and clean the plug to restore smooth drainage. You’ll learn what tools you’ll need, safety tips, and a clear, step-by-step sequence that homeowners can follow without professional help. By the end, you’ll diagnose typical clogs, avoid common mistakes, and save time and money on future maintenance.
What a drain plug bathroom does and why it matters
A drain plug bathroom is a stopper-rich setup that helps regulate water flow in sinks and bathtubs. The plug seals the drain to keep water in for soaking or shaving, and it can also help prevent debris from entering the piping when closed. Regularly inspecting the plug and surrounding hardware is part of responsible home maintenance. Drain Guide’s team emphasizes that a well-functioning drain plug reduces overflow risks, makes baths safer, and minimizes water waste. When a plug or stopper is worn, it can allow slow leaks or frequent backups, signaling that a simple adjustment or cleaning is needed. A quick check can save you from bigger plumbing headaches later on.
In practical terms, the plug’s seal can degrade due to mineral buildup, hair, and soap scum. A loose seal may cause slow drainage, whistling noises, or a gurgling sound from the trap. If you notice water sitting after you pull the stopper, it’s a sign to investigate. With the right approach, most bathroom drains respond well to DIY maintenance, and the Drain Guide approach prioritizes safety, cleanliness, and gradual troubleshooting over brute force.
Common types of bathroom drain plugs and their impact on maintenance
There are several common plug styles you may encounter:
- Pop-up stopper: A rod-operated plug often connected to a lift rod under the sink or tub. It’s easy to lift and clean but can slip out of position if the linkage wears.
- Lift-and-turn stopper: Twisting the plug seals against a ring; easy to remove but can leak if the gasket degrades.
- Toe-tap or plunger stopper: Pressing a button or foot pedal raises the stopper. These are convenient but can collect hair around the stem if not cleaned regularly.
- Basket strainer: A screen that sits in the drain; excellent for debris interception but more prone to clogging if the screen isn’t cleaned.
Each type influences how you access the trap and how often maintenance is needed. Drain Guide’s experience shows that regular cleaning and inspection align with the plug type, reducing spontaneous leaks and ensuring solid drainage performance.
How clogs form in bathroom drains
Clogs in bathroom drains typically form from a combination of hair, soap scum, toothpaste residue, and mineral buildup. Hair strands intertwine with oils and soap, forming a fibrous mat that traps debris. Over time, this mass accumulates, reducing the drain’s effective diameter and slowing water flow. In tubs, body oils and conditioners contribute to a slick film that sets into residue, further impeding flow. In sinks, toothbrush bristles and toothpaste particles can add to the blockage in the trap. A proactive approach—regular rinsing, brushing of the stopper, and periodic trap cleaning—helps maintain steady drainage. Drain Guide's analysis underscores that catching early signs of slow drainage is far less labor-intensive than clearing a stubborn clog deep in the pipes.
Safety and preparation before you start
Before you begin any drain work, clear the area of personal items and lay towels to catch spills. Put on gloves to protect your hands from dirty water and sharp edges. If your plumbing is old or you see corrosion, proceed with extra caution and consider snaking the line rather than forcing a plug through a hard blockage. Disconnect power to nearby electrical outlets if you’re near a sink with electrical appliances and ensure good ventilation to avoid unpleasant fumes when using cleaners. A clean, well-lit workspace makes it easier to see small parts and avoid losing screws or small components down the drain. Drain Guide’s team recommends working slowly, measuring any disassembly against the plug’s fit and the trap’s layout to prevent accidental damage.
Tools and supplies you’ll need
- Gloves (rubber or nitrile), safety first
- Bucket or basin to catch water and debris
- Flashlight for dark corners under the sink
- Screwdrivers (flat-head and Phillips)
- Pliers or adjustable wrench
- Drain snake or flexible auger (3–6 ft)
- Rags or towels for cleanup
- Optional: Plunger and, as a last resort, chemical drain cleaner (follow label)
Having the right tools on hand minimizes surprises and reduces the chance of damaging seals or pipes. Drain Guide emphasizes using safer methods first and avoiding aggressive chemicals near rubber seals.
Step-by-step overview: a high-level flow you’ll follow later
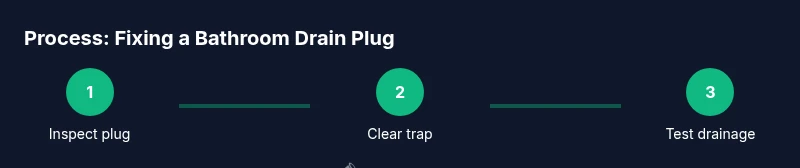
The typical process follows these stages: inspect and remove the stopper, access the trap and clean visible debris, use a drain snake for deeper blockages, reassemble the assembly, and test drainage. This overview helps you picture the sequence before you dive into the detailed steps. Remember to keep a bucket handy for catching water and to work slowly so you don’t disturb seals or gaskets. The goal is clear water drainage and a plug that seats firmly without leaks, achieved through careful inspection and methodical cleaning.
Removing a stopper and inspecting the drain area
To begin, remove the stopper or drain cover, taking note of how it fits. Use a flashlight to inspect the interior for hair, soap scum, and mineral deposits. If the plug has a linkage, check that it moves freely and doesn’t bind. Worn seals around the plug can cause leaks even when the stopper is closed, so look for rubber or silicone deterioration. Drain Guide’s practical guidance suggests documenting the setup so you can reassemble accurately. This step avoids guesswork and makes subsequent cleaning more effective.
Cleaning the trap and proximal piping
Place a bucket under the trap to catch water. Use a cloth to wipe away gunk from the trap and remove any accessible debris. If hair accumulates around the trap, use pliers or a small tool to gently pull it free. Rinse the trap with warm water to flush away residue. For stubborn flakes, use a mild cleaning solution and a brush, then rinse again until the water runs clear. These practices reduce recurring buildup and improve drainage.
Using a drain snake for deeper blockages
If water still drains slowly after cleaning the trap, a drain snake can reach deeper clogs. Insert the snake into the pipe and rotate the handle to break up hair and solids. When you feel resistance, gently push and pull to loosen the blockage. Retrieve the snake slowly to pull out debris. Clean the snake and reinsert if needed. This method addresses blockages that aren’t accessible by hand. Drain Guide advises using protective equipment and avoiding excessive force to prevent pipe damage.
Reassemble, test, and finalize
Reinstall the stopper, ensuring all seals align and move freely. Run warm water to test the plug and drainage rate. If the water backs up, inspect the trap for additional debris or misalignment. Wipe everything clean, dispose of debris properly, and store tools in a safe place. A final test with several cycles confirms consistent drainage and a secure seal. Drain Guide’s approach favors careful testing over rushing the reassembly to avoid leaks.
Maintenance and prevention for the long term
Schedule periodic inspections of the drain plug bathroom setup, ideally every 6–12 months. Clean the stopper and trap to remove hair and film buildup, and consider a finer screen filter to catch debris before it enters the trap. If mineral buildup becomes persistent, a mild cleaning routine with baking soda and vinegar can be gentler than harsher chemicals. Maintaining the seal and keeping the area dry helps prevent rust and degradation, extending the life of the plug and the drain hardware.
When to seek professional help
If you notice persistent slow drainage, sewage odors, or frequent backups after a DIY attempt, it’s wise to contact a licensed plumber. Complex pipe configurations, corroded fittings, or compromised seals may require professional tools and expertise. Drain Guide suggests using DIY first for simple blockages, then escalating to a professional if the problem persists or if you encounter unsafe conditions.
Tools & Materials
- Gloves (rubber or nitrile)(Protect hands from dirty water and sharp edges)
- Bucket or container(Catch water and debris)
- Flashlight(Improve visibility under sink)
- Flat-head screwdriver(Remove covers or fasteners)
- Phillips-head screwdriver(Disassemble stopper mechanisms)
- Pliers or adjustable wrench(Loosen slip nuts or clamps)
- Drain snake / auger(Reach deeper blockages (3–6 ft))
- Rags or towels(Clean spills and dry area)
- Plunger (cup)(Quick unclog before disassembly)
- Chemical drain cleaner (optional)(Use as a last resort per label)
Steps
Estimated time: 20-40 minutes
- 1
Turn off water and prepare the area
Stop the water supply to the sink or tub and clear the workspace. Place towels to catch spills and protect the floor. This reduces mess and protects nearby fixtures while you work.
Tip: Have a bucket handy to collect water; it makes cleanup easier. - 2
Remove the drain cover or stopper
Carefully lift or unscrew the stopper. Note how it sits and how the linkage moves if applicable. This access is essential for inspecting the trap and removing debris.
Tip: Take a quick photo of the setup to aid reassembly. - 3
Inspect the trap and clear visible debris
Examine the trap for hair, soap film, and mineral buildup. Use gloved hands or pliers to remove obvious blockages and wipe the interior clean before testing drainage.
Tip: Always remove the trap cleanly to avoid dropping debris back into the pipe. - 4
Use a drain snake for deeper blockages
Insert the snake and rotate while pushing gently to break up the clog. Retrieve the snake gradually to pull out debris, then flush with water.
Tip: Avoid forcing the snake past resistance; withdraw and try a different angle. - 5
Reassemble, test, and finalize
Reinstall the stopper, ensure seals sit evenly, and run water to verify drainage speed. Check for leaks around the seal and adjust as needed.
Tip: Run multiple test cycles to confirm consistent drainage. - 6
Clean up and document maintenance
Dry the area, wipe tools, and store equipment. Consider noting when you last serviced the drain plug bathroom for future reference.
Tip: Keep a small maintenance log near the sink for quick reminders.
Got Questions?
What is a bathroom drain plug and why is it important?
A bathroom drain plug acts as a stopper to control water flow and debris entry. It helps you seal the drain when needed and prevents backflow. Regular maintenance reduces leaks and clogs.
A bathroom drain plug is a stopper that helps seal the drain; keeping it in good condition prevents leaks and clogs. Regular maintenance matters.
How can I tell if a clog is deep in the pipe and not in the stopper?
If water drains slowly even after removing obvious debris, it may be a deeper blockage. A drain snake can reach further, or you may need to inspect the trap and downstream piping.
Slow drainage after cleaning the trap suggests a deeper clog; try a drain snake or consult a professional if needed.
Are chemical drain cleaners safe for bathroom plugs?
Safer options include mechanical cleaning with a snake or plunger. If you use chemicals, follow the label and keep them away from rubber seals; repeated use can damage fixtures.
Chemical cleaners can be risky for bathroom fixtures; use them sparingly and follow the label closely.
When should I call a plumber?
Call a plumber if you notice persistent backups, strong odors, or leaks after a DIY fix. Complex pipe layouts or corroded fittings often require professional tools and expertise.
Call a plumber if backups persist or you see leaks after DIY steps; professionals handle complex pipe issues.
How often should I maintain a bathroom drain plug?
Aim for a light cleaning every 1–3 months and a thorough trap check every 6–12 months, depending on usage and water quality.
Schedule light cleanings every few months and check the trap about once a year.
Watch Video
The Essentials
- Inspect the plug and seals before disassembly
- Clear the trap and proximal piping for best results
- Use a drain snake for deeper blockages
- Reassemble carefully and test drainage thoroughly
- Establish a maintenance routine to prevent future clogs