Footing Drain Installation: Step-by-Step DIY Guide
Learn to install a footing drain around your foundation with step-by-step instructions, tools, safety tips, and maintenance guidance from Drain Guide.

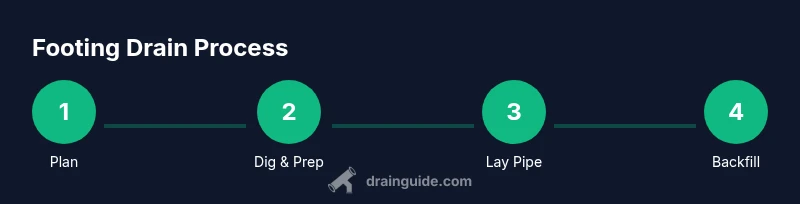
Footing drain installation redirects groundwater away from your foundation by installing a perforated pipe in a gravel bed around the footing. Plan exterior grade, trench below the frost line, and a consistent slope toward a discharge or sump. Layer filter fabric, add gravel around the pipe, then carefully backfill and compact. Follow local codes.
Why Footing Drain Installation Protects Your Home
Footing drain installation is a proactive step homeowners take to keep basements dry and foundations solid. By redirecting groundwater away from the foundation, it lowers hydrostatic pressure against walls, reduces the risk of mold growth, and helps prevent frost damage in cold climates. A well-designed system even reduces the likelihood of landscape erosion around the home. When done correctly, the footing drain becomes a quiet, long-term defender against water infiltration. According to Drain Guide, proper installation is more about planning and execution than expensive materials. The Drain Guide team emphasizes starting with a clear plan, verifying site conditions, and adhering to local codes throughout the process. Keep in mind that a footing drain is most effective when integrated with exterior grading and a robust discharge strategy.
Key Design Principles for Footing Drains
Several core principles guide a reliable footing drain. First, ensure a continuous slope toward the discharge point so gravity does the work. Second, use a filter fabric to prevent soil fines from clogging the perforated pipe while still allowing water to pass. Third, surround the pipe with clean gravel to promote drainage and keep the fabric from collapsing. Finally, keep the system accessible for maintenance and locate the outlet where water cannot pool near the foundation. Drain Guide's guidance stresses that consistent layout, proper material sequencing, and a clean out option at the terminus improve performance and reduce maintenance needs over time. By following these principles, you create a durable path for groundwater to exit your property.
Planning and Sizing Your Trench
Plan the trench to follow the foundation perimeter and extend beyond any potential water entry points. The trench should run to a discharge or sump and be deep enough to place the pipe below the frost line (as required locally). A wider trench with evenly spaced sections reduces the risk of low spots and helps water move freely. Check for buried utilities before digging, coordinate with landscaping plans, and consider future drain cleanouts for easier maintenance. Thoughtful planning reduces surprises during installation and ensures your footing drain functions as intended for years to come. Drain Guide notes that a well-planned trench simplifies later maintenance and reduces the chance of root intrusion or settlement.
Authority sources
- EPA: https://www.epa.gov
- Extension services: https://extension.illinois.edu
- OSHA safety guidelines: https://www.osha.gov
Troubleshooting Common Issues
Gurgling sounds or slow drainage typically signal an air pocket or a clog within the trench or pipe. Uneven ground around the trench can create low spots where water pools, reducing performance. Damaged fabric or crushed gravel can also impede flow. Regular inspections after major rains help catch problems early. If you notice persistent damp soil near the footing, recheck trench depth, slope, and outlet location, and consider adding a cleanout at the discharge point for easier maintenance. Drain Guide recommends addressing issues promptly to prevent long-term foundation damage.
Maintenance and Next Steps
After installation, inspect the discharge outlet periodically for blockages and verify that the outflow path remains clear. If soil shifts or landscaping alters drainage, recheck the trench depth and slope and reseal joints as needed. Keep a simple map of trench locations and pipe runs in your home records for future renovations. Drain Guide suggests compiling a maintenance calendar and scheduling periodic checks to extend the life of your footing drain and preserve foundation health for decades.
mainTopicQuery2_2
Tools & Materials
- Shovel or trenching tool(For digging the horizontal trench along the foundation line)
- Measuring tape(At least 20 ft for planning; mark depths and widths)
- Chalk line or string and stakes(Maintain straight lines and consistent trench width)
- Perforated drainage pipe (4-inch minimum)(Ensure perforations face downward when laid in the trench)
- Geotextile filter fabric(Wrap pipe to prevent fines from entering the pipe system)
- Clean gravel (3/4 inch to 1/2 inch)(Fill around pipe to promote drainage; avoid fine soils)
- Backfill soil (loam or suitable soil)(Used to cover the fabric and restore grade after gravel backfill)
- Safety gear (gloves, safety glasses)",(Protect hands and eyes during digging and handling materials)
- Utility locator service (811)(Call before you dig to identify buried lines)
Steps
Estimated time: 2-6 hours
- 1
Plan trench layout and slope
Mark the foundation perimeter and plan a trench path that follows the exterior edge and continues to a discharge point. Determine a gentle slope toward the exit so gravity moves water outward. Create a simple map using stakes and string lines to visualize the route.
Tip: Use batter boards and string lines to keep the trench straight and maintain a consistent slope. - 2
Dig the trench to planned depth
Excavate along the mapped path to a depth that places the pipe below the frost line (per local code). Ensure the trench bottom is flat and free of sharp rocks that could damage the pipe. Leave space for the fabric wrap and gravel bedding.
Tip: Dig slightly wider than the pipe diameter to allow for gravel bedding and fabric wrap. - 3
Install filter fabric and gravel bed
Line the trench with geotextile fabric, then add a compact gravel bed to provide a stable bedding for the pipe. This layer helps channel water while protecting the pipe from soil fines.
Tip: Overlap fabric edges to prevent soil ingress; avoid wrinkles in the fabric. - 4
Lay perforated pipe with fabric wrap
Place the perforated pipe on the gravel bed with perforations facing downward. Secure joints and ensure a continuous run along the trench toward the discharge point.
Tip: Keep joints above potential silt pockets; run a continuous line without sharp bends. - 5
Backfill and cover the pipe
Wrap the pipe with additional geotextile fabric and cover with more gravel. Finish with a layer of backfill soil to restore grade, using a tamper to compact gently.
Tip: Avoid heavy compaction over the pipe to prevent deforming the trench. - 6
Connect to discharge, test, and finalize
Connect the drain to the chosen discharge path or sump, then test water flow to confirm a clear path. Finish by replacing any landscaping and documenting the trench layout for future reference.
Tip: Test flow under load (rain event or simulated) to ensure no backups occur.
Got Questions?
What is a footing drain and why do I need one?
A footing drain is a perimeter drain placed around a building’s foundation to channel groundwater away from the structure. It helps prevent basement moisture, mold growth, and foundation damage by reducing hydrostatic pressure. Installation requires planning, proper materials, and adherence to local codes.
A footing drain diverts groundwater from your foundation to protect your basement and foundation from moisture and cracks.
How deep should the trench be for a footing drain?
Depth should place the pipe below the frost line as required by local codes, and deep enough to allow proper bedding and backfill. Always verify utilities before digging.
Keep the trench deep enough to avoid frost and to accommodate bedding and backfill.
Can I install a footing drain myself?
DIY installation is possible for capable homeowners with basic plumbing and trenching experience. If you’re unsure about local codes, frost lines, or utility locations, consider hiring a professional.
You can do it yourself if you’re comfortable with trenching and pipe work, otherwise a pro can help.
What slope should the footing drain have?
A consistent slope toward the discharge is essential so water flows by gravity. Exact slope depends on site conditions; aim for a steady downhill path without dips.
Keep a gentle, continuous downhill slope toward the exit.
Do footing drains require a sump pump?
A sump pump is often used to move water away from the foundation, especially in areas with high groundwater. It may not be required if the discharge path is effective and gravity-driven.
A sump pump is common but not always necessary depending on your site drainage.
What maintenance does a footing drain require?
Inspect outlets regularly, remove blockages, and ensure the discharge area remains clear. Periodically check fabric integrity and the trench for settling or root intrusion.
Check the outlet and trench from time to time to prevent clogs and keep water flowing.
Watch Video
The Essentials
- Plan trench path with clear slope to exit.
- Use geotextile and gravel bedding for durability.
- Install pipe with downward-facing perforations and wrap with fabric.
- Test discharge flow and maintain clear outlets.