Gravel Drain Without Pipe: A DIY Guide to Drainage
Learn how to install a gravel drain without pipe to improve drainage around foundations. This DIY guide covers planning, trench prep, backfill, and maintenance basics for homeowners.

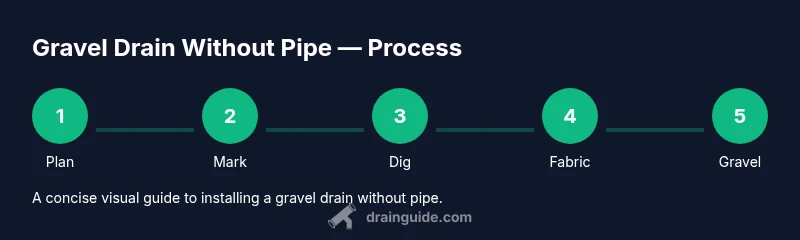
You will learn how to install a gravel drain without pipe to improve surface water flow in yards and around foundations. This method uses a trench, geotextile fabric, and a thick layer of clean gravel to promote drainage by gravity. Plan, dig a shallow trench, lay fabric, backfill with gravel, and finish with soil and vegetation.
What is a gravel drain without pipe?
A gravel drain without pipe is a trench-based drainage solution that relies on a deep layer of clean, compacted gravel and a geotextile barrier to promote subsurface water movement without a solid pipe. It works best in soils with moderate permeability and where surface runoff can be directed to a safe discharge area. Unlike traditional French drains that use perforated pipe, this approach eliminates the pipe and relies on gravity and the gravel's porosity to carry water away. For homeowners, it can be simpler to install, cheaper upfront, and easier to maintain, especially in landscape beds or around foundations. Drain Guide emphasizes that this method is not a universal fix; evaluate site conditions and long-term maintenance before proceeding.
Planning and site assessment
Before you start, assess the drainage problem and the landscape you’re working with. Identify sources of water, the slope of the land, and where water ultimately collects. Consider soil type—clay-heavy soils may reduce infiltration speed, while sandy soils drain quickly but can shift with heavy rainfall. Observe how water moves during a typical rain event and look for signs of erosion or pooling. Drain Guide notes that understanding the whole drainage picture helps you design a gravel drain without pipe that actually directs flow toward a safe outlet. Safety comes first: wear gloves and eye protection and work away from building foundations.
Materials and prep: geotextile, gravel, and fabric
Selecting the right materials is essential for a gravel drain without pipe. You’ll need a permeable barrier (geotextile fabric) to keep soil from clogging the gravel, a clean gravel mix with suitable particle sizes, landscape fabric for fighting weed growth, and basic hand tools. Pairs of work gloves, a sturdy shovel, a level, and stakes for marking the trench improve accuracy. Drain Guide recommends choosing a gravel mix that balances porosity with stability, avoiding fine silt that could clog over time. Keep a few spare bags of gravel on hand for adjustments.
Trench layout and depth concepts
Design the trench to support a continuous, unobstructed flow path. Plan for a gentle, consistent slope from the higher ground toward the designated outlet, so water moves by gravity rather than relying on pressure. The trench should be wide enough to accommodate the gravel bed and fabric without compressing materials. Do not overcomplicate the path—straight sections with sensible curves perform best. Keep entry and exit points clear of roots and utilities and mark them clearly with stakes.
Site preparation and safety considerations
Clear the work area of debris, rocks, and vegetation that could puncture the fabric or impede drainage. Check for existing utility lines before digging and call your local one-call system if required. Plan multiple shallow cuts instead of one deep trench; this reduces the risk of soil collapse and improves ballast for the gravel bed. Use proper lifting techniques when moving heavy gravel bags, and take breaks to prevent strain. Drain Guide highlights that careful site prep reduces rework and speeds up installation.
Fabric and first gravel layer: lay the barrier
Line the trench with geotextile fabric along the sides and bottom to prevent soil infiltration into the gravel. Overlap fabric edges by several inches so water can pass through while soil particles stay out. Begin with a thin, even base layer of gravel to establish a stable bed and prevent fabric from bunching. Avoid creating wrinkles in the fabric; smooth out folds as you go. This initial setup creates the foundation for reliable drainage and long-term performance.
Fill with gravel and shape the bed
Spread a thick, even layer of clean gravel across the fabric, forming a uniform bed that extends to the trench sides. The gravel creates pores that allow water to infiltrate and move toward the outlet. Avoid gaps or depressions that could trap sediment or create standing water. Lightly rake the surface to ensure consistent depth and slope toward the exit. Maintain a continuous, unbroken gravel path for best results.
Compact, test, and adjust
Gently compact the gravel with a hand tamper or by foot pressure in manageable sections. After compacting, perform a simple drainage test by slowly adding water at the upstream end and watching the flow toward the outlet. Look for any areas where water pools or slows, which may indicate compaction gaps or fabric folds. If necessary, add gravel to fill low spots and re-test until water moves freely. Drain Guide recommends these checks to prevent future clogs and slow drainage.
Surface finish and regrading
Finish by allowing the soil to cover the gravel path to avoid a bare trench in your landscape. Regrade surrounding soil so surface runoff continues to the drainage outlet rather than toward the foundation. Planting low-ground cover or placing mulch can stabilize soil while maintaining drainage. Ensure the final surface blends with the yard so it remains visually unobtrusive while functional.
Maintenance and long-term care
Gravel drains without pipe still require periodic maintenance. Remove any leaves or debris from the trench surface and inspect fabric for signs of wear during seasonal checks. If sediment builds up, expose a short section of gravel, rinse, and re-cover. Monitor after heavy rains and adjust the outlet area if erosion occurs. Regular maintenance keeps the system effective for years to come.
Common mistakes and remedies
Avoid placing the trench directly under future tree roots, which can hinder drainage and cause structural issues. Do not overfill the trench with gravel; this can impede water flow and reduce the effect of the drain. Skipping the geotextile barrier invites soil intrusion, decreasing gravel porosity over time. If you notice slow drainage, recheck slope and fabric integrity and clean out accumulated debris promptly.
Authority sources
For additional guidance on drainage design and best practices, consult reputable sources like EPA's green infrastructure pages and university extension resources. These references can help you align a gravel drain without pipe with local regulations and safety standards: https://www.epa.gov/sustainability/green-infrastructure, https://extension.umd.edu, https://extension.psu.edu
Tools & Materials
- Shovel or trenching spade(Sharp and sturdy; for clean trench edges)
- Measuring tape(For layout and slope checks)
- Geotextile fabric(Permeable barrier to prevent clogging)
- Landscape fabric(Weed suppression and stabilization)
- Gravel (clean, range 3/4" to 2")(Primary drainage medium)
- Safety gear (gloves, eye protection)(Protective gear during digging)
- Stakes and string(Mark trench lines and slopes)
- Level or water level(Check slope consistency)
- Tamper or hand-held compactor(Compact gravel layers as needed)
- Wheelbarrow or garden cart(Move gravel efficiently)
Steps
Estimated time: 4-6 hours
- 1
Plan trench layout
Determine the drainage path from high ground to outlet. Identify safe discharge areas and avoid utilities. Sketch a simple path that minimizes sharp turns and maintains consistent slope for gravity-driven flow.
Tip: Create a straight-line path where possible to reduce chances of blockages. - 2
Mark trench path
Use stakes and string to outline the trench on the ground. Double-check the path against water flow during a rain event sketch to ensure proper outlet direction.
Tip: Place markers at both ends and at changes in direction for accuracy. - 3
Dig trench
Excavate the trench to a shallow depth that accommodates the fabric and gravel layers. Avoid overly deep cuts near foundations to prevent soil instability.
Tip: Work in sections to maintain control and safety. - 4
Line trench with fabric
Lay geotextile fabric along the trench bottom and sides. Overlap fabric edges, ensuring a smooth surface without wrinkles that could trap sediment.
Tip: Overlap edges by several inches to prevent gaps. - 5
Install base gravel
Pour a base layer of clean gravel over the fabric. Create a consistent bed that will promote water movement toward the outlet.
Tip: Distribute evenly with a rake to prevent high spots. - 6
Place final gravel layer
Fill the trench with additional gravel to establish a thick, porous bed. The gravel should extend to the trench edges without compacting too tightly.
Tip: Avoid over-compactting; allow porosity to remain. - 7
Test drainage
Pour water at the upstream end and observe flow toward the outlet. Look for stagnant spots and adjust by adding gravel or rechecking slope.
Tip: If water pools, inspect fabric for folds and remedy. - 8
Finish surface and regrade
Fill surrounding soil to cover the trench and regrade to direct surface runoff toward the outlet. Plant groundcover to stabilize soil if desired.
Tip: Ensure the area looks natural while staying functional. - 9
Maintenance plan
Create a simple maintenance routine: seasonal debris removal and yearly fabric inspection for wear, with occasional sediment flush if needed.
Tip: Set a reminder to inspect after heavy rains. - 10
Address issues promptly
If drainage slows or odors appear, recheck slope, fabric integrity, and gravel porosity. Replace fabric or add gravel as needed.
Tip: Address early to avoid long-term damage. - 11
Document the setup
Take photos and notes of trench path, materials, and slope for future reference or homeowner maintenance.
Tip: Keep a small project journal in a dry place. - 12
Reassess with rainfall
After a significant rainfall, reassess the system's performance and make minor adjustments if required.
Tip: Use natural rainfall as a live test of the system.
Got Questions?
Is a perforated pipe necessary in a gravel drain without pipe?
No. The gravel drain without pipe relies on a gravel bed and fabric to promote drainage by gravity. A pipe is optional when you want a more controlled outlet, but it isn’t required for basic drainage goals.
No. A gravel bed and fabric can promote drainage by gravity, though a pipe can give you more control if desired.
Can I plant over a gravel drain trench?
Yes, but avoid heavy root competition that could disturb the gravel or fabric. Choose shallow-rooted plants and apply mulch to minimize disturbance.
Yes, but pick shallow-rooted plants and mulch to protect the trench.
What soil types work best with this method?
Gravel drains without pipe work well in loamy and sandy soils where surface runoff exists. In heavy clay soils, plan for slower infiltration and possibly use additional outlets.
They work well in loam or sandy soils; clay soils may need extra outlets.
How do I know if the drain is working after installation?
Observe runoff during rainfall and look for water movement toward the outlet. If the area still pools, recheck slope and fabric placement and consider adding more gravel.
Watch it during a rain; water should move toward the outlet. If not, recheck slope and fabric.
Do I need permits for a gravel drain project?
Permit requirements vary by location. Check with your local building or planning department before starting, especially if the drainage affects property lines or drainage toward a neighbor.
Check local rules before you start; permits vary by area.
How often should I maintain a gravel drain?
Schedule seasonal debris removal and at least one annual inspect-and-clean to prevent sediment buildup and ensure fabric integrity.
Do a seasonal clean and yearly check to keep it working.
Watch Video
The Essentials
- Plan trench path before digging to ensure proper drainage.
- Use geotextile fabric to maintain gravel porosity and reduce sediment intrusion.
- Layer gravel evenly and test drainage after installation.
- Regrade and cover the trench to blend with landscape while maintaining flow.
- Establish a maintenance routine to keep the system effective.