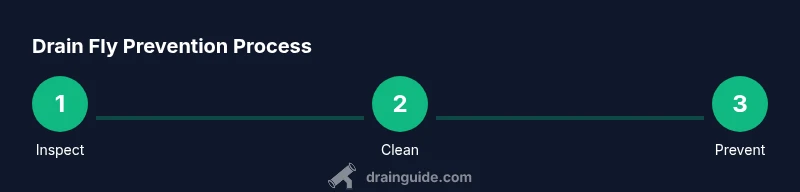
How Do Drain Flies Get in the Drain? A DIY Prevention Guide
Learn how drain flies enter drains, what attracts them, and proven DIY steps to remove and prevent infestations in kitchens and bathrooms. Safe cleaner alternatives, a maintenance checklist, and expert tips from Drain Guide.

Drain flies get in drains when organic film builds up inside the pipes, providing food and breeding sites. They often enter through sewer joints, vents, or damaged seals. The quickest fix is a thorough drain cleaning, followed by ongoing sanitation and regular maintenance. Use enzyme cleaners, hot water flushes, and monitor for several days.
What are drain flies and how they get in the drain
Drain flies, also known as sewer gnats or moth flies, are tiny, moth-like insects that thrive in damp, organic-rich environments. They breed in the slimy biofilm that can coat the inside of drains, traps, and access lines. According to Drain Guide, drain flies frequently enter homes through sewer connections, cracked pipes, or unsealed vents, hitching a ride on air currents or through the P-trap when the trap seal is compromised. In kitchens and bathrooms, the most common sources are organic accumulation behind slow drains, disposal residues, and leaky plumbing. The moment you notice even a few adults fluttering around a drain, treat the issue promptly because populations can grow quickly when conditions remain favorable for breeding. Understanding how they get in helps you target the right prevention and removal steps rather than spraying blindly.
Common entry points and how flies use plumbing
Drain flies can enter via cracked sewer pipes and damaged joints, unsealed vent connections, gaps around the P-trap, and access cleanouts. They often hide in the moist, organic film that accumulates behind slow drains or in laundry rooms where dampness persists. Once inside, adults emerge from the drain and lay eggs in the biofilm; larvae feed on organic debris within the pipe system. The presence of multiple drains with similar odors or moisture increases cross-drain landing; even ventilated bathroom fixtures can become entry routes when seals are weak. Practical takeaway: inspect joints, seals, and vent paths, and be vigilant for damp, organic buildup behind fixtures.
The life cycle of drain flies and why timing matters
Drain flies experience a rapid life cycle in breeding sites like drains and moist pipes. Eggs hatch into larvae, which then become pupae and finally adults. Because several generations can occur in a short span, a small initial sighting can escalate into a full-blown infestation if sanitation is neglected. This is why prompt cleaning, ongoing maintenance, and repeated treatments are essential. Drain Guide emphasizes that controlling the breeding environment is more effective than chasing adults alone. A sustained approach minimizes re-entry and regrowth.
Signs you have drain flies and what to look for
Look for tiny moth-like flies hovering around drains, especially in the bathroom and kitchen. You may notice a musty odor, a film or slime around the drain, or small black specks near the drain cover. Larvae are worm-like and pale, often found in the drain rim or on the inside of the trap. If you see multiple adults in the evening near a drain, that’s a strong indicator of an active breeding site. Regular inspection of every drain in the home helps catch problems early.
Immediate steps you can take to reduce breeding
Begin with removing standing water from affected basins and ensuring traps are filled with water to maintain seals. Scrub the interior of the drain with a long-handled brush to disrupt biofilm, then flush with hot water to dislodge debris. Apply an enzyme-based cleaner according to package directions and let it sit for the recommended time before flushing again. Keep area dry as you work and minimize moisture buildup in adjacent rooms to deter further breeding.
Long-term prevention strategies
Adopt a routine maintenance plan: clean drains weekly or monthly, use mesh screens on stoppers, fix leaks promptly, and address any musty odors quickly. Keep bathroom and kitchen areas dry, improve ventilation, and reduce organic residues behind traps by careful disposal and regular cleaning. Schedule monthly enzyme-based treatments to maintain a hostile environment for breeding and to prevent biofilm buildup.
Cleaning and sanitation routines for drains
Establish a schedule that combines mechanical cleaning with chemical or enzyme-based cleaners. Periodically remove and rinse P-traps, then reinstall with a fresh seal of plumber’s tape if needed. After cleaning, run hot water through every drain for several minutes. Document your routine and check for signs of renewed activity after a full cleaning cycle to verify effectiveness.
Safe use of drain cleaners and alternatives
Prefer enzyme-based cleaners or microbiological products over harsh chemical drain openers. Enzymes digest organics without corroding pipes. Never mix cleaners, especially bleach with acids or ammonia, as fumes can be dangerous. Mechanical methods like brushing and hot-water flushing should be your first line of defense, with cleaners used only as directed.
When to call a professional
If multiple drains show signs of infestation after several cleaning cycles, or if you notice sewage backup, persistent odors, or cracked pipes, it’s time to contact a licensed plumber. A professional can assess for structural leaks, root intrusion, or venting problems that DIY methods can’t resolve. Drain Guide recommends escalation when home remedies fail to stop ongoing activity.
DIY trapping options that work
Sticky traps placed near the drain can capture adults, reducing visible activity while you work on root causes. A simple, effective trap is a dish of fermenting liquid (like apple cider vinegar) with a drop of dish soap to break the surface tension. Check and replace traps regularly. For best results, combine traps with thorough cleaning and sanitation.
Common myths vs. reality
Myth: Drain flies originate from garbage. Reality: they breed in moist organic matter inside drains. Myth: Bleach alone will solve the problem. Reality: while bleach can kill some flies, it doesn’t remove biofilm effectively and can damage pipes; enzyme cleaners are typically more effective long term. Myth: You only need to clean one drain. Reality: infestations often involve multiple drains; address all affected areas.
Quick reference checklist
- Inspect all drains for moisture and biofilm. - Clean and scrub drains with a brush. - Flush with hot water; use enzyme cleaners per directions. - Keep trap seals filled with water. - Install mesh screens on sinks to block entry. - Monitor for a week and repeat if necessary. - Consider professional help for persistent cases.
Tools & Materials
- Rubber gloves(Protect hands from biofilms and cleaners)
- Long-handled drain brush(Reaches deep inside the pipe and trap)
- Boiling water(For flushing and dislodging debris)
- Enzyme-based drain cleaner(Digest organic matter without harming pipes)
- Baking soda(Assist in disruption and deodorization)
- Vinegar(Used with baking soda for fizzing cleaning action)
- Measuring cup and funnel(For accurate cleaner dosing)
- Flashlight(Inspect dark pipe areas and traps)
- Bucket(Catch spills during cleaning)
Steps
Estimated time: 2-3 hours
- 1
Assess the problem and prep safety gear
Identify affected drains, gather tools, and put on gloves and eye protection. Clear the work area and ensure pets and children are away. Knowing what you’re dealing with helps you choose the right cleaning approach.
Tip: Take a photo of the drain setup before removal for reference. - 2
Clear area and remove standing water
Remove standing water from bowls and basins to minimize splash and spread. Dry surfaces reduce breeding opportunities for any lingering larvae.
Tip: Use a dry cloth to wipe edges and dry any damp surfaces. - 3
Inspect the trap and access points
Remove the P-trap cap and inspect for debris, slime, or cracks. Replace damaged seals to restore a proper water barrier.
Tip: Take a note of any loose fittings that might need re-sealing. - 4
Scrub the drain interior
Using a long brush, scrub the inside of the drain and the trap rim to disrupt biofilm. Focus on the widest areas where grime accumulates.
Tip: Scrub in both clockwise and counterclockwise motions for thorough cleaning. - 5
Flush with hot water
Pour boiling water in small batches to flush out loosened debris. Hot water helps suspend and remove organic matter more effectively.
Tip: Avoid pouring boiling water directly onto PVC joints in one go to prevent cracking. - 6
Apply enzyme-based cleaner and dwell time
Follow product instructions to apply the enzyme cleaner and let it sit for the recommended dwell time to digest organic film.
Tip: Do not use bleach or ammonia-based cleaners with enzymes. - 7
Rinse and reassemble the trap
Reattach the P-trap, ensuring all connections are tight and leak-free. Run water to confirm a proper seal and no leaks.
Tip: Check for unusual odors indicating leaks or standing water. - 8
Dry the area and maintain moisture control
Keep the area dry to deter regrowth. If you must re-use the sink, run hot water and wipe down after use.
Tip: Consider leaving drain covers slightly ajar to improve air flow when not in use. - 9
Set up a regular maintenance routine
Schedule weekly or monthly cleanings, depending on infestation level, and use enzyme cleaners as part of routine maintenance.
Tip: Use a calendar reminder to stay consistent. - 10
Implement physical prevention measures
Install drain screens or strainers on all sinks and ensure seals are intact. Block potential entry points and reduce moisture buildup.
Tip: Clean screens weekly to prevent clogging. - 11
Monitor and reevaluate
Observe drains for any renewed activity over the next 1-2 weeks. Repeat cleaning cycles if needed.
Tip: Keep notes on which drains show activity and timing. - 12
Know when to escalate
If infestations persist after repeated DIY treatments, contact a licensed plumber for a professional assessment.
Tip: Document prior steps to speed up the evaluation.
Got Questions?
What are drain flies and why are they in my drain?
Drain flies are tiny moth-like insects that breed in the organic film inside drains. They emerge from the drain perimeter and nearby plumbing when conditions are moist and food sources are abundant. They are more of a nuisance than a direct threat, but their presence signals a breeding site that should be addressed.
Drain flies are tiny moth-like insects that breed in organic film inside drains. They are primarily a nuisance and indicate a damp breeding site that should be cleaned.
Are drain flies dangerous to people or food?
They don’t bite or sting and aren’t known to transmit diseases directly. However, they can carry bacteria on their bodies and are a sign of unsanitary conditions. Cleaning and maintenance reduce any potential contamination risk.
They don’t bite, but they can carry bacteria. Regular cleaning helps reduce any risk and keeps your drains sanitary.
Do I always need a professional to solve drain fly problems?
Not always. Many infestations respond to thorough cleaning, enzyme cleaners, and improved drainage hygiene. If pests persist after several DIY cycles or you suspect structural issues, a licensed plumber should assess for root intrusion or vent problems.
Usually not at first, but if the problem persists, call a pro to check for roots or vent issues.
Can I use bleach to kill drain flies?
Bleach can kill some flies and may temporarily reduce surface presence, but it doesn’t remove the biofilm that feeds larvae. Enzymatic cleaners plus physical cleaning are more effective long-term and safer for pipes.
Bleach may kill some flies, but it won’t remove the biofilm. Enzymes plus cleaning work better long-term.
How often should I clean drains to prevent infestation?
Regular maintenance is key. Consider weekly to biweekly cleaning for problem drains and monthly enzyme treatments for overall prevention, adjusting based on activity.
Clean drains regularly—weekly to biweekly for problem areas, and consider monthly enzyme treatments.
Will baking soda and vinegar help with drain flies?
They can help disrupt minor buildup and deodorize, but they’re not a stand-alone solution for an infestation. Use them as a gentle assistive step along with brushing and enzyme cleaners.
Baking soda and vinegar can help a little, but they won’t solve an infestation by themselves.
Watch Video
The Essentials
- Identify where breeding occurs and target those drains first.
- Prioritize mechanical cleaning and enzyme cleaners over harsh chemicals.
- Maintain drains with a regular cleaning schedule.
- Seal leaks and improve ventilation to deter future infestations.
- Monitor after treatment to confirm the issue is resolved.