How to Clean a Bathroom Sink Drain: A DIY Guide
A practical, step-by-step guide to clean a bathroom sink drain, remove hair buildup, prevent odors, and keep your drain flowing freely with safe, household supplies.

By the end of this guide, you will be able to clean a bathroom sink drain safely and effectively, removing hair, soap scum, and gunk that cause slow draining. Gather a few common tools, such as gloves, a cup, pliers, baking soda, vinegar, and hot water, then follow a simple, step-by-step routine to restore free flow and prevent odors. This quick method suits most bathroom sinks.
Why regular maintenance matters for bathroom sink drains
A clean bathroom sink drain prevents slow draining, odor buildup, and unexpected clogs. Hair, soap scum, toothpaste, and mineral deposits can accumulate behind the drain cover and inside the trap, forming a stubborn obstruction over time. By adopting a simple maintenance routine, you reduce the need for harsh chemical cleaners and minimize the risk of pipe damage. Drain Guide recommends a light cleaning every 1-3 months, depending on usage, and a quick flush with hot water or mild cleaner after heavy bathroom activities. Regular attention also helps you spot leaks early, which saves water and money. In this guide, you’ll learn how to approach the task safely, using common household tools and spare-time patience. You’ll also discover when a DIY fix becomes a job for a professional, because not every problem is best solved by pulling a trap apart. The goal is a clear drain, a dry cabinet under the sink, and a fresh, odor-free bathroom.
Tools and supplies you’ll need to clean a bathroom sink drain
Before you start, gather a few basic tools and materials. Essential items are inexpensive and widely available:
- Protective gloves (nitrile or rubber): keep hands clean and protected from cleaners.
- Screwdriver or a coin for removing the drain cover: depends on your model.
- Bucket or large bowl: catch water and debris.
- Old towel or rags: protect the cabinet and absorb spills.
- Pliers or an adjustable wrench: loosen the P-trap nuts.
- Old toothbrush or small brush: scrub the trap interior and joints.
- Baking soda (1 cup) and white vinegar (1 cup): inexpensive, effective cleaners.
- Hot water (boiling safe to pour) and dish soap: flush and loosen residue.
- Drain snake or auger (6–8 ft) (optional): clear stubborn blockages.
- Cloth bag or small container to store small parts.
Optional but helpful:
- Plumber’s putty or replacement washers: for a tighter seal when reassembling.
- Flashlight: inspect hidden corners behind the pipes.
Having everything ready minimizes interruptions and helps you stay organized throughout the job.
Step-by-step prep before you start
Clear the area under the sink and place a towel to catch drips. Remove any cosmetics or products stored under the sink to keep them away from cleaners. Put on gloves and safety glasses if you’re concerned about splashes, and ensure good lighting. If your sink has a pop-up stopper, note how it’s attached so reassembly is straightforward. Run a small amount of hot water into the sink to gauge current drain speed and decide whether you’ll need extra cleaning power. Have your bucket ready and work slowly to avoid splashing dirty water onto walls or cabinets. This prep reduces mess, protects surfaces, and guarantees that you can focus on the actual plumbing tasks without sudden spills.
Step 1: Remove the drain cover and inspect the trap
Start by removing the drain cover with the appropriate tool. Lift or unscrew and set the cover aside in a safe spot. Look for visible hair, soap scum, or mineral buildup around the rim and along the drain opening. If the stopper connects to a rod, gently disconnect it to free the cover. Take a quick photo if you’re unsure about reassembly. This step is critical because it reveals whether you’ll need to loosen the trap or attempt a lighter cleaning from above.
Step 2: Detach and clean the P-trap
Place a bucket under the P-trap to catch water and loosen the nuts with adjustable wrench or pliers. Carefully detach the trap and inspect it for cracks or heavy buildup. Use a brush to scrub the interior, removing hair and gunk, then rinse with hot water. Wipe the joint surfaces dry before reattaching. If the fittings show signs of wear, replace washers or the entire trap; a good seal prevents leaks.
Step 3: Clear the drain line and flush safely
With the P-trap removed, look into the drain line for any obstructions. Use the pipe brush or a flexible cloth to clear minor clogs from the trap elbow. For tougher blockages, run the drain snake gently into the pipe until it meets resistance, then withdraw slowly to pull out debris. After clearing, reassemble the trap and slowly pour hot water mixed with dish soap down the drain to flush residue. Stop if you hear gurgling, and reassess.
Step 4: Prevent future clogs with a maintenance routine
Create a simple monthly habit: flush with hot water, and every few months sprinkle baking soda, followed by vinegar, wait 5-10 minutes, then flush with hot water. Wipe away soap scum and check the stopper. Use a drain screen to catch hair. If you’re careful about what goes down the drain, you’ll minimize buildup and odors.
Step 5: Safety and common mistakes when cleaning bathroom sink drains
Never pour concentrated chemical drain cleaners into a sink that has a P-trap; they can damage fittings and release harmful fumes in enclosed spaces. Always disconnect water supply if you’re going to work with the trap. Avoid using metal tools that could scratch the enamel. Do not overtighten nuts when reassembling; leaks occur.
Step 6: When to call a plumber
If you repeatedly clear clogs but the drain remains slow, or you notice persistent leaks, corrosion, or foul odors despite maintenance, it’s time to involve a professional. A plumber can inspect venting issues, hidden blockages, or sewer line problems that DIY tools cannot safely handle. Drain Guide recommends seeking help early to prevent bigger damage and costly repairs.
Tools & Materials
- Gloves (nitrile or rubber)(Protect hands from grime and cleaners)
- Screwdriver or coin(Remove drain cover depending on model)
- Bucket or large bowl(Catch water and debris)
- Old towel or rags(Protect cabinet and absorb spills)
- Pliers or adjustable wrench(Loosen P-trap nuts)
- Old toothbrush or small brush(Scrub trap interior and joints)
- Baking soda(1 cup for routine cleansing)
- White vinegar(1 cup for safe cleaning reaction)
- Hot water(Flush residues and rinse)
- Dish soap(Assist flushing)
- Drain snake/auger (6–8 ft)(Clear stubborn blockages)
- Plumber’s putty or replacement washers(Seal leaks on reassembly)
- Flashlight(Inspect hidden areas behind pipes)
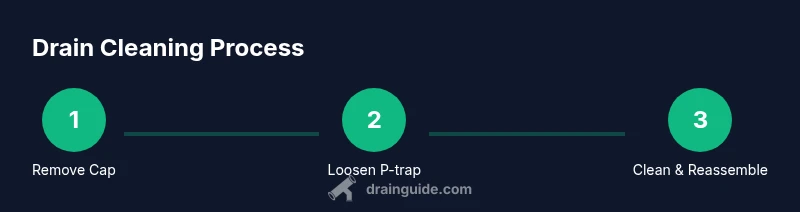
Steps
Estimated time: 30-60 minutes
- 1
Remove the drain cover
Lift or unscrew the cover and set it aside. Inspect for hair and buildup around the rim to gauge the extent of cleaning needed. This step reveals whether the trap needs attention.
Tip: Keep the cover and screws in a labeled bag to avoid misplacement. - 2
Detach and inspect the P-trap
Place a bucket under the trap, loosen the nuts with a wrench, and carefully remove the trap. Check for cracks and heavy buildup, then scrub the interior with a brush.
Tip: Take a quick photo of the assembly before disassembly for easier reassembly. - 3
Clear the drain line
Inspect the trap elbow for visible debris. Use a snake or brush to remove blockages, then reassemble the trap and test the drain with hot water.
Tip: Withdraw the snake slowly to pull out caught hair. - 4
Test and maintain
Run hot water through the drain for 60 seconds to ensure full flow. Wipe seals dry and replace gaskets if needed. Set up a monthly maintenance reminder.
Tip: A drain screen greatly reduces future hair buildup.
Got Questions?
What is the quickest way to unclog a bathroom sink drain?
The fastest DIY approach is to remove the trap, clear the elbow with a snake or brush, then reassemble and flush with hot water. Avoid harsh chemical cleaners on a trap.
Remove the trap, clear the elbow with a snake, reassemble, and flush with hot water.
Can I use vinegar and baking soda to clean the drain?
Yes, in many cases this combination can help loosen minor buildup. Do not rely on it for severe clogs, and always flush with hot water afterward.
Yes, baking soda and vinegar can help with minor buildup, followed by hot water.
How often should I clean my bathroom sink drain?
Most homes benefit from a light cleaning every 1–3 months, plus a quick flush after heavy use blocks. Adjust based on hair and soap buildup.
Clean every 1 to 3 months, or more often if you notice slow draining.
Is it safe to remove the P-trap myself?
Yes, with the right tools and caution. Place a bucket, loosen nuts gradually, and check for leaks after reassembly.
Yes, with care. Have a bucket ready and recheck for leaks after reassembly.
What if the stopper remains stuck after cleaning?
Check the linkage and ensure nothing is tangled. Gently work loose with the appropriate tool; avoid forcing parts to prevent damage.
If the stopper sticks, inspect the linkage and don’t force it.
When should I call a plumber?
If clogs persist after DIY efforts, or you notice persistent leaks, corrosion, or sewer-like odors, a professional should assess venting or deep blockages.
Call a plumber if clogs persist or you notice leaks or odors.
Watch Video
The Essentials
- Identify and access the trap to remove buildup
- Use safe cleaners and basic tools to avoid damage
- Reassemble carefully and test for leaks
- Adopt a simple maintenance routine to prevent clogs