How to Clean a Bath Drain: A DIY Guide
Learn how to clean a bath drain safely and effectively with Drain Guide's step-by-step methods, essential tools, and practical tips to prevent clogs and odors—perfect for homeowners and DIY enthusiasts.

This guide teaches you how to clean a bath drain and clear common clogs using safe, DIY-friendly methods. You’ll learn when to remove the trap, how to use a plunger and a drain snake, and how to flush with hot water and baking soda–vinegar for best results. This approach minimizes chemical exposure and is suitable for most bath setups.
Why a clean bath drain matters
A clean bath drain is essential for maintaining good bathroom hygiene and steady water flow. Hair, soap scum, skin flakes, and mineral deposits can build up in the drain over time, leading to slow draining, unpleasant odors, and even backups if the blockage becomes severe. According to Drain Guide, routine maintenance reduces the risk of sudden clogs and makes emergency fixes easier. By understanding how drains work and what tends to cause clogs, you can intervene early with simple, safe methods that protect your pipes and your home. In many homes, a small amount of routine cleaning can prevent larger, messier problems, saving time and money in the long run.
Safety and prep before you start
Before reaching for tools, set up a clean, well-lit work area. Put on rubber gloves and eye protection if you have any splashing risks. Ventilate the bathroom by opening a window or turning on a fan. Keep kids and pets away from the work zone. Gather your tools and materials listed in the Tools & Materials section, and consider placing a towel or disposable rags under the drain to catch any drips. Drain Guide emphasizes safety first so you avoid contact with dirty water and potential chemical cleaners. If you have a septic system, avoid flushing anything that can upset the bacterial balance.
Common clogs and what they mean
Most bath drain clogs are caused by hair tangled with soap scum, soap residue, and mineral deposits. In softer water areas, hair is the primary culprit; in harder water areas, mineral buildup can act like a sponge, catching hair and debris. A stubborn clog may indicate a partial blockage further down the line, such as in the P-trap or the drain pipe. Understanding where clogs originate helps you choose the right technique—pulling hair from the trap, using a snake in the pipe, or flushing with hot water and safe cleaners. Remember that prevention is easier than restoration, so regular maintenance goes a long way.
Step-by-step approach overview
This article provides a clear, actionable plan that covers assessment, mechanical clearing, and flushing. It combines mechanical methods (trap removal, plunger, drain snake) with a gentle chemical-free flush to minimize chemical exposure and protect your pipes. The steps are designed to be performed in sequence, but you can adapt based on your sink configuration, trap type, and access. For best results, follow the Step-by-Step section to perform each action deliberately and safely, then switch to maintenance routines to keep drains flowing smoothly.
Authority sources and best practices
Reliable drain care draws on general plumbing safety and household-waste guidelines. The sources listed provide foundational safety practices and maintenance reminders that align with DIY drain care. Always prioritize non-chemical methods first and reserve chemical cleaners only if necessary and in accordance with local regulations. See the Authority Sources section for links to government and university guidance related to safe home maintenance.
Maintenance to prevent future clogs
Preventing clogs is easier than clearing them. Regularly remove accessible hair from the drain opening after showers, use a drain screen to catch hair and debris, and flush drains with hot water weekly. Periodically pour a baking soda and hot water flush, followed by a vinegar swirl to help keep residues loose. Clean traps and the surrounding area during routine bathroom cleaning, and inspect the plumbing under the sink for any signs of leaks or slow drainage. Consistent maintenance reduces the likelihood of sudden, disruptive clogs and extends the life of your plumbing.
Tools & Materials
- Rubber gloves(Protect hands from dirty water and sharp edges)
- Bucket(Catch water when removing the P-trap; prevents spills)
- Drain snake (auger)(Clears hair and debris from deeper in the drain)
- Adjustable wrench(Loosen and re-seat P-trap nuts without damage)
- Pliers or channel locks(Grip and loosen components in tight spaces)
- Old towels or rags(Protect surfaces and clean up spills)
- Screwdriver set (Phillips and flathead)(Assist in removing trap screws or covers)
- Baking soda(Used for gentle chemical-free flushes)
- White vinegar(Used with baking soda for a fizzing flush)
- Hot water (kettle or pot)(Flush to clear loosened debris)
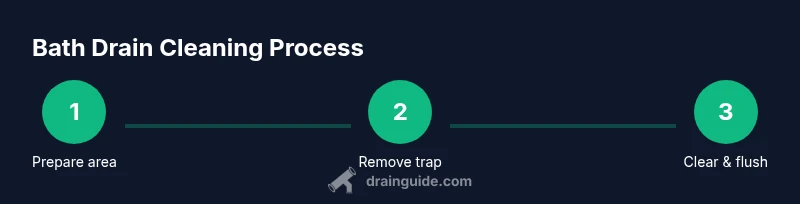
Steps
Estimated time: 60-90 minutes
- 1
Clear the area
Move any shower items away from the tub area and place a towel under the drain to catch drips. This ensures you have a clean workspace and reduces the chance of losing small parts down the drain. Gather your tools within easy reach so you can work without interruption.
Tip: A tidy workspace speeds up the process and prevents accidental drops into the drain. - 2
Remove the P-trap
Place the bucket underneath the P-trap, then use the adjustable wrench to loosen the slip nuts. Carefully detach the trap and inspect for debris. Have a rag ready to catch any remaining water that spills from the pipe.
Tip: Loosen nuts by turning counterclockwise; hold the trap steady so you don’t twist the pipe connections. - 3
Inspect the trap and drain opening
Check the P-trap for obvious clogs and remove any hair, soap scum, or gunk you can see. Shine a light into the drain to inspect for partial blockages deeper in the pipe. If you see buildup, take a photo for reference before clearing.
Tip: Even small strands of hair can form dense clogs over time; remove them piece by piece for safety. - 4
Use the plunger to dislodge blockages
Cover the drain and plunge with steady, vertical motions to create suction. The goal is to loosen the clog and push it toward the trap. Avoid excessive force to prevent damaging pipes.
Tip: Hold the plate flush and avoid over-pumping; a few strong strokes are often enough. - 5
Advance with the drain snake
Insert the snake into the drain and rotate the handle to break up or pull out deeper blockages. Retrieve debris gradually and wipe it off before continuing. If you meet resistance, back off slightly and try again with a gentler approach.
Tip: Take your time; forcing the snake can damage pipes or push clogs further down. - 6
Flush with hot water and natural cleaners
After clearing the blockage, run hot water to rinse loose debris. Consider a baking soda and hot water flush, followed by a quick vinegar rinse to help keep residues loose. Do not mix vinegar with bleach.
Tip: If your water is very hard, repeat the flush to ensure the pathway remains clear. - 7
Reassemble the trap and test
Reconnect the P-trap with clean washers, tighten the slip nuts, and lean on the pipe fittings to ensure a snug seal. Run cold and hot water to verify a smooth flow and check for leaks.
Tip: Hand-tighten first, then give a final gentle tighten with the wrench—avoid overtightening. - 8
Clean up and dispose of waste
Wipe down tools and surfaces. Dispose of used paper towels and the removable hair in the trash. If you removed any chemical cleaners, follow local disposal guidelines and rinse tools before storing.
Tip: Store tools in a designated kit to keep your bathroom organized.
Got Questions?
What is the fastest way to unclog a bath drain?
Start with a plunger to create suction, then use a drain snake if the blockage persists. This often resolves most hair-related clogs without harsh chemicals.
Try the plunger first, then a drain snake if needed. Most hair clogs clear with this approach.
Can I use chemical drain cleaners on a bath drain?
Chemical cleaners can damage pipes and septic systems and may not be safe for all surfaces. Use them only as a last resort and follow the product instructions carefully.
Chemical cleaners should be a last resort and used with caution per the product directions.
Should I remove the P-trap?
If you frequently experience clogs, inspecting and cleaning the P-trap is a good first step. Reassemble securely to prevent leaks after clearing debris.
Removing the P-trap can help clear hair and soap buildup; reassemble tightly to prevent leaks.
How often should I clean the bath drain?
Aim for a light cleaning every few months and a thorough trap inspection annually. Use a screen to catch hair and debris to reduce future clogs.
Clean every few months and inspect the trap yearly for best results.
Why does my drain gurgle after cleaning?
Gurgling often indicates a venting issue or a partial blockage that’s still present in the line. If it persists, consider a deeper inspection or professional help.
Gurgling means air is trapped somewhere; you may have a partial blockage or vent issue.
What should I do if the clog returns after cleaning?
If clogs recur, consider more thorough pipe cleaning, install a drain screen, and evaluate water hardness or hair load. Reassess trap layout and path for persistent issues.
If clogs keep coming back, you may need a deeper inspection or professional help.
Watch Video
The Essentials
- Identify the blockage origin (trap vs deeper in pipe).
- Use mechanical methods first—plunger and snake—before chemical cleaners.
- Reassemble carefully and test for leaks after cleaning.
- Maintain a drain screen to reduce future clogs.